Getting Started Guide
This guide walks users through the initial setup and core functions of Leave Manager. Before entering Leave Requests, users must add company Locations, set up Leave parameters, and add employees—either manually, via bulk import, or through optional HRIS integration using Finch. The guide provides step-by-step instructions with screenshots for each process, including setting state-specific Leave Programs and default Administrative details. Once setup is complete, users can create Leave Requests through a guided 6-step process that ensures accuracy and compliance.
Topic Index
The following guide will assist you in getting started with Leave Manager. Click a link below to jump to a specific topic.
Adding Company Locations | Setting Up Parameters | Adding Employees | Adding a Leave Request
Getting Started
There are 3 things you should do before you start entering leave requests:
- Enter Locations
- Set Up Parameters
- Add Employees (Manually or via Import)
Adding Company Locations
To add company locations, first click on the Locations tab. Then click +Add Location.


You will be required to fill out basic address/location information.
Note: If you have previously imported your employees along with location names, you will not need to add the location again. However, you may want to first verify the location information is correct, as the state you enter will tie the location to the state-specific programs.

When you are finished, Save. Or, you can Save and Set Up Parameters immediately for that Location. See Setting Up Parameters below for more information.

💡Helpful article:Adding Locations in Leave Manager
Setting Up Parameters
Once your location/s is entered, you will need to set up "Leave Parameters". If you are setting up Parameters after adding a location, start by going to the Locations tab.

Next to the desired Location, click the gear button.

For each location define the following parameters. Use the (?) buttons to learn more information about each section.
- Define your Federal Leave Year: Choosing the correct option will ensure the calculations are done accurately and will add back leave as appropriate.
- Additional Federal Leave: Apart from alternate state and/or corporate programs, would you like to add extra leave to the federal minimum?
- Track Additional Leave Programs: Will you be tracking or granting family/medical leave under programs beyond the federal requirements?
- State FMLA Leave Program: View the state-specific programs that are applicable to this location. You can verify the Leave Year Type is correct and view the Program Guidelines. (If you do not see the state leave section, then there are no available state leave programs.)
- For Federal Leave Only: Selecting Yes to either question will have you fill in additional information, which will also auto-fill the same way on each Notice of Eligibility/ Rights and Responsibilities form.
- Confirm Federal Leave Coverage for Employer and Define Default Administrative Information: Determine coverage; ie. are you a private sector employer?
- Define Default Administrative Information (Optional): Here you can define a default contact person for use in leave documentation. If you want to fill in this information on a per leave basis, you may leave this section blank.

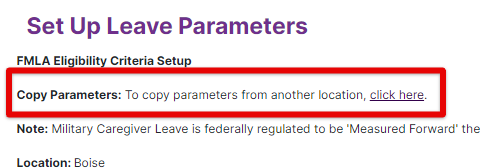
Repeat for all Locations. If you would like to copy parameters from another existing Location, you can do so by clicking the link next to Copy Parameters at the top of the Set Up Leave Parameters page. (You can only copy parameters from locations in the same state. If you have two or more locations in the same state, you will have to set up the parameters for one location first and then you can copy parameters for the other locations.)

💡Helpful article: Setting Up Parameters
Adding Employees
You can add employees one-by-one to your system, import your employees using the Leave Manager import wizard, or by integrating your HRIS system with Leave Manager.
One-By-One
To add an employee, first click the Employees tab. Then click +Add Employee.


Fill in the employee's information.

Note: If the Department, Location, or Position Title is not available in the drop-down, you can easily add them as you go.

When you have finished adding the employee's information, click Save.
💡For detailed instructions on manually adding employees, see this resource: Add Employees Manually
Importing Employees
To import employees in bulk, first click the Employees tab. Then click Import Employees.


Follow the on-screen instructions to properly prepare your data.

💡Continue with detailed Import instructions by using this resource: Import Employees
Finch HRIS Integration
(This is an optional, add-on feature)
This convenient tool provides seamless and secure information sharing between platforms, eliminating the need for manual data uploads and reducing the risk of administrative errors. You can connect your HRIS system with Leave Manager to upload employees to the site.
First go to the Employees tab, and then locate the HRIS Integration / Finch button.

Note: If you have not yet received the Finch add-on and are interested, you will be prompted to click the "Please contact me..." button.

💡Continue with detailed Integration instructions by using this resource: HRIS Integration
Adding a Leave Request
After you have set up Locations, Parameter, and Employees, you can begin entering leave requests.
Select the Leave Requests tab. Then, click +New Leave Request.


Search for/select the desired employee.

Determine a Case Number.

You will then be guided through the six-step process of creating a leave request. The program will stop you along the way if something is missing or done incorrectly.
💡Continue with detailed Leave Request instructions by using this resource: Adding a Leave Request


