Handling DVIRs with Defects
This article explains how to manage DVIRs with reported defects in Encompass®, including accessing, updating, and certifying repairs. Users can locate defective DVIRs through the Pre-/Post-Trip Defects subtab or the Alerts Center. Mechanics can mark defects as Resolved or Deferred, add notes, and update the DVIR over time until repairs are completed. Once all defects are corrected, Certification details—such as who verified the repair and when—are entered, and the driver confirms the updates in the ELD app. This process ensures clear communication and proper documentation between Mechanics, Drivers, and Administrators.
ACCESSING DVIRS
When a DVIR has been submitted with a reported defect, an alert will be generated.
There are a few, easy ways to navigate to a DVIR with the defect:
1. The Pre-/Post-Trip Defects subtab within the DVIRs tab. (Steps 1-4 below)
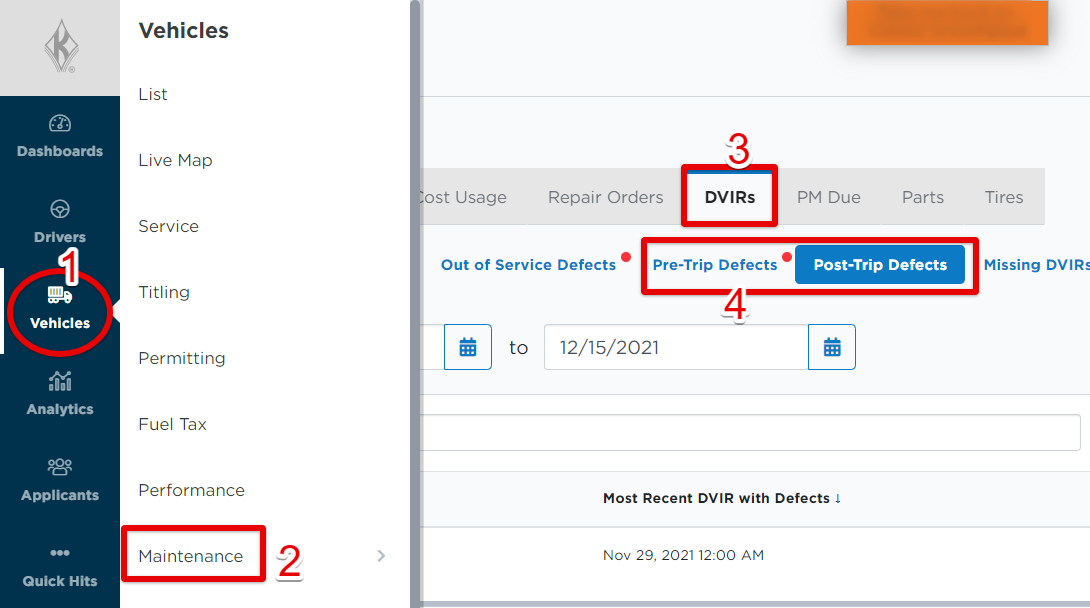
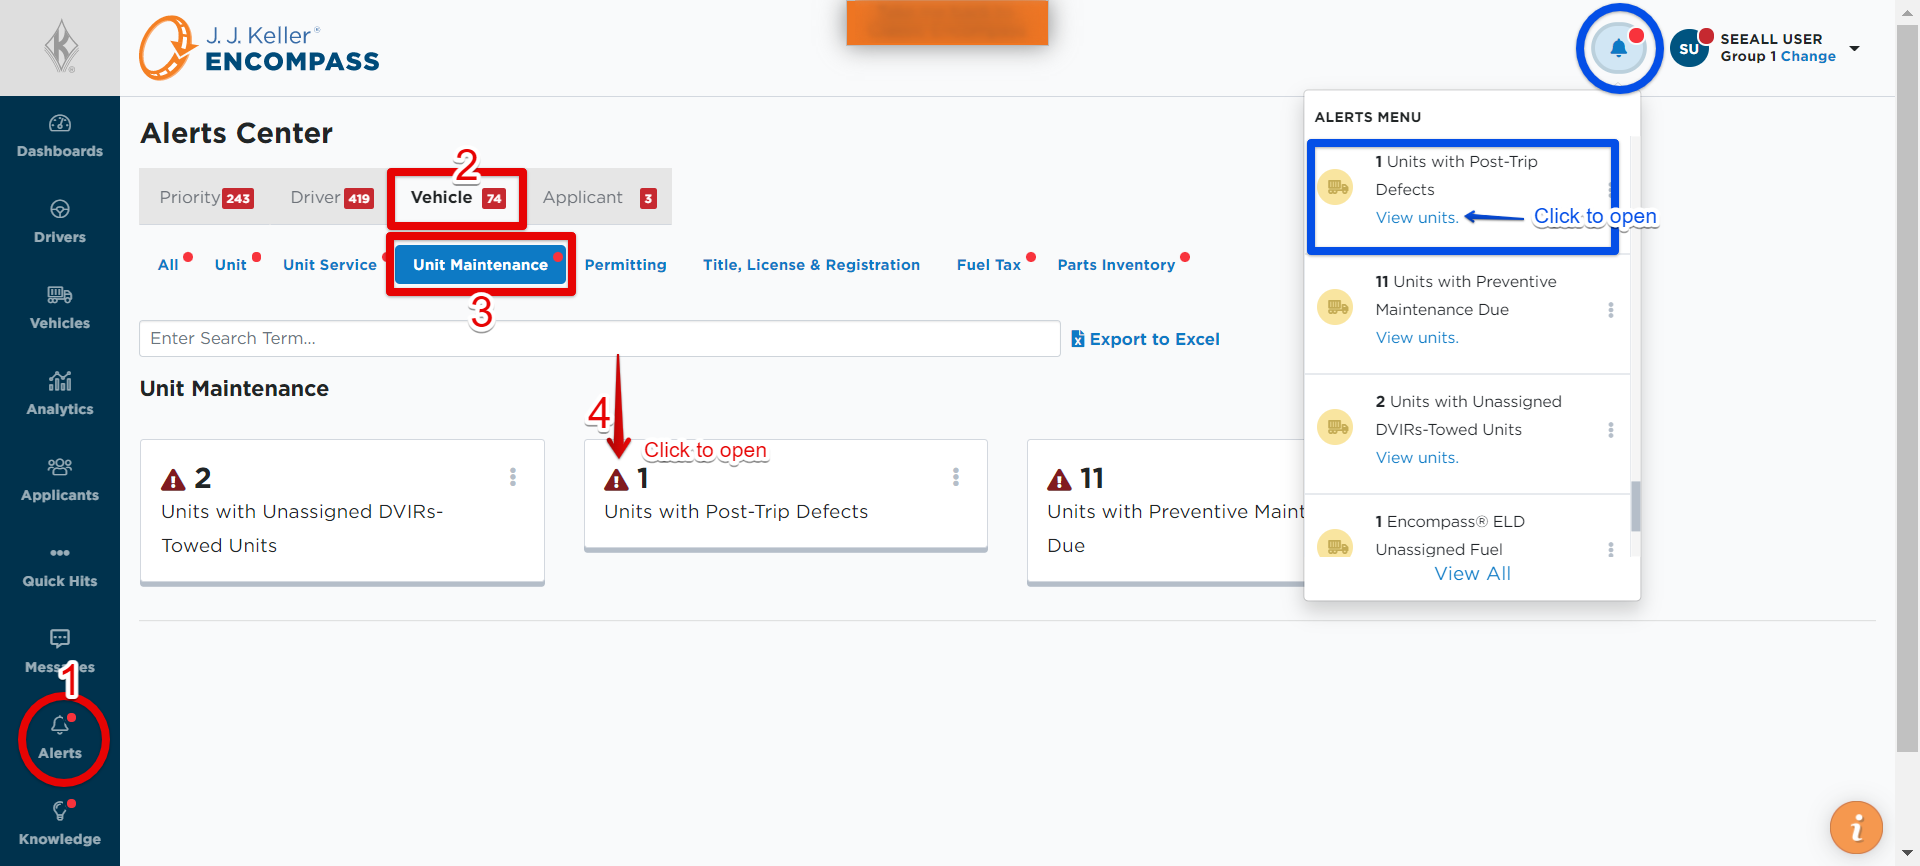
2. Viewing via the Alerts Center (Steps 1-4 in red below) and/or the "bell" alerts (in blue below). These options will take you to the Pre-/Post-Trip Defects subtab.
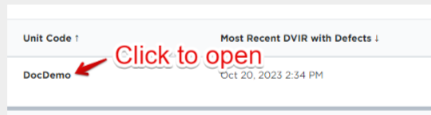
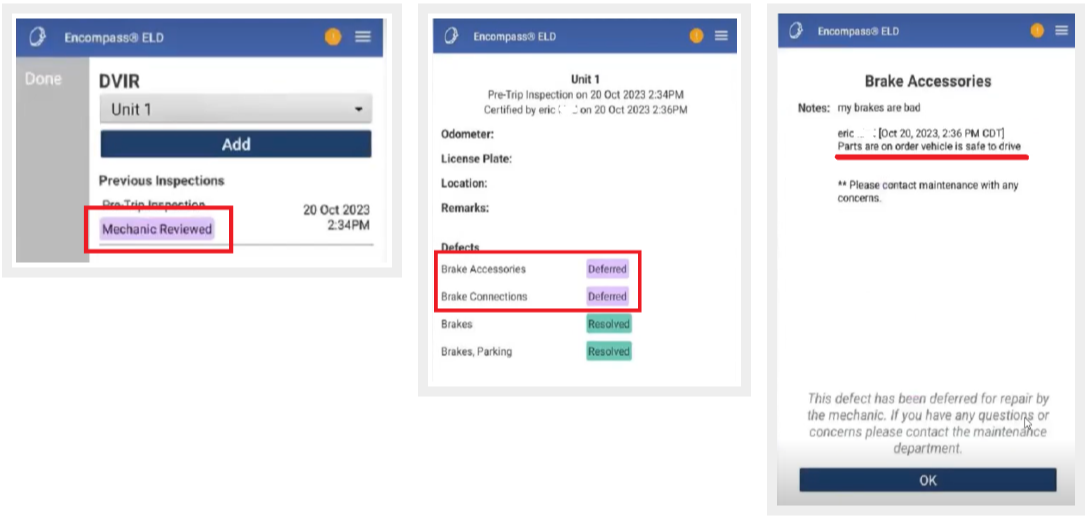
When viewing the list of units with Pre-/Post-Trip Defects, click on the Unit Code of the DVIR in question to open details.
Select the DVIR with the defect/s.

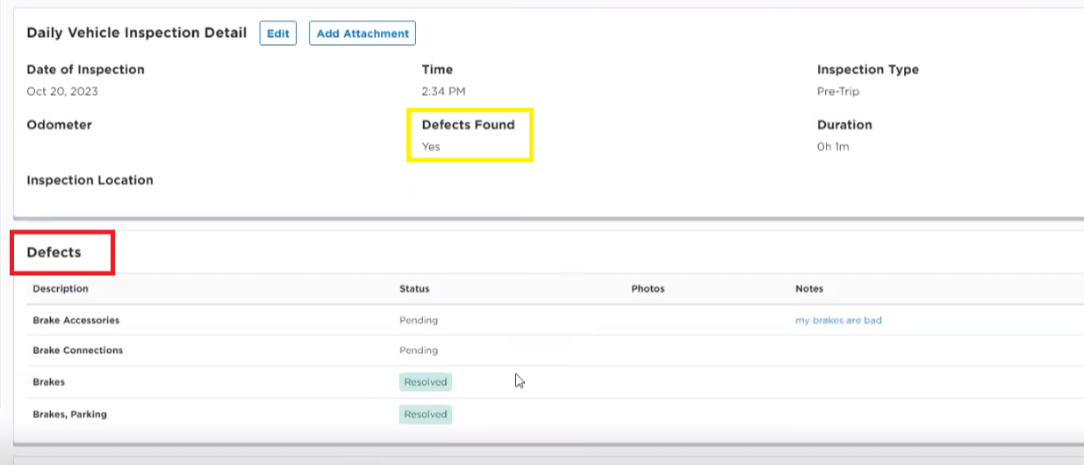
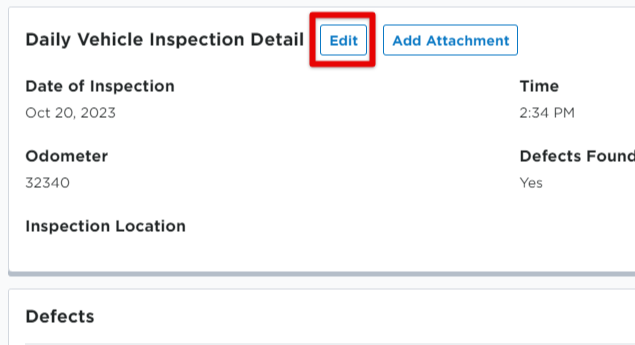
The user will be taken to the Unit Maintenance file for the unit. Here you can view the DVIR details. The defects will be listed in the Defects section. Note the Status of each identified defect. You can view any photos or notes the driver may have attached upon submitting the DVIR.
UPDATING/COMPLETING A DVIR WITH A DEFECT
Perhaps a mechanic would like to update information regarding the defect. Click Edit next to Daily Vehicle Inspection Detail. An Edit DVIR pop-out page will be displayed.
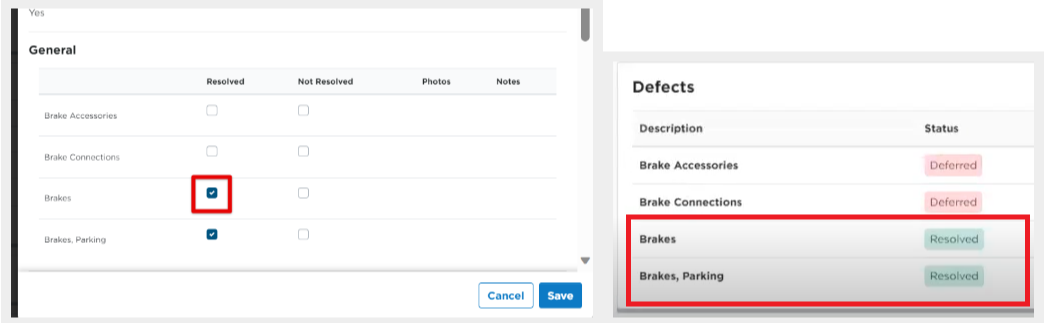
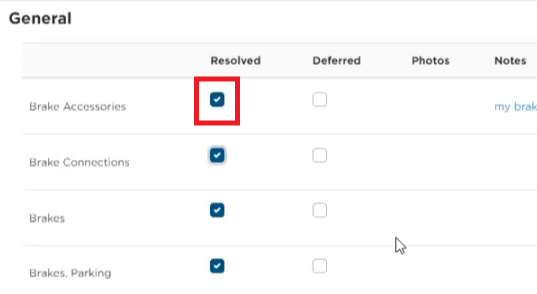
Each defect listed will have the option to select them as Resolved or Deferred. If there are multiple items on the inspection and only some of them have been resolved, but others have not, they can be marked appropriately and saved. The DVIR can be returned to later to finish completing the DVIR.
Resolved Defects
If the defect has been resolved, check the Resolved box. Save the DVIR edit. Now, you will see the defect is marked as "Resolved".
Deferred Defects
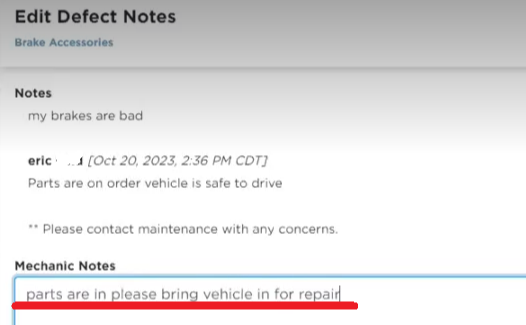
Marking a defect as Deferred can be a way for the mechanic to communicate that the defect is being worked on, parts are being ordered, etc. For example, if the Brake Accessories have been ordered for the truck, the mechanic can check the Deferred box and enter a Note to add further details.
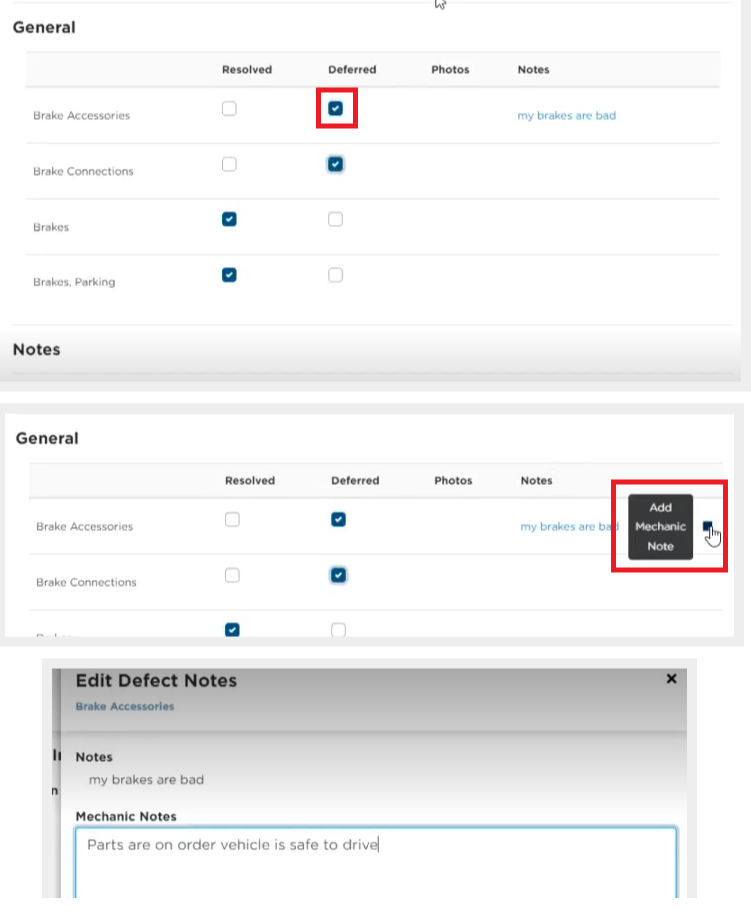
When finished marking things as deferred, be sure to Save the DVIR edit.

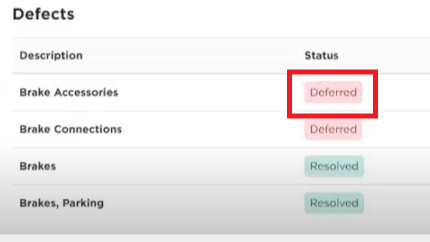
Now you will see that the Status for the defect is Deferred.
In the ELD app, the driver will see the below and can Certify & Submit, acknowledging that they have seen this DVIR update:
The mechanic can continue to add notes as they see fit. For example, when the parts arrive, the mechanic can add a Note to the DVIR. The driver will then see this added note in their app.
When the necessary repairs have been made, the mechanic can again edit the DVIR and Resolve the defect. Simply check the box under Resolved for the appropriate defect and save the update.
WHEN ALL DEFECTS ARE RESOLVED/CORRECTED
Whomever certified that the corrections were made (a mechanic perhaps), can be entered in the Certified By field (scroll further down in the Edit DVIR pop-out to find this section) along with the date the corrections were certified.
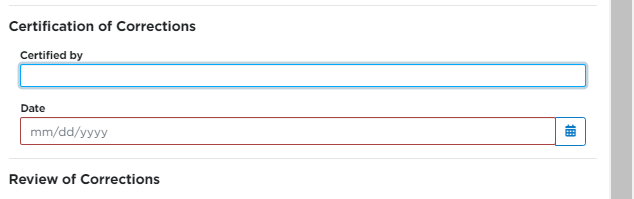
The driver then needs to have verified that the corrections were made. Search for and select the appropriate driver and enter the date in which the driver reviewed the corrections.
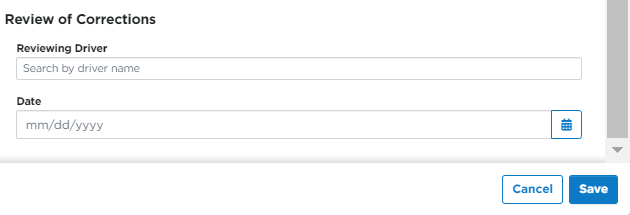
Click Save once all necessary information is entered.