Supporting Documents
This article explains how to add, edit, and manage Supporting Documents in Encompass® for Drivers’ Hours of Service logs. Supporting documents, such as fuel or toll receipts, provide proof of duty statuses and locations. Admins can add these documents via the Drivers > Hours of Service page, either from the Log Detail page or the Supporting Docs tab, and can also attach files, edit, or delete them as needed. The system automatically checks supporting documents against log data to detect Falsifications, and discrepancies are visible in the Falsifications column or the “With Falsifications” tab. For comprehensive review, running a Falsification Audit periodically is recommended to ensure all inconsistencies are detected.
Go to Drivers > Hours of Service. Find the employee by using the search function, scrolling through the list of employees, or by filtering with the Advanced Filters to narrow down your search results.
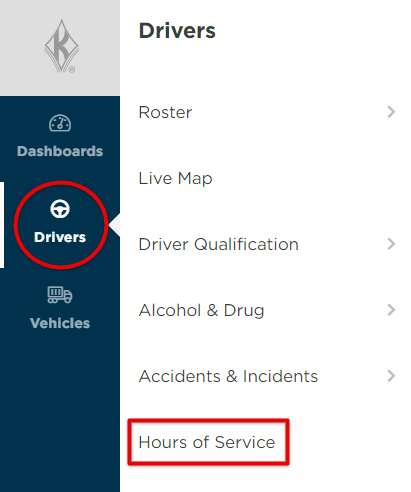
Click on the name of the employee. This will bring you to their Hours of Service information.

Adding Supporting Documents
Click the date of the log in which the supporting document needs to be added to. Note: You may have to adjust the dates in order to see the log in question.
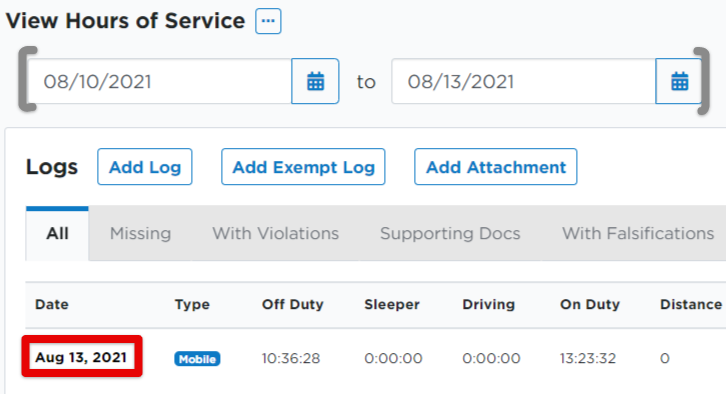
Scroll down to the section for Supporting Documents and click Add New.

Enter in the information for the supporting document, and click Save.
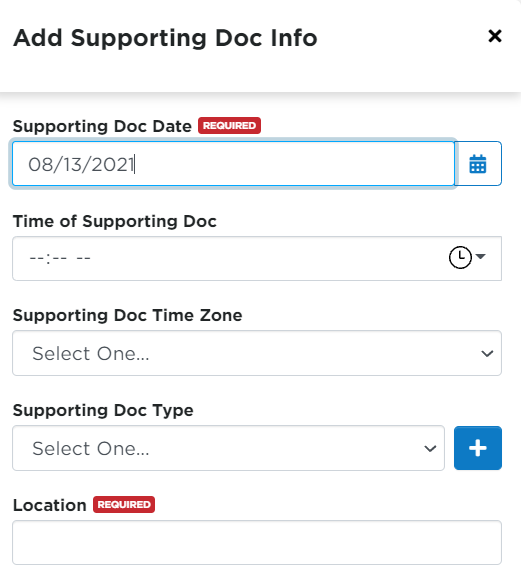
The supporting document will then be seen under the Supporting Documents section of the individual log and in the Supporting Docs tab on the main Logs screen.


Edit Supporting Documents
There are two methods to editing supporting documents: editing from the Supporting Docs Tab, or from within the Log's detail page.
Supporting Docs Tab
When you are in the Supporting Docs tab, click on the log date.

Hover and click on the pencil to Edit the supporting document's information. Be sure to Save your updates. (You can also delete the Supporting Doc here by clicking the trash can.)

From Within the Log Details Page
From the Logs page, click into the date of the log.

Scroll to the Supporting Documents section. Hover and click the pencil to Edit information, paperclip to Attach, or the trash can to Delete.

Add Attachments to Supporting Documents
There are also various ways to add attachments to supporting documents: from the Supporting Docs Tab, or from within the Log's detail page.
Supporting Docs Tab
From the driver's Logs page, click on the Supporting Docs tab.

Then click Add Attachment or click the paper clip icon next to the correct date's supporting document. A pop-out page will appear and there you can enter in the attachment information and add a file. (You'll notice you are adding a Supporting Doc Attachment by seeing the title of the fly-out.)

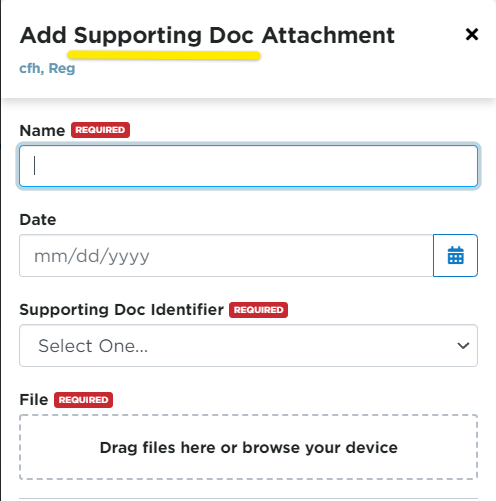
Log Details Page
From the Logs page, click into the date of the log. Then, scroll to the Supporting Documents section. Click the paperclip to add an attachment.


Supporting Docs with Falsifications
About Falsifications
When adding Supporting Documentation to a log, the system will check the supporting document information against the log data to determine whether the receipt does or does not support the log status. If, for example, a driver has a meal receipt for 11:00AM but their log has a status of 'Driving' at 11:00AM, there would be a falsification detected.
The system automatically audits for a falsification when saving a new log with a supporting document. Note: If the supporting document is added AFTER the log is saved, it may not audit for the falsification. A falsification audit can be run after entering supporting documents if it is suspected that a falsification wasn't detected.
Example of a Falsification
There are a few ways you can see if a supporting document has a falsification.
1) On the main Logs page, check the Falsifications column for any red numbers. This indicates the number of falsifications, if any.

2) Or, you can click the With Falsifications tab to narrow down your view to show just those logs that have falsifications.

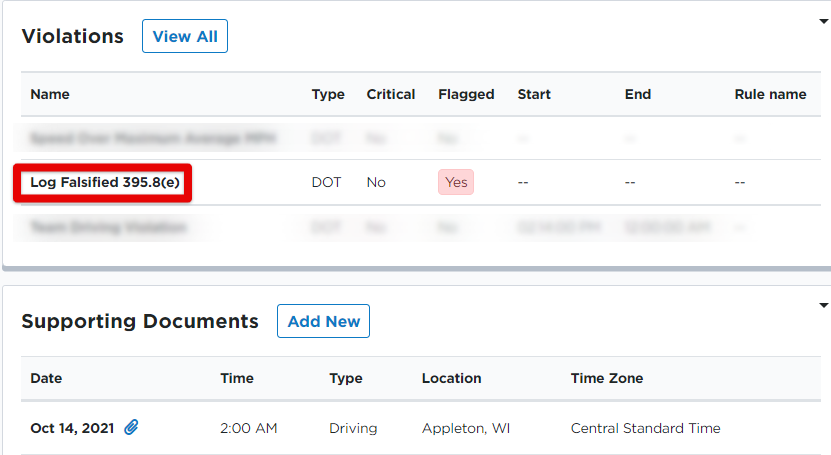
Whichever way you chose to access Falsifications, you can click into the individual log to view more details about the falsification. Then, scroll to the Supporting Documents and Violations sections. You will see that the Supporting Document added in this case beared a falsification, which, in turn, fell into the Violations section.
REMEMBER: The Falsification Audit occurs when a log is saved, not necessarily the Supporting Document. To catch all falsifications entered, you'll periodically want to run the Falsification Audit.


