Add and Edit an Employee/Driver
This article provides step-by-step instructions for adding, editing, and terminating Employee or Driver Records in the Encompass system. To add a new employee, users access Drivers > Roster, click Add New, and enter required details such as Name, unique Employee Code, Company Information, and Employment Status, with options to add personal details and a profile picture. Editing employee information involves opening their profile, updating the necessary fields, and saving changes. Termination can be done individually or in bulk by updating Employment Status or using the Delete function, which archives rather than permanently removes records. For companies using ELDs, Drivers must receive login credentials before accessing the Encompass® ELD application.
Adding an Employee/Driver
In the left navigation bar, select Drivers > Roster.

Click Add New.

Under General Information, enter the First Name, Last Name, and Employee Code of the employee/driver. These are required fields.
Note: Employee Code must be unique and is limited to 11 characters. We do NOT recommend using the Social Security Number here as this is Personally Identifiable Information (PII). Since the Employee Code is wholly visible through the system, using the SSN could put you and your employee at risk for identity theft.

Enter the Company Information.
- Reporting Level: Pick the company name from the list using the drop-down arrow this driver reports to.
- Job Class: Select the job class from the list using the drop down menu.
- These can be set up in Settings > Lookups > Job Class
- Status: Choose an employment status, such as pre-employment or full/part-time from the list using the drop-down arrow.
- These can be set up in Settings > Lookups > Employment Status
- Note: Drivers marked as Temporary: Encompass will not audit for missing logs violation. The system recognizes this isn’t a regular full-time driver, so it won’t expect to get a log for each day but will audit any log entered or submitted as normal.
- Date of Hire: Dates must be entered in mm/dd/yyyy format.

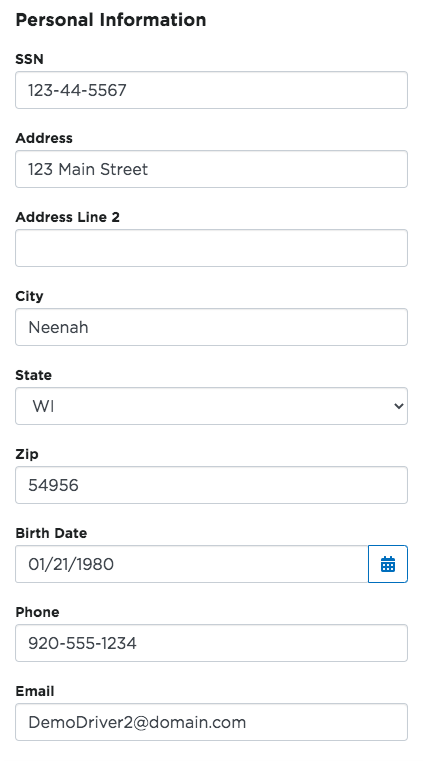
Additional information can be entered for the employee under Personal Information. If a Social Security Number is entered, this information is not visible to standard users, but administrators have access to export this information.
Click Save once all necessary information has been entered.

*Note: If your company is using ELDs, before a driver is able to login to the Encompass® ELD application for the first time, they will need to be provided a username, password, and activation code/fleet ID. These are setup in Encompass via Settings. VisitEncompass ELD Fleet ID, Usernames, and Passwords* for more information.
Adding an Employee Profile Picture
While viewing the Employee, hover your mouse over the image at the top of the profile card on the left. A pencil icon will be displayed. Click the Pencil.

Select the appropriate image from your device and click Open/OK/Select. The image will then be displayed in the profile card of the Employee.

Editing an Employee/Driver
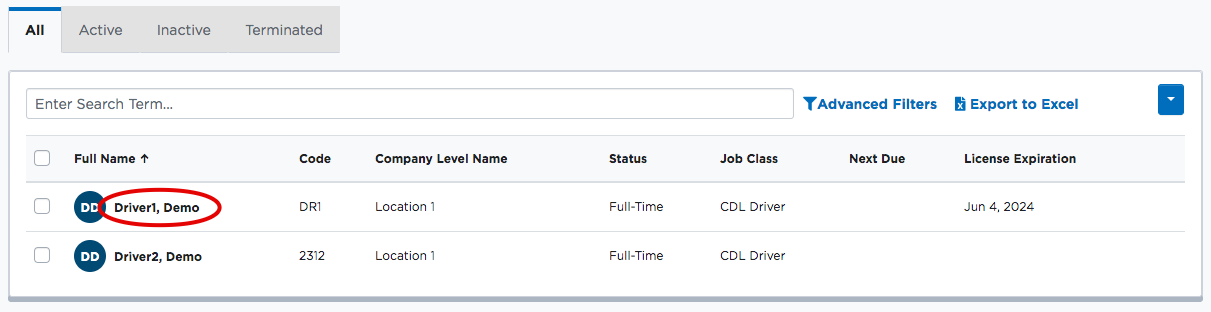
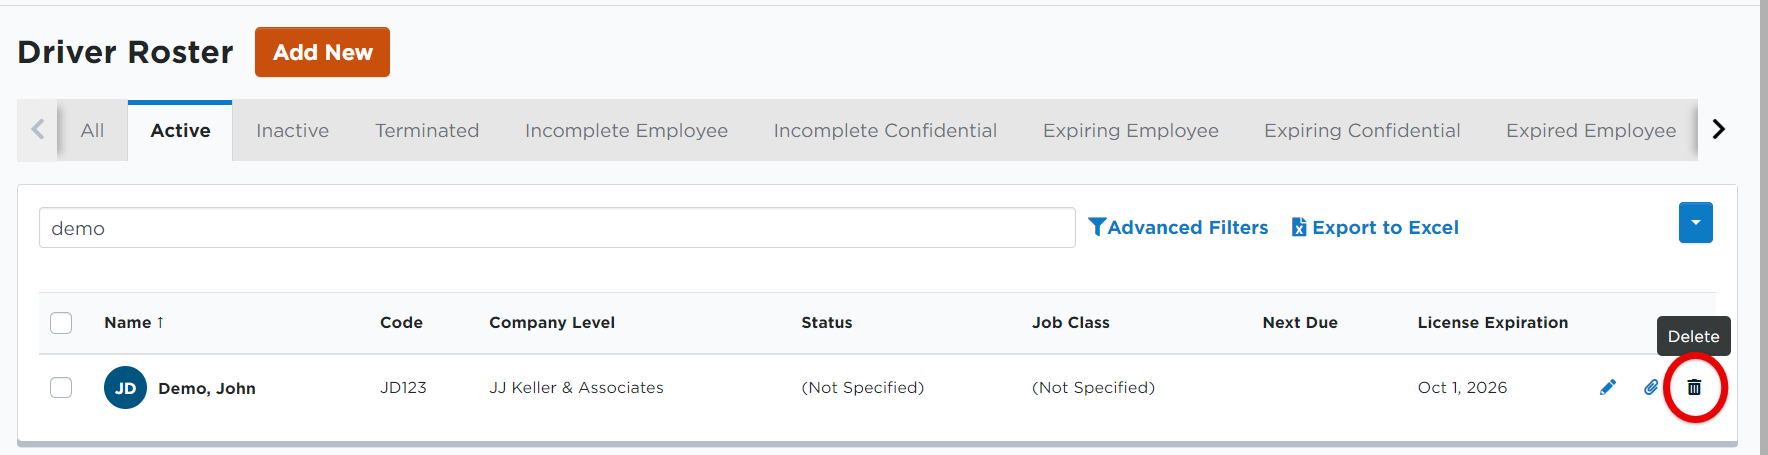
Select Drivers > Roster from the left navigation pane.

By default, all Employees with the exception of Terminated employees will be displayed (across multiple pages if necessary). Use the search function at the top of the list, use the Advanced Filters, or, find the employee throughout the list. Click on the employee's name to view their file.
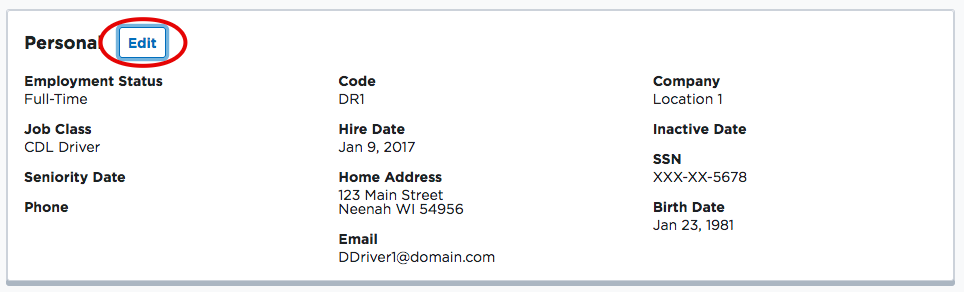
Scroll down to the section in the Employee File that needs editing. For example, click Edit in the Personal section.
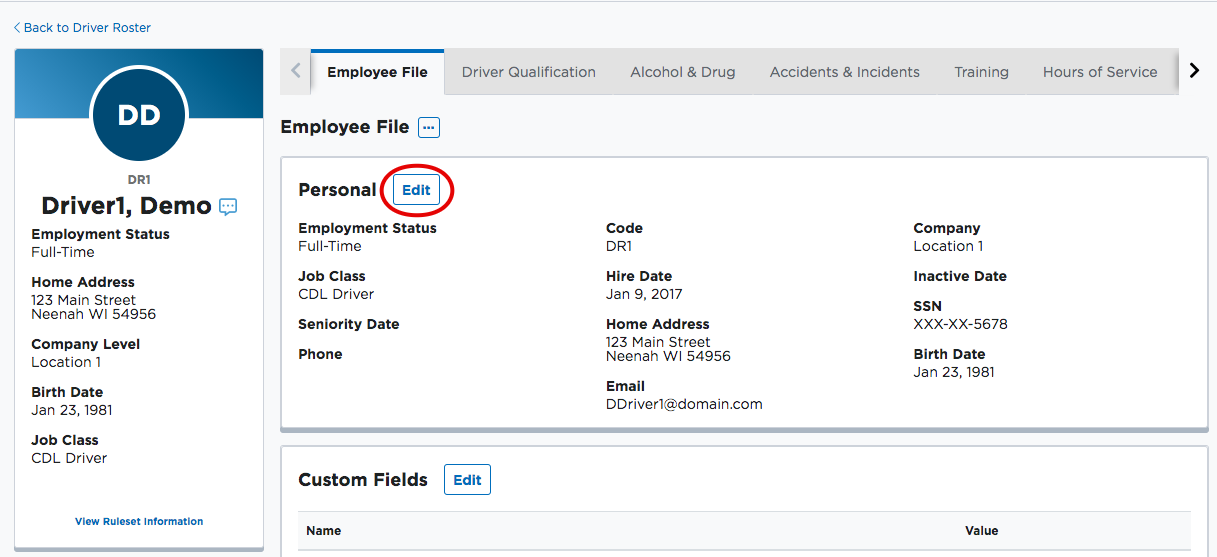
Once any necessary information is changed or added, click Save changes at the bottom of the edit menu.

Multiple Employee Checklist Update
A single Employee Checklist item may be updated/completed for a large group of employees.
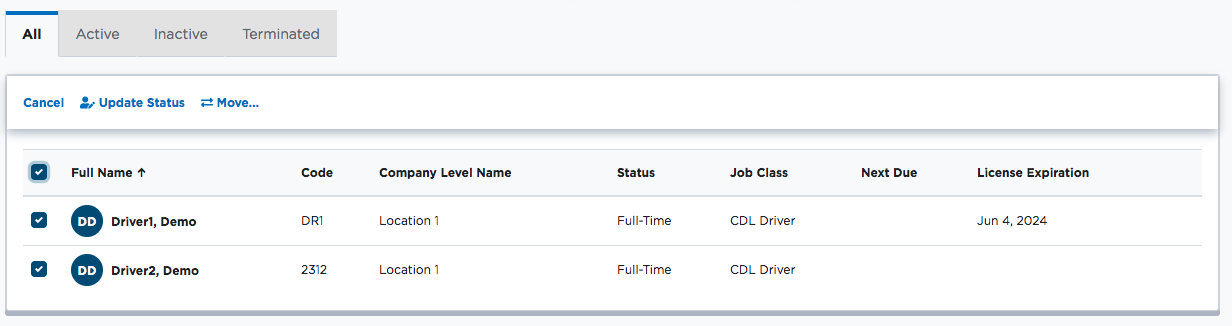
When you are on the Driver Roster, check the box next to each employee that needs a checklist item updated. You can use the filter options to narrow down results to a certain group, etc.

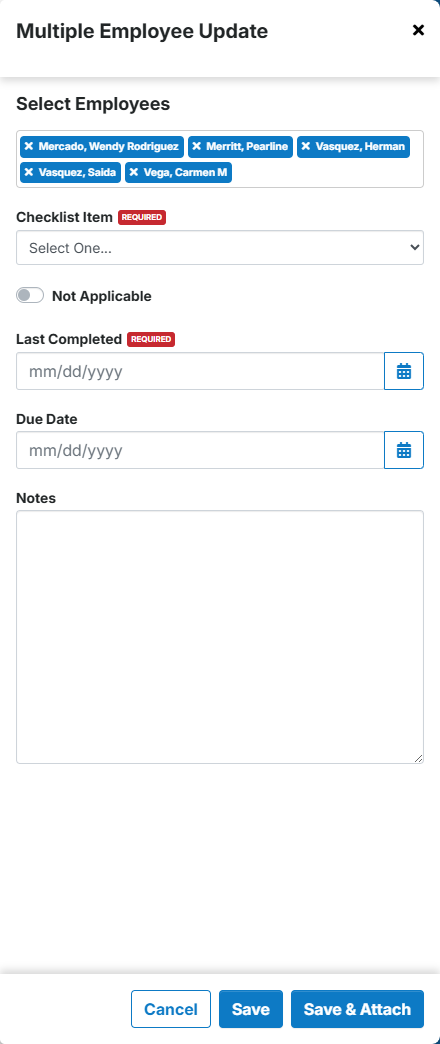
At the top of the list, select Multiple Employee Checklist Update.

Employees selected from the roster are listed.
- They can be removed by clicking the X next to their name. Additional Employees can be added by typing their name in the box.
- Select the Employee Checklist item that is being updated
-
Enter in the necessary information:
- Not Applicable: Turn this toggle on if the checklist item does not apply to the selected Employees
- Last Completed: Use this field for the date the item was last completed.
- Due Date: Use this field if the checklist item must be renewed at a later date
- Notes: Enter any necessary notes.
-
Click Save to save the records, or Save & Attach to add attachments to the stored records
Terminating/Deleting Employees
Employees can be terminated individually or in groups (ie. in the event that multiple employees were terminated on the same day).
Terminating an Individual Employee
While viewing the roster, over to the right of the employee and hidden action buttons will display. Select the trash bin to delete. Note: 'Deleting' employees/units in Encompass does not remove them from the system. 'Deleting' terminates/disposes those records accordingly.
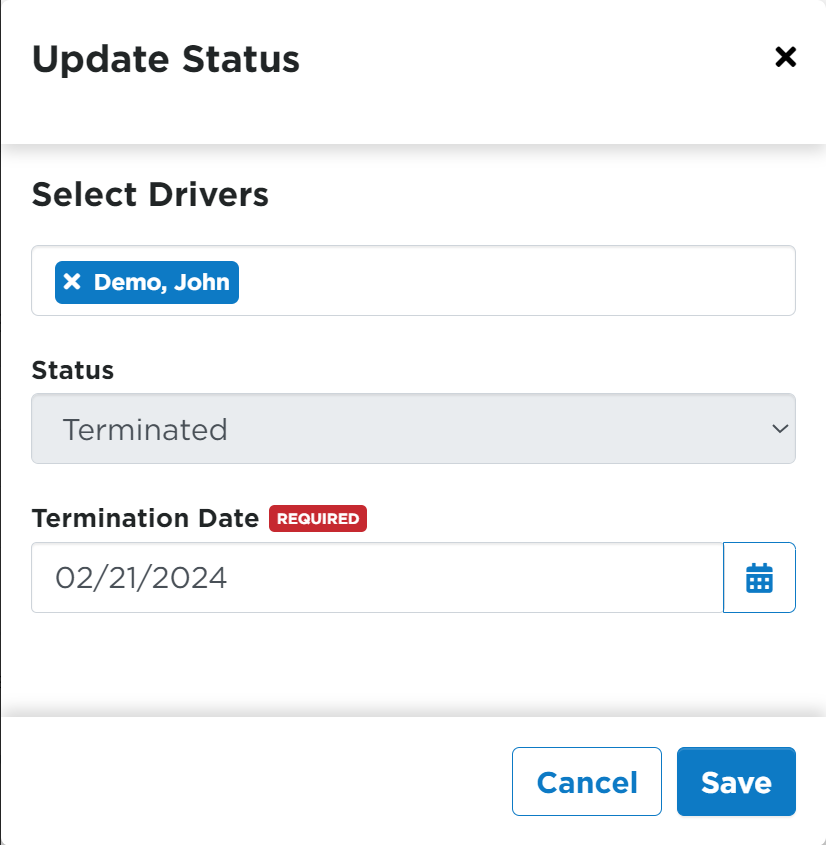
Enter the date of termination and select Save.
Additionally, the employee can be terminated by editing their Employment Status under the Personal information when viewing their Employee File.
Terminating a Group of Employees
While viewing the employee roster, use the checkboxes on the left to select the employees to terminate. Once all necessary employees have been selected, click Update Status.
Set their employment Status as Terminated and enter their termination date. Click Save to store the record.
