Hiring Process Setup
This article provides a detailed guide for Administrators on setting up the Hiring Process in Encompass. It outlines key components including customizing the Screening Process to prioritize Qualified Applicants, configuring the Prequalification Checklist to manage required forms, and assigning Recruiters to specific states or territories. The guide also covers setting up an Online Application, adding custom dropdown questions, managing third-party providers, and configuring hiring steps to ensure all necessary documentation is collected. These tools and settings help streamline Applicant processing, improve data accuracy, and ensure compliance with company hiring policies.
Setting up the Hiring Process can only be performed by an Encompass user with Administrator access.
See User Roles and Permissions for more information on changing access level.
Go to Settings, located in the dropdown next to your name. Select the Applicants tab. The following information will focus on the Hiring Processes section.

Use these links to skip to the desired topic, or use the Table of Contents at the top of your page:
- Screening Process
- Prequalification Checklist
- Recruiter Assigned States
- Online Application Settings
- Third Party Providers
- Configure Hiring Steps
Screening Process
The Screening Process for new Applicants can be customized to meet a company's own requirements. These settings will determine if an Applicant is considered a Priority 1 (meets all requirements) or Priority 2 (failed at least one requirement). This lets a recruiter work with the Priority 1 applicants first. To establish these settings, go to Screening Process.

Check any boxes in the Screen On column for items that an Applicant should be screened for. To select all of the boxes, check the box next to Screen On. Enter the appropriate screening information (e.g. Applicants should be at least 21 years old) for each item/s selected. Click Save when completed.
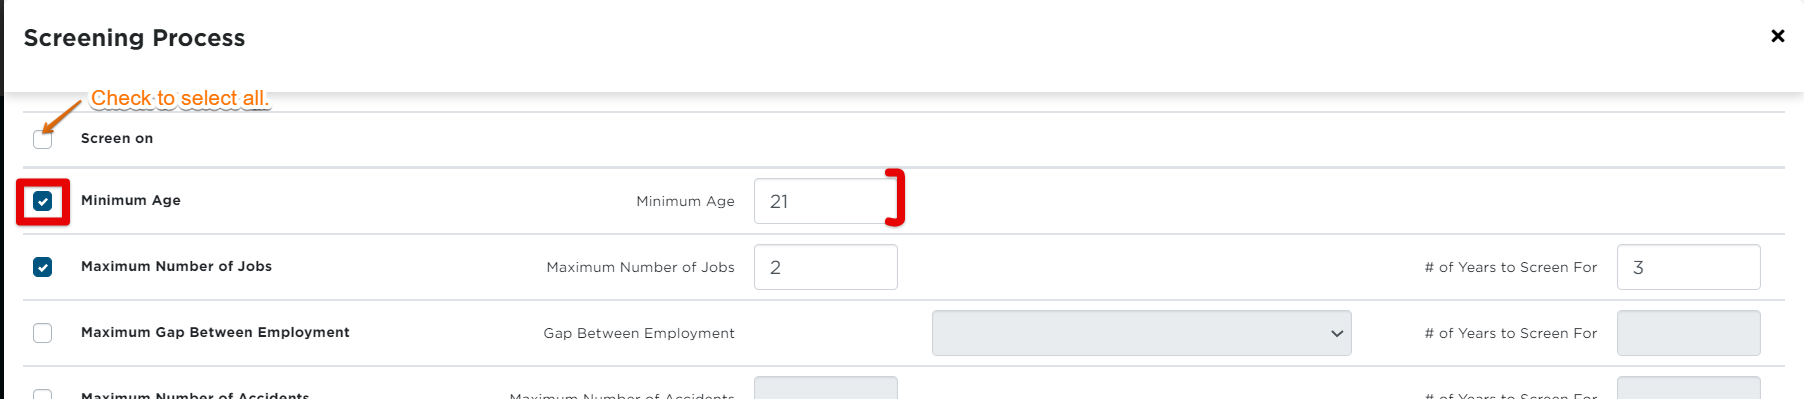
Applicants that meet ALL of the screened requirements will be indicated as Priority 1 applicants. Applicants that fail at least 1 requirement, will be indicated as Priority 2 Applicants.
Prequalification Checklist
This setup is critical to determine which forms will be generated and managed in the Prequalification Checklist step of the Hiring Process. To access this area, go to Settings > Applicants > Prequalification Checklist.

When the Prequalification Checklist is generated during the Hiring Process, the Prequalification Item(s) that are checked/selected will appear in the Applicant's record. Once all desired items are selected, click Save.
Note: The items selected below are an example. They may not align with the needs of every company.

All forms are now managed within the Prequalification Checklist. Checklist items are still turned on or off, but now you can select the form that is associated to that Checklist item. When a form is selected for a Checklist item, it will download to the browser when the Prequalification Checklist is generated.
You can select from predefined forms supplied by Encompass:
- Alcohol & Drug Employees Certified Receipt
- Alcohol and/or Drug Test Notification
- Applicant Online Employment Application
- Drug and Alcohol Clearinghouse Consent for Limited Queries
- Medical Examination Report
- Medical Examiner’s Report
- Motor Vehicle Driver’s Certification of Violations
- Previous Employer Alcohol & Drug Test Information
- Previous Pre-Employment Employee Alcohol & Drug Test Statement
- PSP Applicant Consent
- Record of Road Test
- Request for Check of Driving Record (Current State)
- Request for Check of Driving Record (Previous State)
- Request for Information from Previous Employer
- Safety Performance History Records Request
Or you can also select from your own uploaded Company Forms (Drivers > Forms > Company Forms).
- Forms must be in PDF.
- When signed by a Driver, the form will be static (no information filled), but the Driver’s signature will be on a page appended to the end of the Company Form.
If a form is selected and the Digital Signature is enabled, then an Applicant will be able to sign them at the end of the Online Application.
Digital Signature is enabled by selecting the Edit hover action and toggling it on as seen in the image below.
If the Online Application is enabled, the Applicant Online Employment Application will be set by default for the Employment Application Checklist item.


Recruiter Assigned States
Recruiters can be assigned to specific states, provinces, and territories. When new applications are entered, they are routed to Recruiters based on the address information. Click on Recruiter Assigned States.

The Recruiter at hand is, essentially, you. Changing these settings means changing the assigned states for yourself.
Select the state(s), province(s), or territory(ies) for the Recruiter. Click Save when completed.
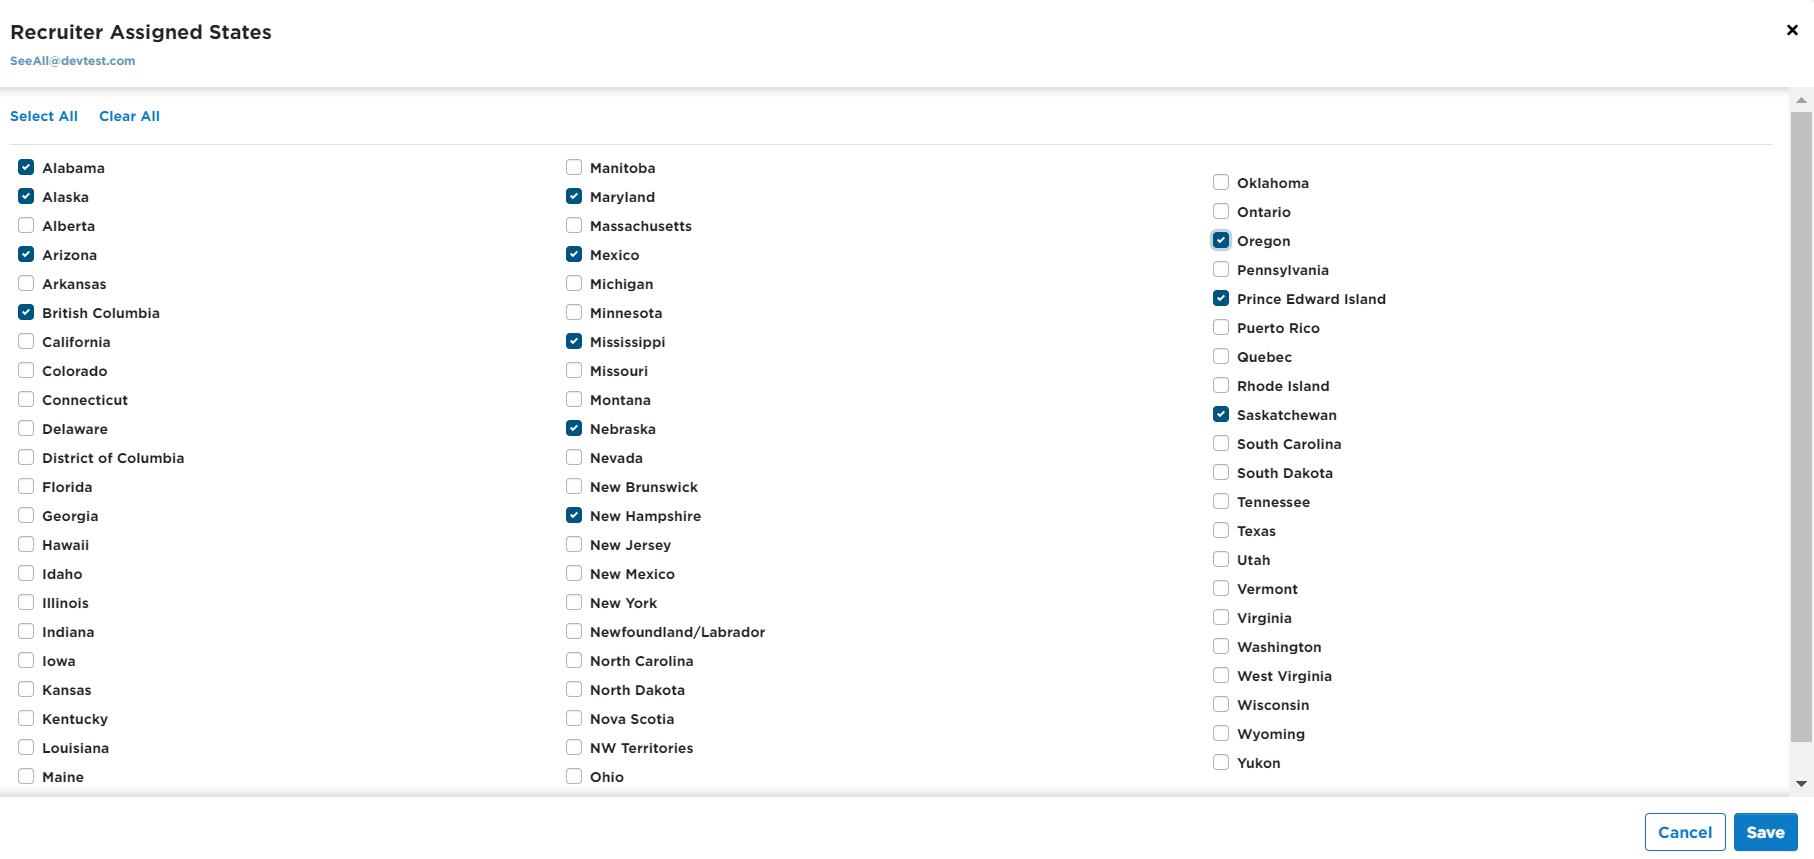
(Note: The Recruiter is assigned based on the Applicant's state of residence, not the state where the CDL was issued.)
Online Application Settings
Setting up an Online Application is a good way to save time by not having to manually enter in a paper application; the Online Application is entered by the Applicant. An Online Application URL will be generated so you can share it directly with Applicants. To set this up, click on Online Application Settings.

To enable the Online Application, click Edit.
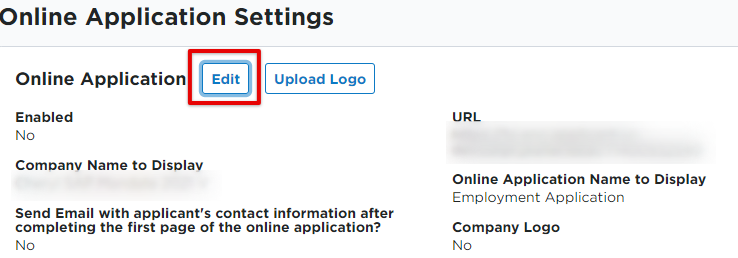
Check Enable Online Application to activate the Online Application. Then click Save.

Reminder: If the Online Application is enabled, the Applicant Online Employment Application will be set by default for the Employment Application Checklist item.
For more detailed information on setting up the Application, visit Online Application Settings.
Online Application Dropdown
Additional questions/drop downs can be created and added to specific sections in an Online Application. (You can also add these and other custom questions that are not dropdown-based; see Online Application Settings for more information.) Click Online Application Dropdown.

Click Add New Dropdown.

Enter the question/information you want to know; determine the section you want to add the question to; enter the sequence (ie. where you want the question to display in the list). Turn the toggle on to display this question in the application. Then, add the dropdown "values". These are the options the Applicants will have to choose from when answering this question. Click Save when finished.

Third Party Providers
Third Party relationships must be established prior to this setup process. These settings also affect Annual Review processing. Contact your Sales Representative for additional details.
Click Third Party Providers.

Once the desired options are selected, click Save.

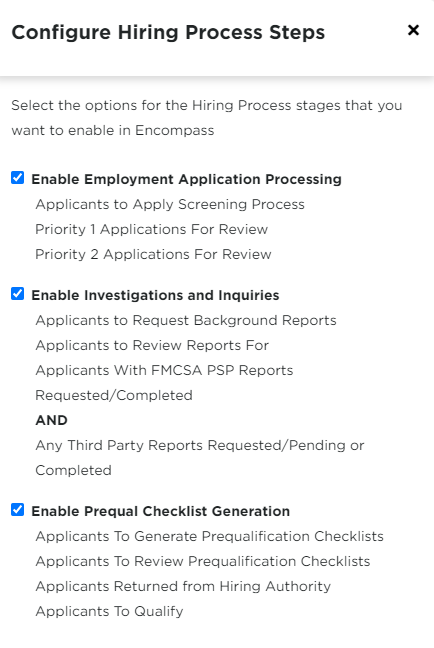
Configure Hiring Steps
Hiring Steps are configured into 3 phases. It is recommended to use the default settings (all enabled) to ensure you get all the necessary paperwork before hiring Applicants. Click on Configure Hiring Steps.

Check/uncheck the box next to the desired Hiring Process Steps, and click Save.