Hiring an Applicant
This article explains how Encompass users with Hiring Authority can convert processed Applicants into Active Employees within the system. From the Applicants page, users access the “Ready to Hire” tab, where they can choose to hire, reject, or reassign the Applicant to a Recruiter, as well as review the Prequalification Checklist. To hire an Applicant, users enter or confirm the Employee Code, select the Company and Reporting Level, assign a Job Class and Employment Status, and input the Hire Date. Once saved, the Applicant becomes an Active Employee in Encompass. This process ensures accurate Employee Records and proper alignment with company hierarchy and reporting structures.
Once an application has been processed, Encompass users with the Hiring Process - Hiring Authority can continue the Hiring process.
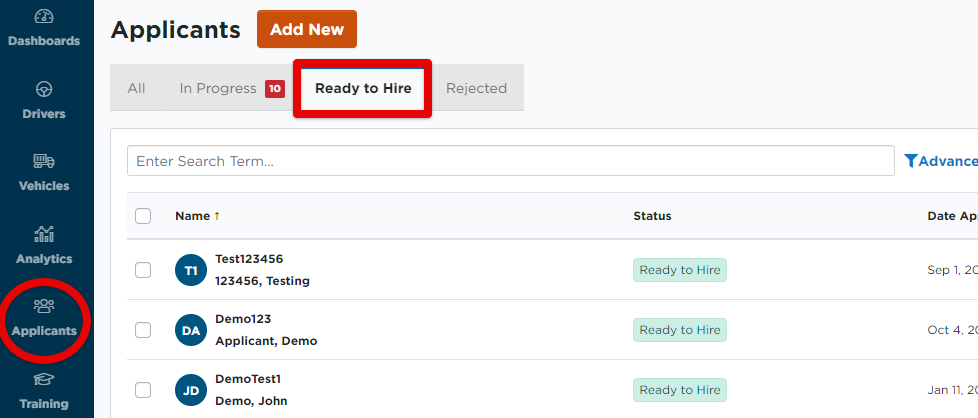
From the Applicants page, click on the Ready to Hire tab.

Next, you can hover over the applicant to reveal the following links:
- Hire Applicant - The steps below will cover hiring the applicant to make them an Employee within Encompass.
- Assign Applicant back to Recruiter - This will assign the application back to the recruiter and the hiring authority will no longer be able to view the applicant.
- Reject - Clicking this will take the user to a screen to enter in notes applying to the rejection. Then, click Save to reject the applicant. Note: Rejection notes will display in the General Information section on the View Applicant screen.
- Review Checklist - You can view the Prequalification Checklist to ensure all items have been received.

To make the applicant an official employee, hover and click Hire Applicant.

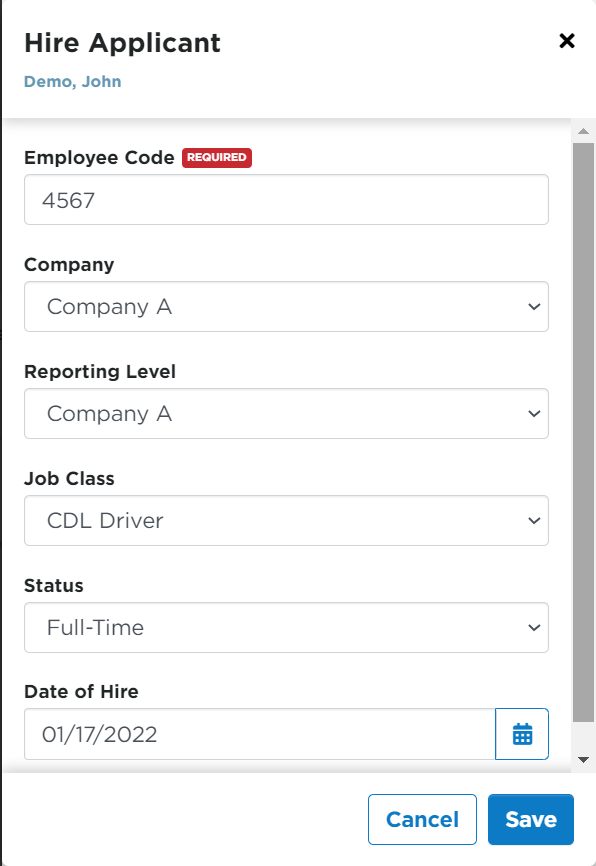
From the Hire Applicant screen:
- Enter an Employee Code or keep the employee code that was automatically generated.
- Select the Company & Reporting Level.
- Select the Job Class.
- Select the Status (Full-Time, Part-Time, etc.).
- Enter the Date of Hire. Click Save.

A success message will display.
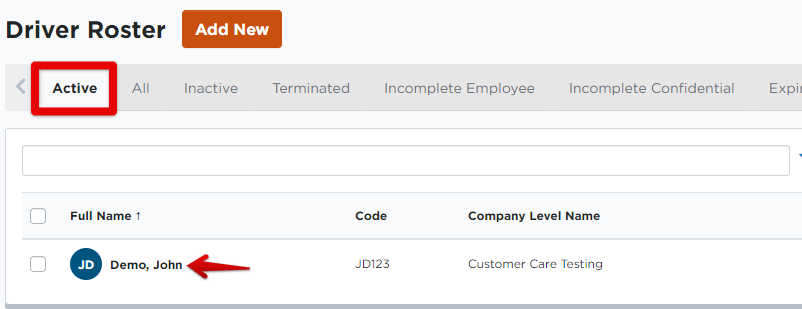
Now, the hired applicant will fall into your list of Active employees!


