Employees
To add and update Employees, first click the Company Data tab in the left menu.

Select Employees.

Add Employees
To add a new employee, click Add New.

Enter the details of the employee. Each field denoted by a red asterisks (*) is required. Additionally, each field specifies which Form they apply to below the field. The drop-down menus for Job Title and Employee Location are created by adding them from their respective areas on the Company Data page. They can also be added from this screen by selecting the drop-down menu and clicking Add New. A pop-up window will display with the required fields for their entries.

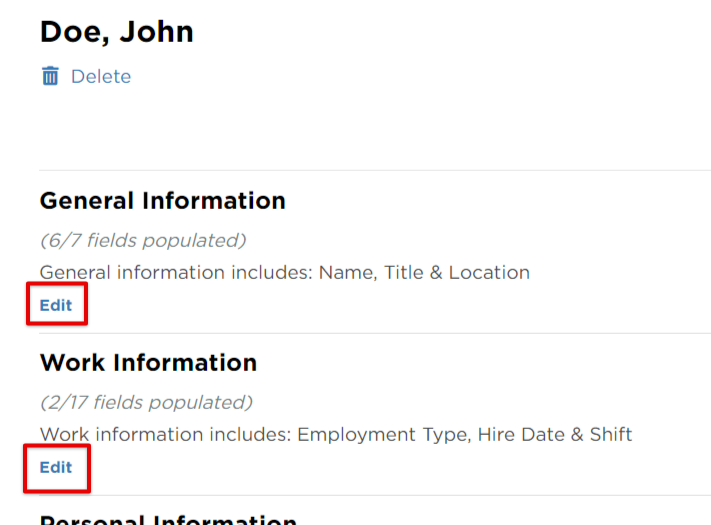
Adding/Viewing Additional Information
After saving the initial information, you will be brought to a screen where you can add additional employee information such as: work information, personal information, Form 300 & 301 information, and any other notes/attachments. To enter any of this information, click Edit under the appropriate section. To view the information, click the More arrow to reveal additional details.

-
Work Information: Includes information such as hire date, employment type (ie. full time, part time, temporary, contract worker, etc.), shift hours, job functions, phone numbers, etc.
-
Personal Information: Includes information such as date of birth, gender, home address, etc.
-
Form 300 Information: Employee fields that you must complete in order to complete the OSHA Form 300
-
Form 301 Information: Employee fields that you must complete in order to complete the OSHA Form 301
-
Notes & Attachments: Includes any additional notes/attachments related to the employee
Editing Employee Information
Go to Company Data > Employees. find the employee and click the ellipsis ("3 dots") in the Menu column.

From here, you can either:
Click View to be taken to a list of all categories of the employee's information and edit from there, remembering to click Save after updating.
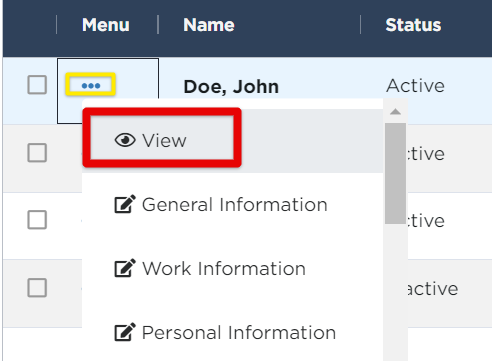
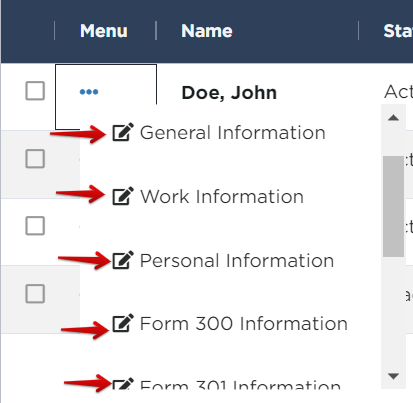
OR you can be taken directly to a specific set of information to edit by selecting the desired category. This will automatically open the section and you can edit any information there. Remember to click Save after updating.
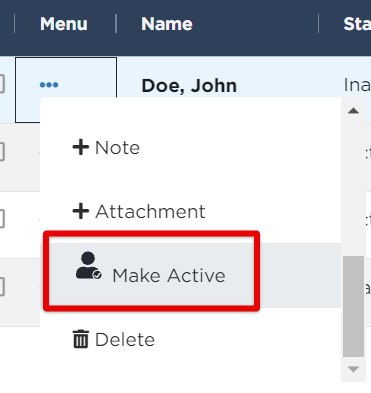
Make Employees Inactive/Active
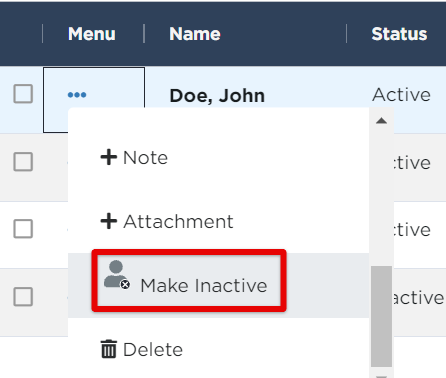
To make an employee inactive, find the employee and click the ellipsis ("3 dots") in the Menu column.
Scroll until you find the Make Inactive option and select.
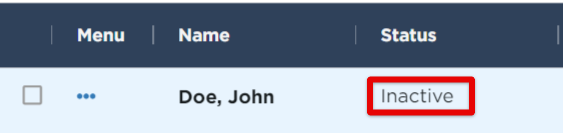
You can see that the employee's Status has changed to Inactive.
To make the employee Active again, click the "3 dots" next to the employee. Scroll until you find Make Active and select.