Locations
To update Locations, first click the Company Data tab in the left menu.

Select Locations.

Add New Location
To add a new location, click Add New.

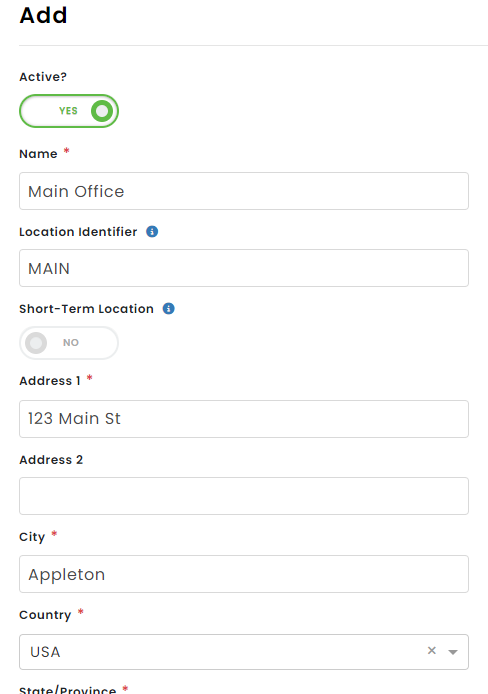
Enter in details of the location. The fields denoted by a red asterisk (*) are required.

NOTES:
- The Location Identifier field is used for Form 300 incident record numbering. For example, if your location name is Chicago, you might use CHI as your location identifier.
- Short-Term Location: According to OSHA, a "short-term establishment" is a location that will be in operation for less than a year (ie. a construction site). Employers still track recordable injuries and illnesses of employees at short-term locations, but can group them into a single OSHA 300 Log.
- Your NAICS (North American Industry Classification System) code is entered using a search wizard. Select the option that applies to you to enter your NAICS code into the system.

Click Save at the bottom when all necessary information has been entered.
The new location will be shown in the table.

Inactivate/Delete a Location
If you need to make a Location inactive, click the three dots next to the location and select Make Inactive.

If no records are associated with that Location, you can delete the location by clicking the three dots. Then, click Delete.

Note: If there are records associated with the Location, you will not be able to delete the location, as shown below. Instead, you can mark it "inactive".
