Tracking Device Encompass Setup
Use the Table of Contents to jump to a specific tracker, or click below:
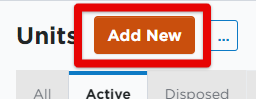
Add Unit
It is important to set up the unit/s in Encompass in order to pair tracking devices to the unit. Go to Vehicles > Units > Add New. For more information on how to add a unit, see Adding a Unit/Vehicle and for fuel tax specific setup, see Vehicle Setup for Fuel Tax.
Adding a VT100 Device
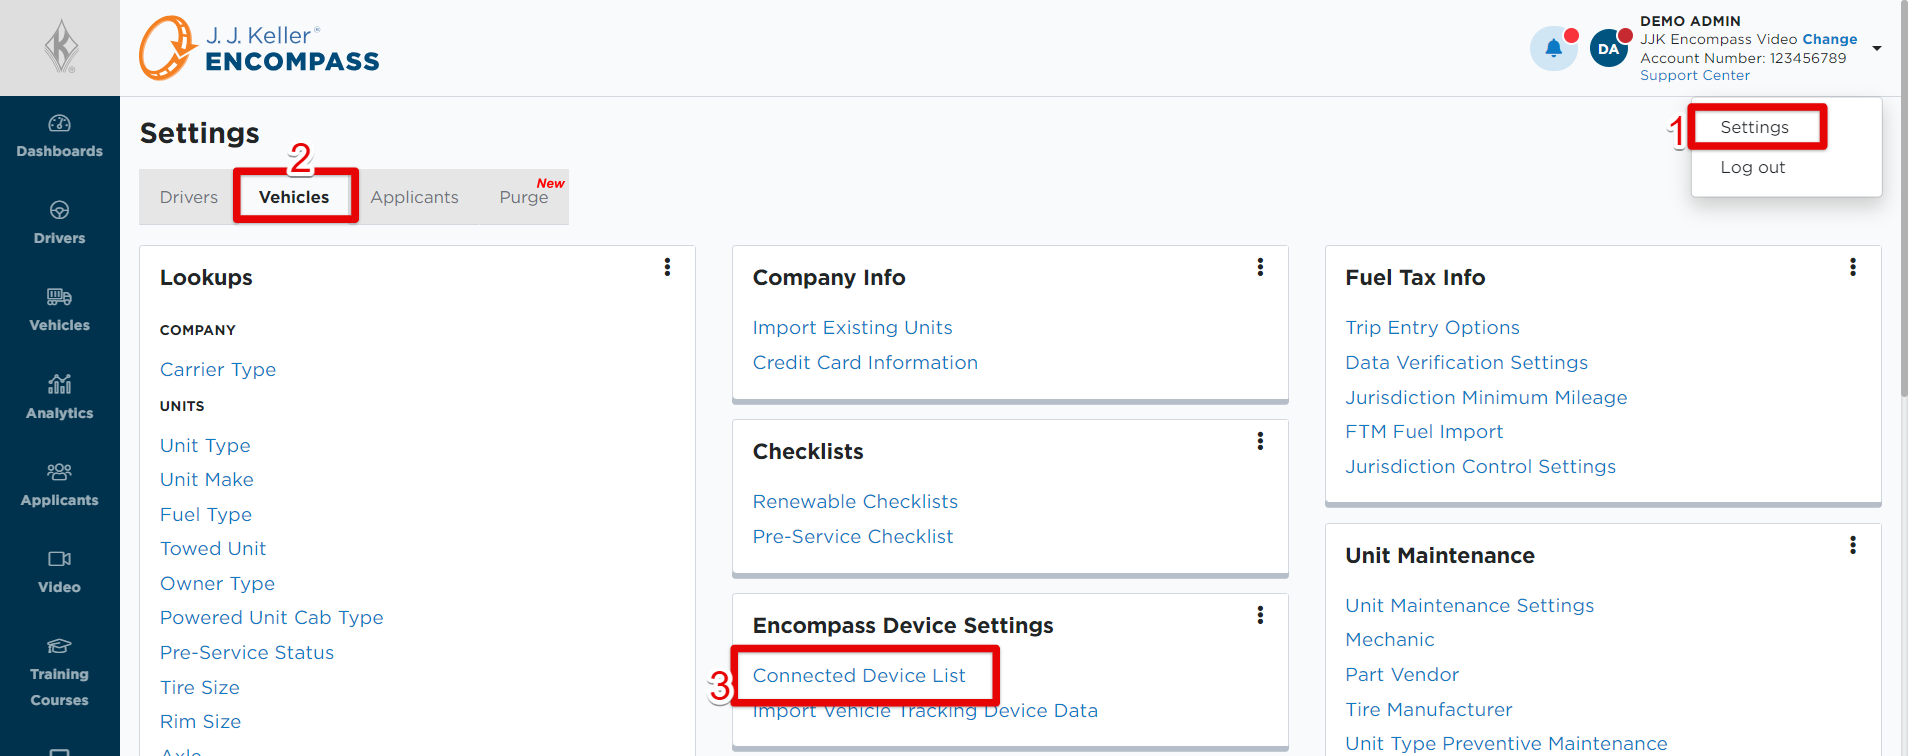
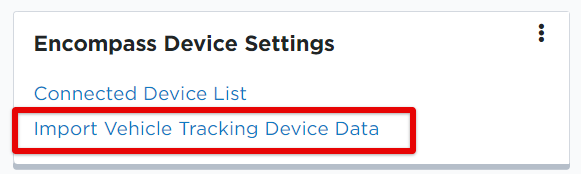
Go to Settings (1) > Vehicles tab (2) > Connected Device List (3) (located under the Encompass Device Settings section)
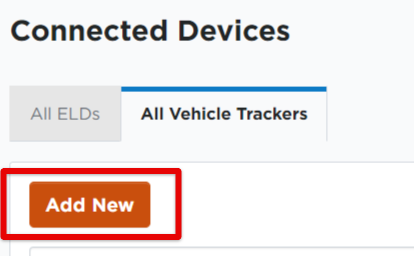
Select the All Vehicle Trackers tab.
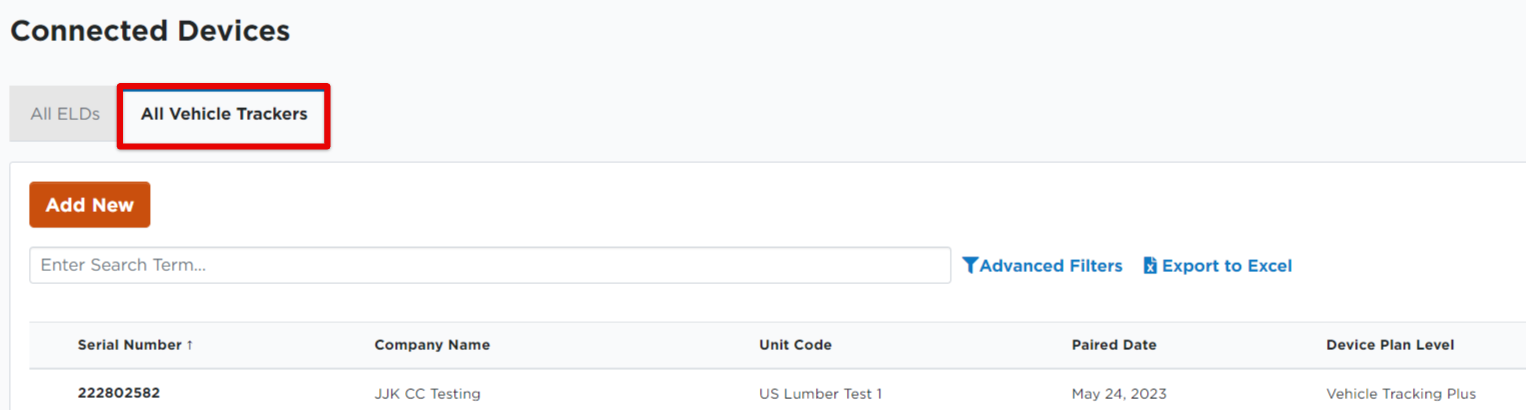
Then, click Add New.
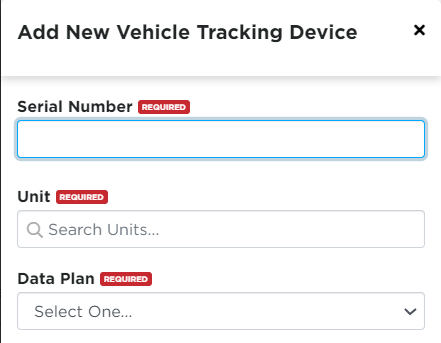
Enter the tracking device's serial number and unit the device is installed in.

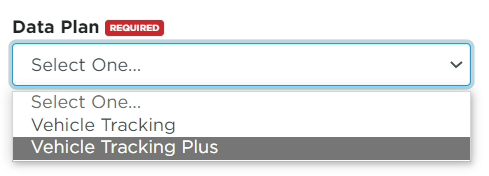
Select the appropriate Data Plan.
- Vehicle Tracking is the default selection for the Data Plan.
- Note: Vehicle Tracking Plus includes all of the mapping features of Vehicle Tracking and also provides mileage records that can be used for IFTA and IRP reporting. Vehicle Tracking Plus is an additional charge; reach out to your sales representative to learn more about Vehicle Tracking Plus and any additional charges this would incur.

Adding a Geotab® GO9™ Device
Go to Settings (1) > Vehicles tab (2) > Connected Device List (3) (located under the Encompass Device Settings section)
Select the All Vehicle Trackers tab.
Then, click Add New.
Enter the serial number for the Geotab® GO9™; it will begin with GA or G9 and be twelve characters long (ex. G9XXXXXXXXXX). Enter the Unit the device is assigned to, and then select the Data Plan. Click Save when finished.
When selecting the appropriate Data Plan:
- Vehicle Tracking is the default selection for the Data Plan.
- Note: Vehicle Tracking Plus includes all of the mapping features of Vehicle Tracking and also provides mileage records that can be used for IFTA and IRP reporting. Vehicle Tracking Plus is an additional charge; reach out to your sales representative to learn more about Vehicle Tracking Plus and any additional charges this would incur.
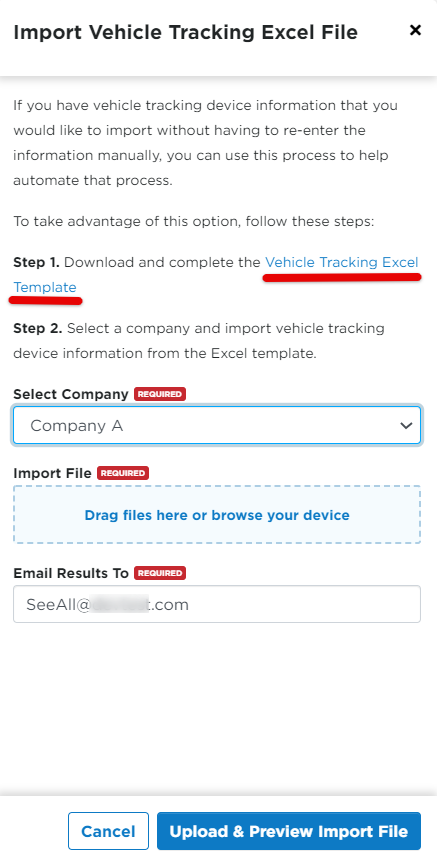
Import Vehicle Tracking Device Data
Importing can be utilized if numerous devices are being added at once. Click on Import Vehicle Tracking Device Data (from the Encompass Device Settings section) and complete the spreadsheet linked in the pop-out page (underlined in red below). Save the spreadsheet to your device and then upload the file to this area in Encompass. Then, complete the additional required fields.
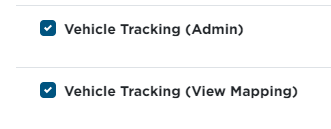
Access Roles
Administrators will need to provide access to other users who will need to view vehicle tracking. See User Roles (Permissions) for more information about granting user access.