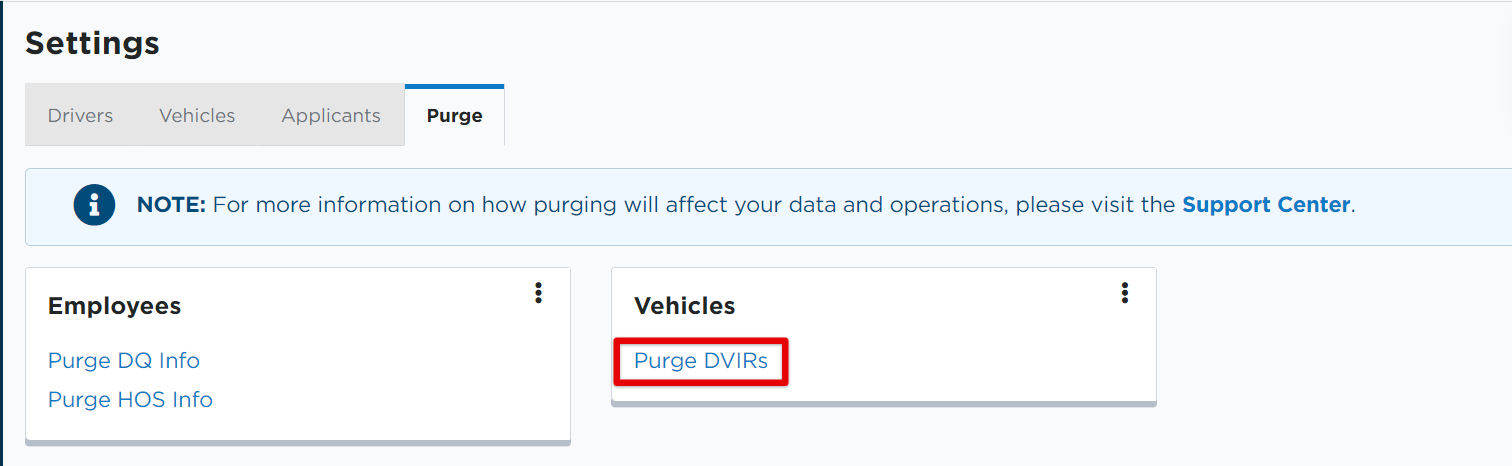
Purge DVIRs
The steps below walk through the process of purging DVIRs in the new/"new UI" version of Encompass.
Reminder: This process is permanent. There is no "undo" or restore option available. Please purge records with caution.
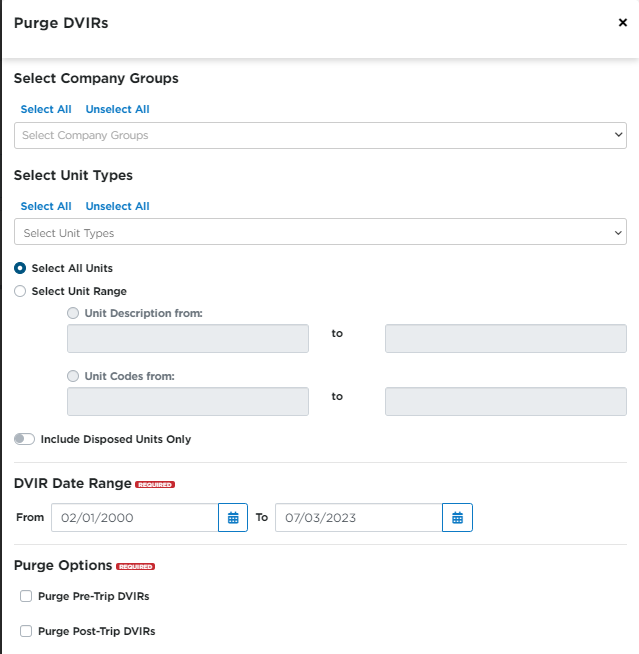
Next, set the parameters for the purge.
- The user can choose to purge DVIR records from specific company groups/locations, specific unit types, all units and/or a specific unit range.
- Choose whether or not to only purge disposed unit records. Switch the toggle on to include disposed units only. Keep the toggle off to include active and disposed units in the purge.
- Set the date range of DVIRs to be purged.
- Select if the purge should include Pre-Trip and/or Post-Trip DVIRs.
Click Continue when ready for the next step. The next screens will display all DVIRs that will be included in the purge. You can export this list to Excel to review further, if desired. If you find there are DVIRs that should NOT be purged, uncheck the box next to the DVIR in question. Click Continue to proceed.

Note: At any time, you can click the Back button to the Parameters screen in order to edit/update your selected parameters.

Confirm the final list of records to be purged. If you again find a DVIR that should not be included in the purge, hover over the DVIR's line and click the trash can to remove that DVIR from the purge list. Click Continue to proceed.

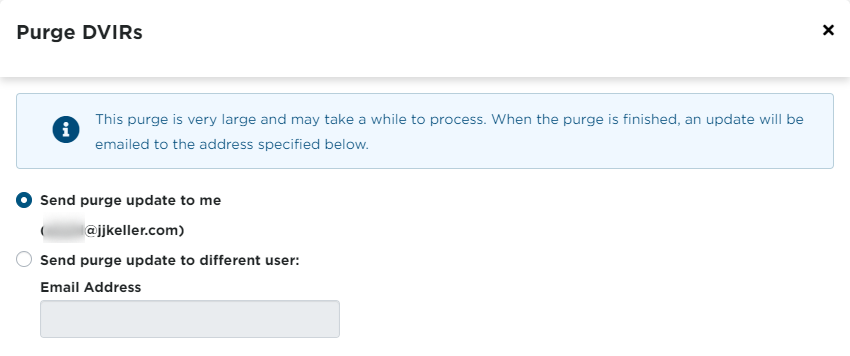
Choose if you want the purge update to be sent to your email address, or enter a different email address. Click Purge when ready to begin the purge of all selected DVIR records. A message will generate that states that the DVIR purge has been started. Dependent on the amount of records that are being purged, this process could take several hours to complete.

REMINDER: CLICKING PURGE IS A PERMANENT DELETION OF ALL SELECTED RECORDS.