Moving Units Between Company Locations (Virtual Setup)
When an Encompass account is setup with multiple partitioned locations (known in J. J. Keller as a virtual setup), moving Employees and Units between these locations isn't the same as simply changing reporting levels like in a basic setup (if it is unknown what kind of setup your company has, reach out to your system administrator).
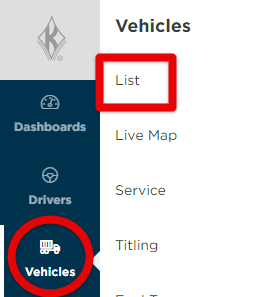
Go to Vehicles > List.
You can move the unit directly from the unit's file, or you can move the unit via the main unit roster page.
From Unit File
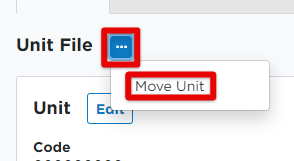
Click on the desired unit to move to open the unit's file.

Click the ellipses button near the top. Then click Move Unit.
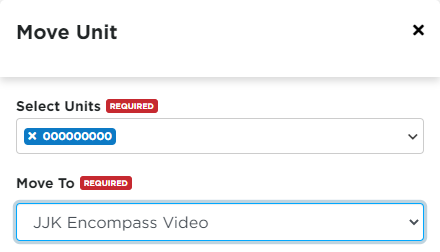
The Unit field will be prefilled based on the specific unit file you are currently in. Select the new Company/reporting Level. Click Move Unit at the bottom.
From Unit Roster/List Page
Units can be moved right from the vehicle/unit list page. Check the box next to the unit you wish to move. Then, above the table, click Move.

Move in Bulk
Units can also be moved in bulk. On the Vehicle/Unit List page, click the ellipsis (three dots) next to the Add New button at the top of the page. Then, click Move Units.

From the drop down, select the vehicle/s that need to be moved. Simply search and click on the vehicle code to select multiple.

Select the company/reporting level in which the vehicle needs to be moved to. Then click Move Units at the bottom of the pop-out.