Manually Entering a Vehicle Inspection (DVIR)
This article outlines the process for manually entering DVIRs (Driver Vehicle Inspection Reports) in Encompass, in addition to submissions via the ELD or DVIR applications. DVIRs can be added either directly through Vehicle Management > Unit Maintenance > Add DVIR or by locating a specific Unit and using the Add New… option in the DVIR section. Users enter key details such as Date, Time, Pre- or Post-Trip Type, Odometer Reading, Defects, and Inspection Notes, and select the submitting Driver. DVIRs can then be saved, saved and linked to another DVIR, linked to a Repair Order, or linked to an Out of Service Record. This process ensures all Inspections are recorded, tracked, and associated with relevant maintenance actions.
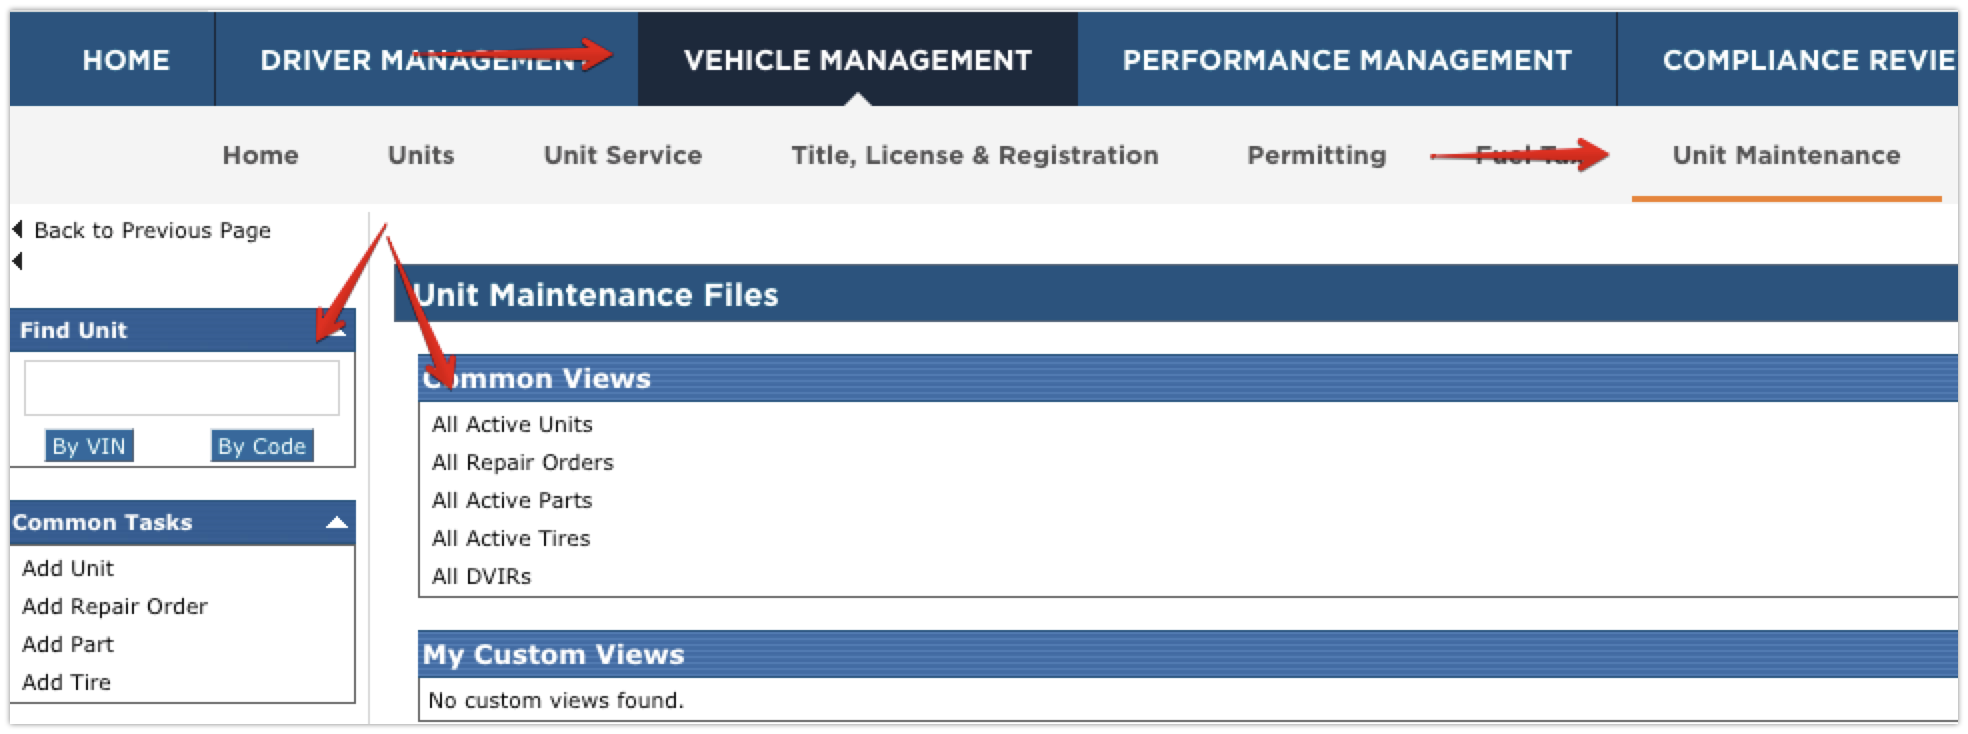
There are two ways to navigate to the screen to enter the DVIR:
1. Vehicle Management > Unit Maintenance > Add DVIR (on the left)
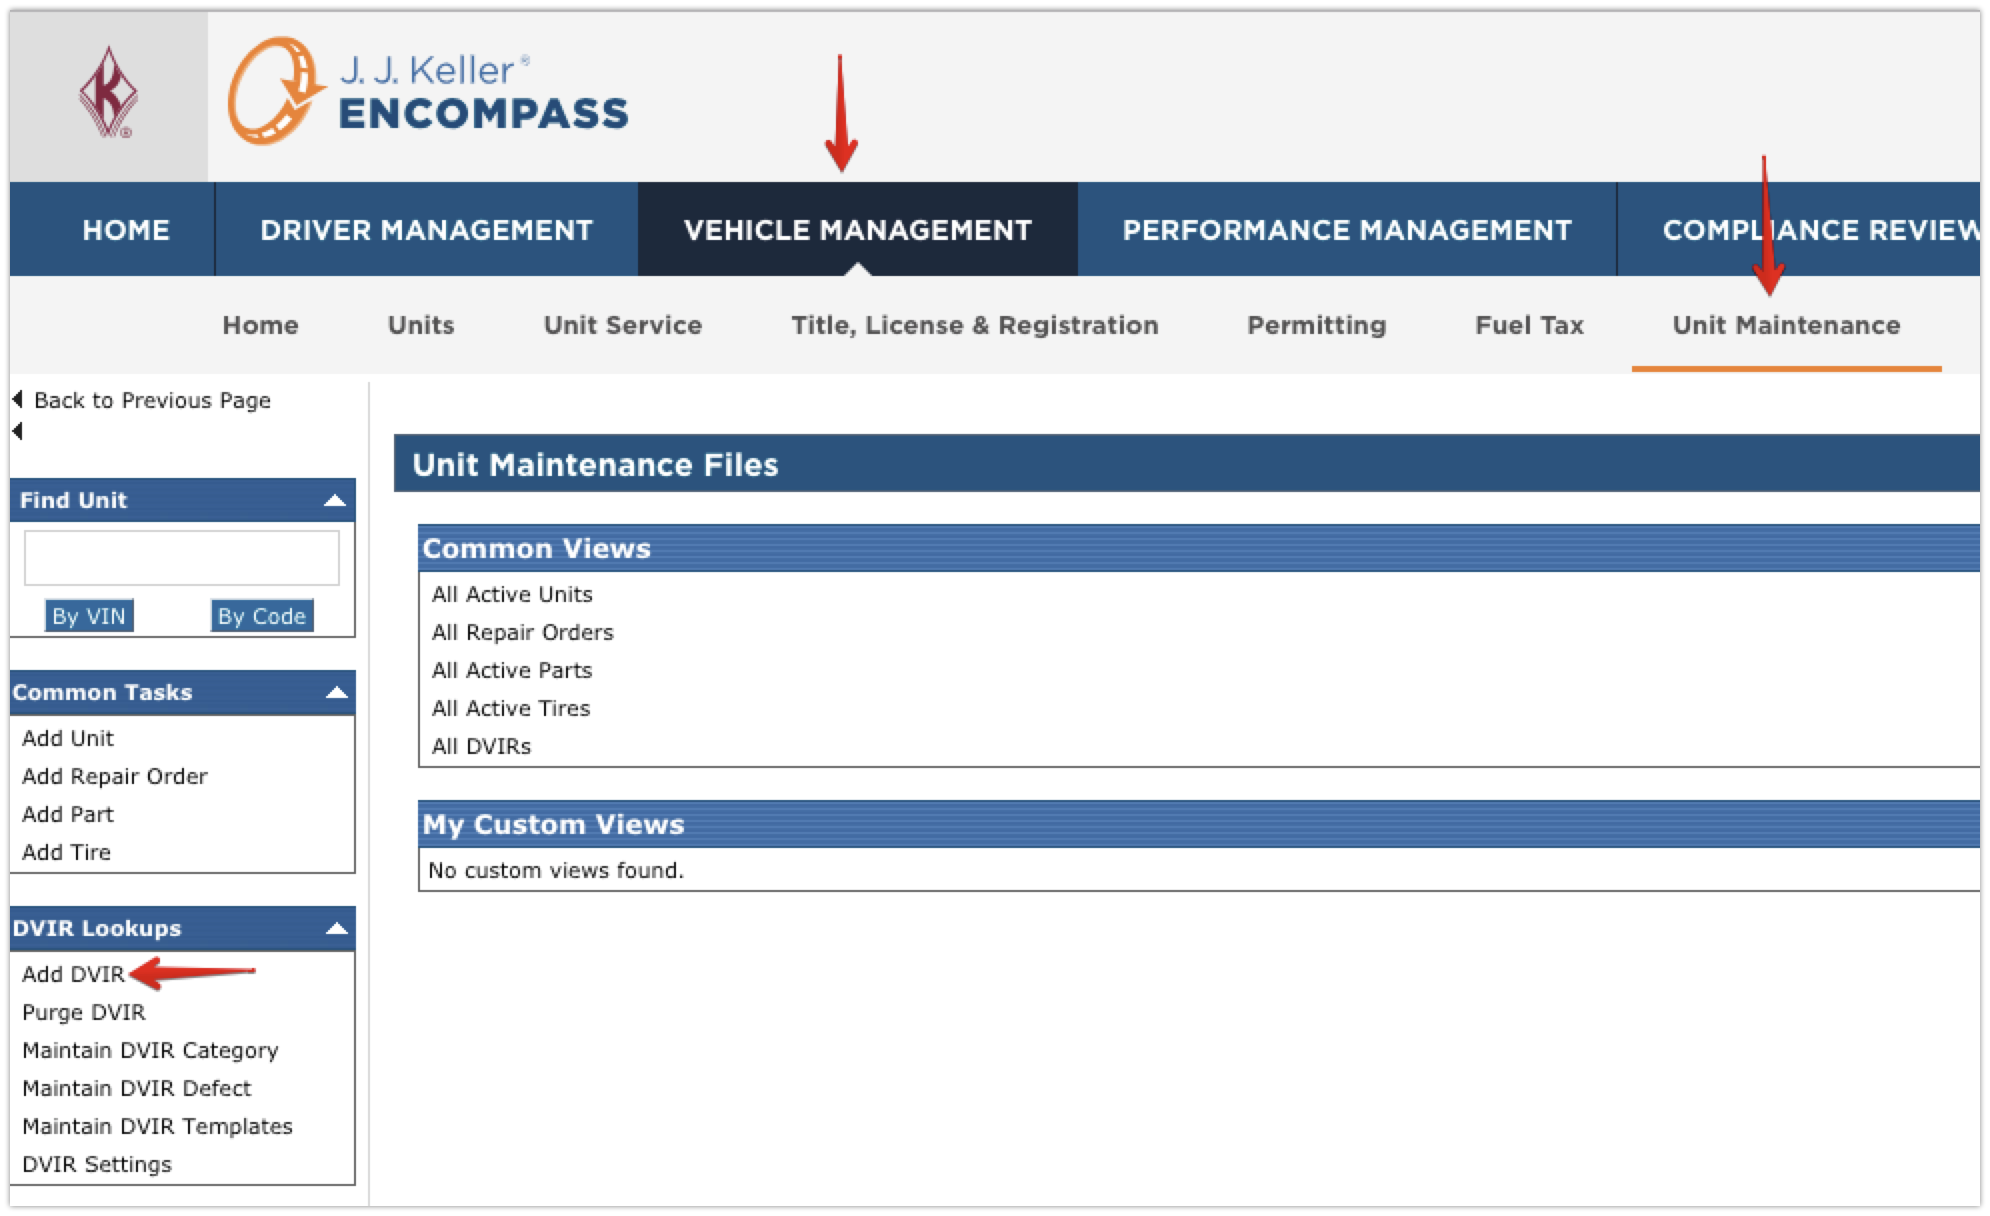
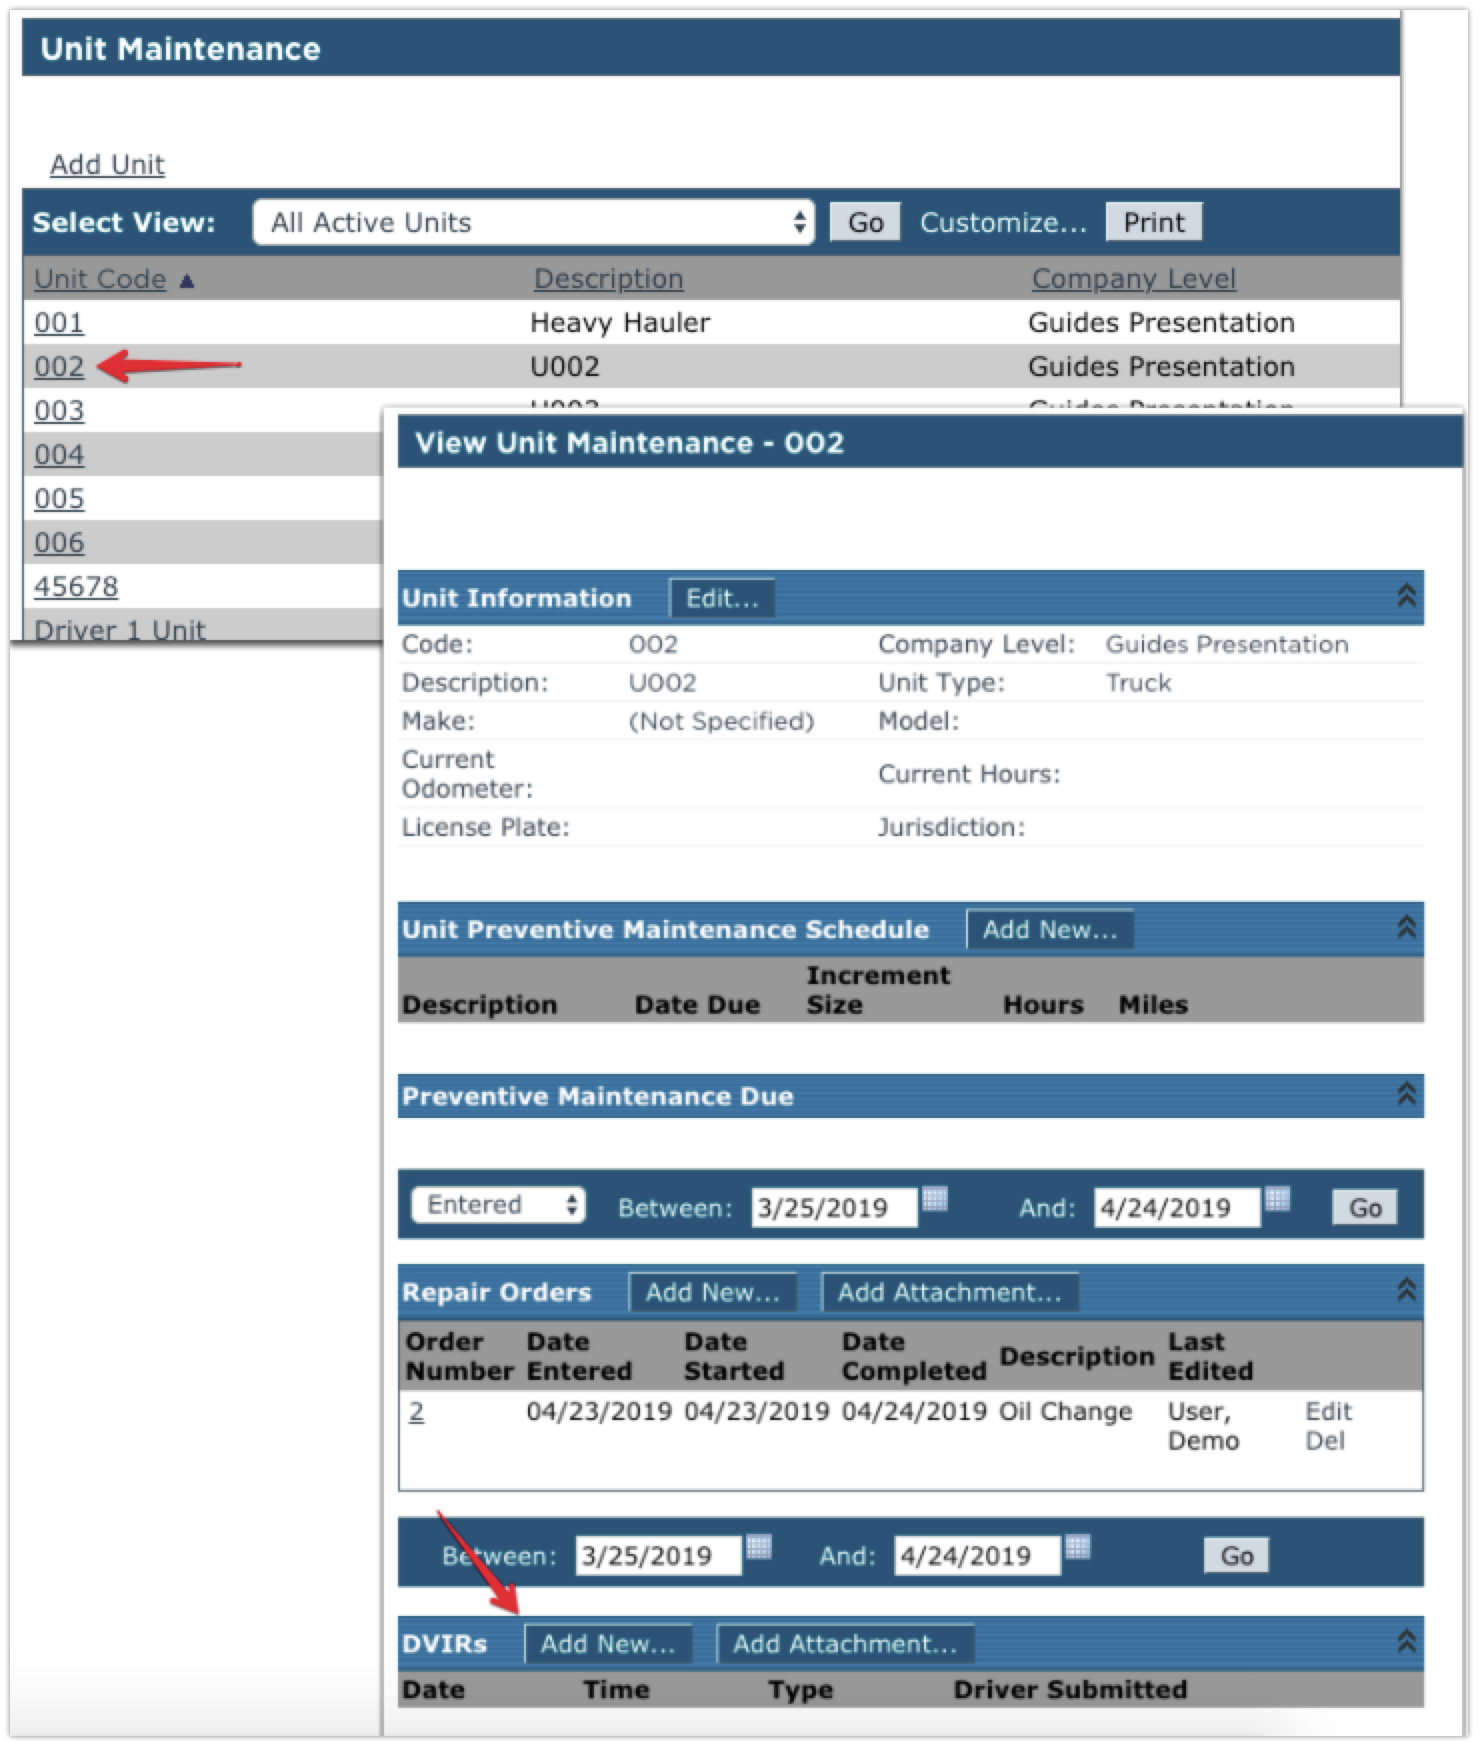
2. Vehicle Management > Unit Maintenance > Find the Unit (via search on the left or by using a common view in the middle) > Click on the Unit Code to view the Unit Maintenance File > Click Add New... in the DVIRs section.
Entering a DVIR
The first section of the DVIR entry screen allows the user to enter the basic information about the DVIR: Date, Time, whether it's a Pre- or Post-Trip, and Odometer Reading.

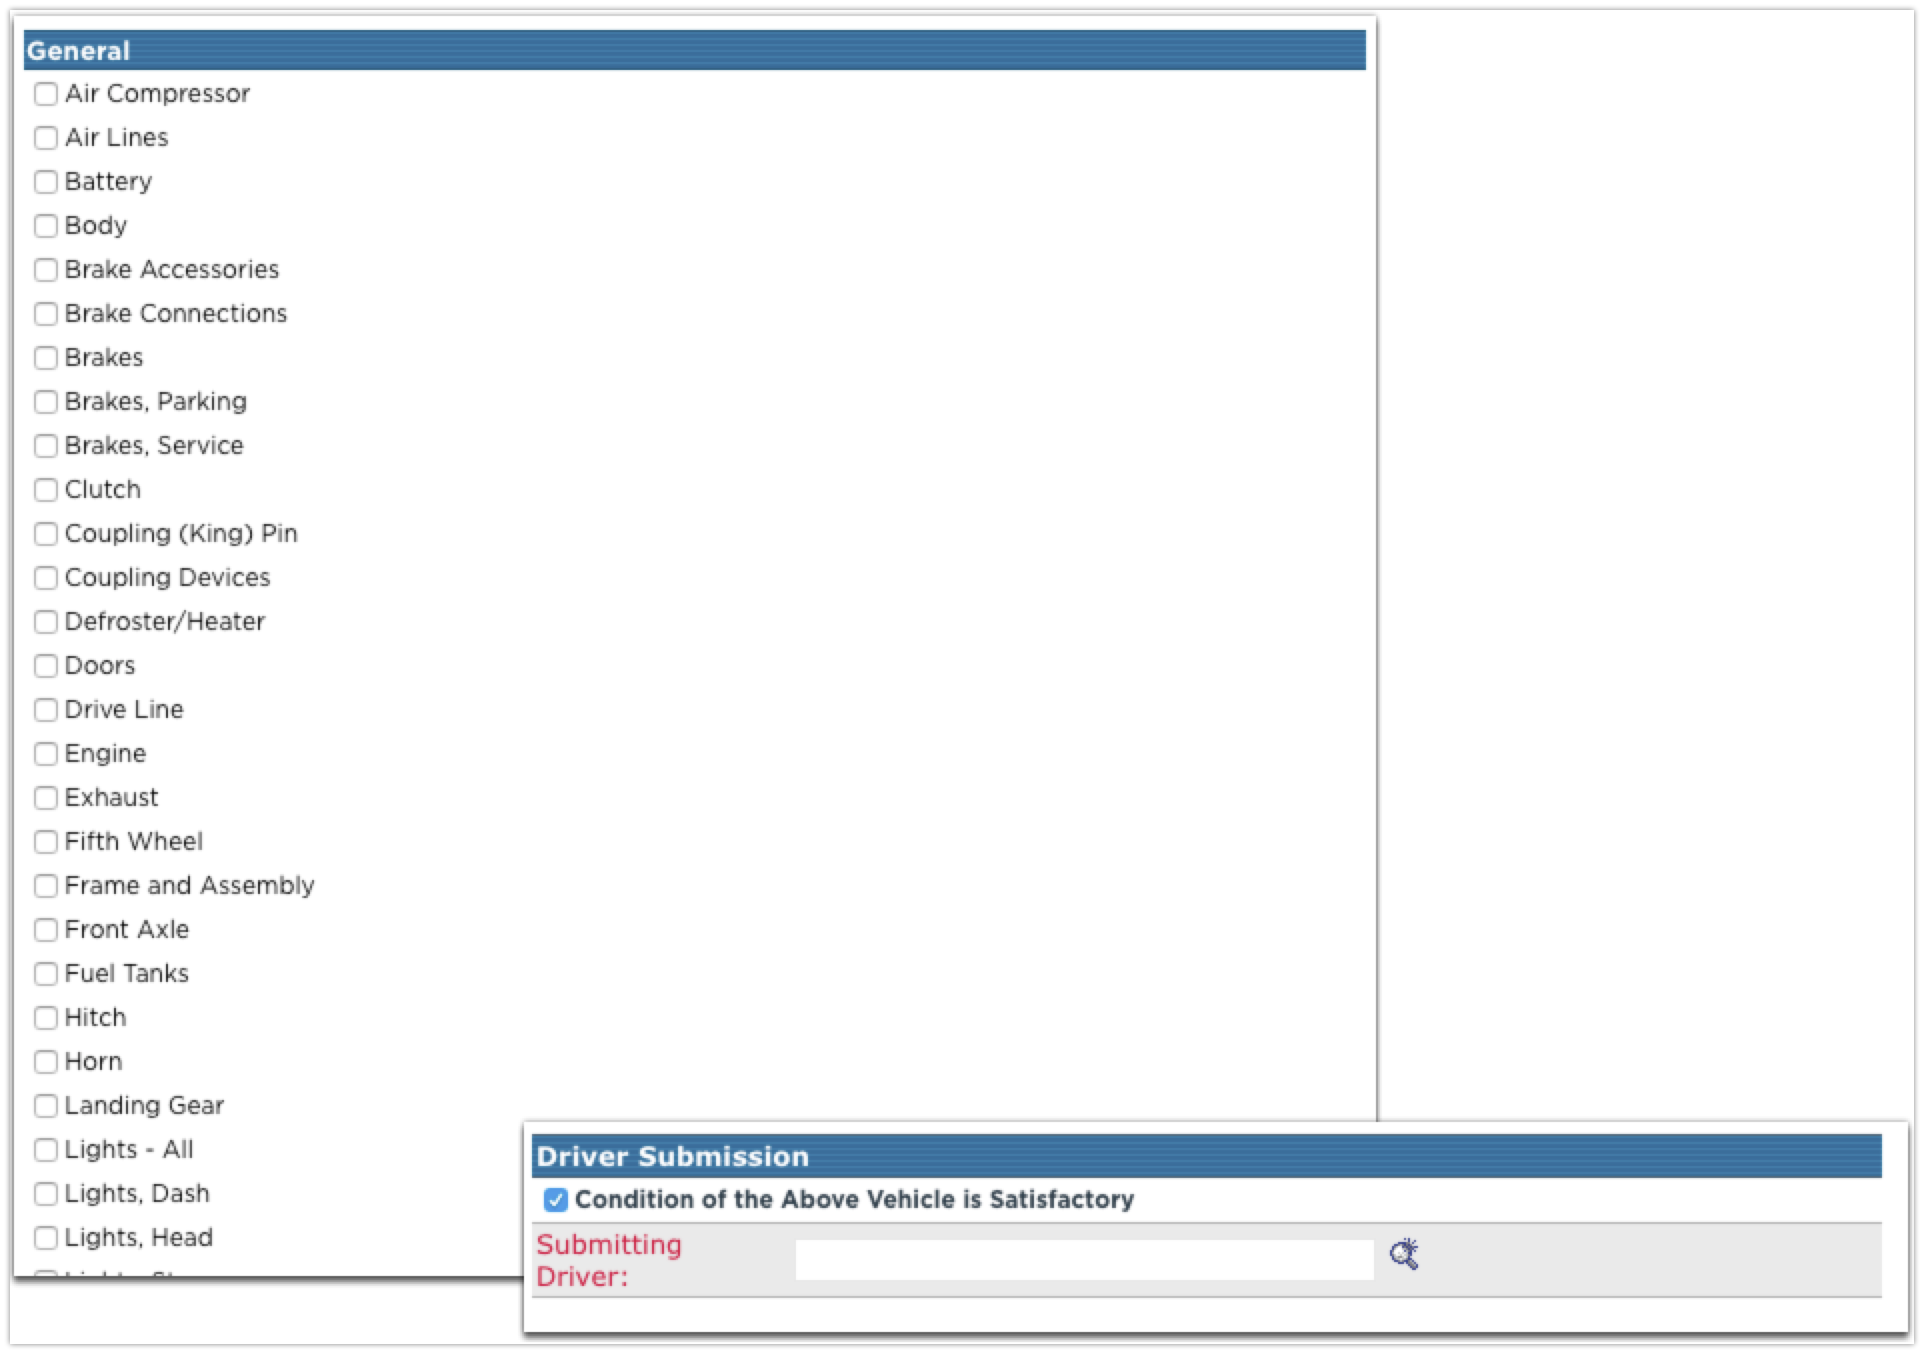
Check any defects that need(ed) repair or check the box for Condition of the Above Vehicle is Satisfactory at the bottom of the page if there are no defective items.
Enter any notes needed for the inspection.
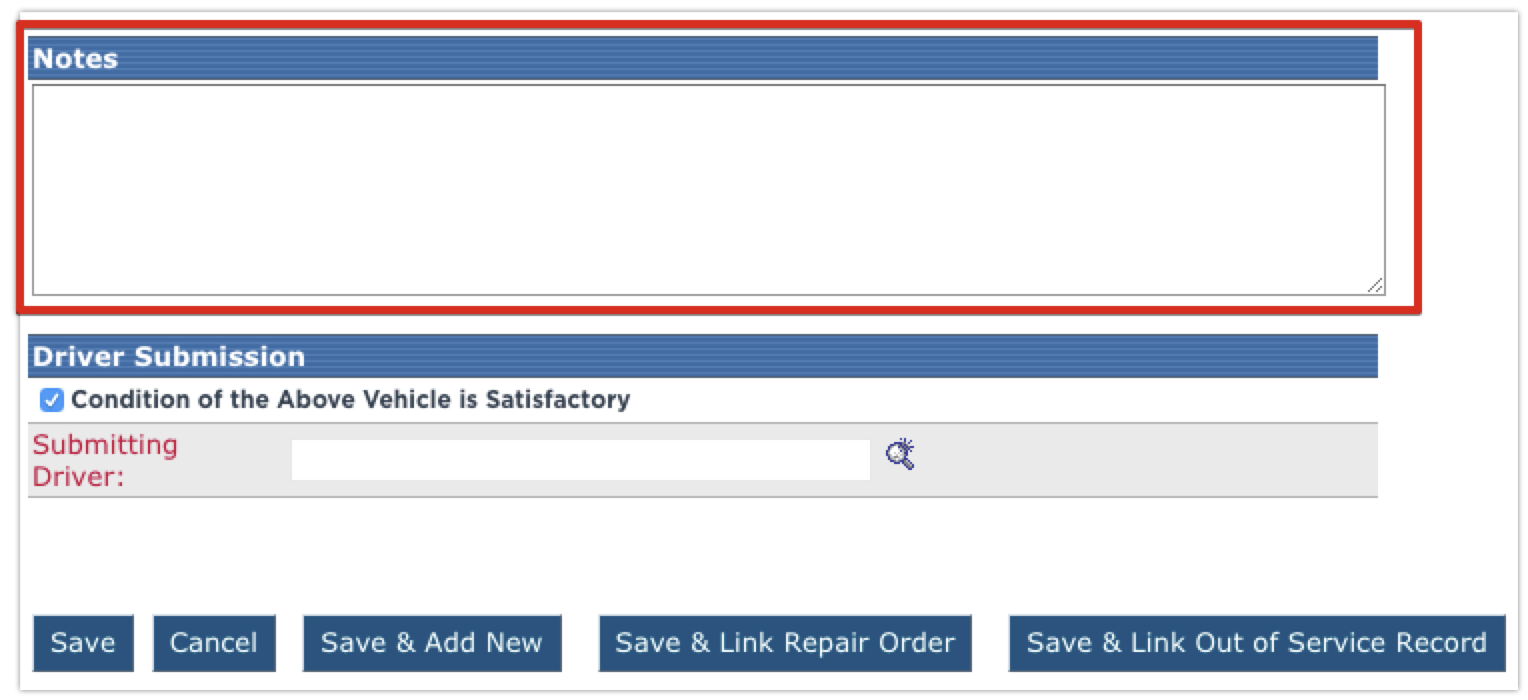
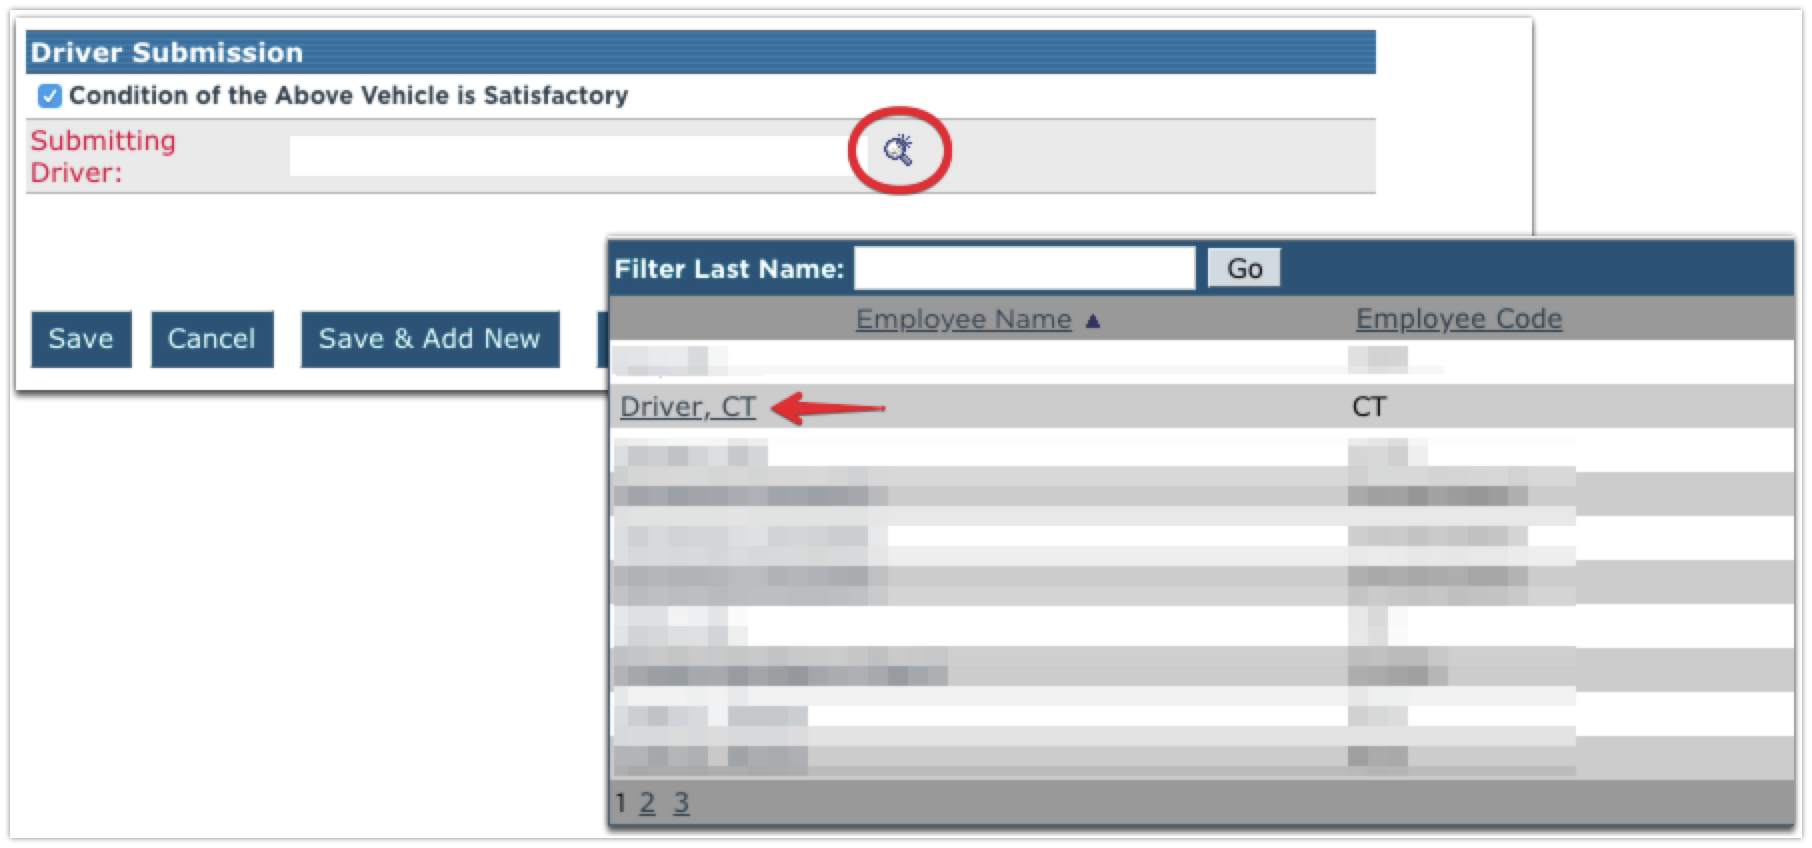
To select the submitting driver, click the magnifying glass to the right of the field. In the pop-up window, select the appropriate driver.
Click:
Save - to store the DVIR
Save & Add New - to store the DVIR and add another one
Save & Link Repair Order - to store the DVIR and link it to a repair order entered in Encompass
Save & Link Out of Service Record - to store the DVIR and link it to an out of service record entered in Encompass
