Adding Vehicle Inspections (DVIR) for Android™
Note: The driver must be in an On Duty status in order to submit a vehicle inspection (pre-/post-trip DVIR).
For information regarding previous inspections, see Reviewing Previous Vehicle Inspections (DVIR) for Android™.
Adding a DVIR
Tap the Vehicle Inspection icon on the home screen.

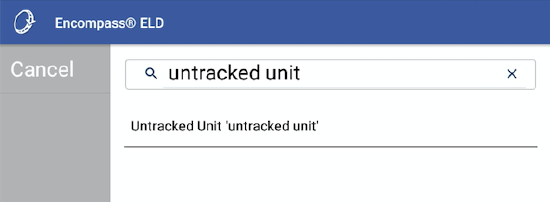
If the driver is connected to the ELD, the unit number may already be selected. If the ELD is not connected, or the unit number is incorrect, then locate/search and select the correct unit number.
Note: This list contains all active units for the company (Vehicles and Trailers). If a trailer inspection needs to be completed, simply select the trailer number from the list.
 >
> 
Note: If a trailer has not been added to Encompass, a DVIR can still be completed for it. Enter in the trailer number. If the trailer number is not found in Encompass, it will indicate it is untracked. Administrators: Once the driver submits the inspection, it will come into Encompass as an Unassigned Towed Unit on the Unit Maintenance page.
Once the appropriate unit is selected, tap Add.

Select Pre-Trip or Post-Trip depending on which inspection type is needed.

The driver will be taken to the DVIR screen for the selected unit.

- The selected Vehicle/Unit will be listed at the top, along with the type of inspection that was selected.
- A progress bar is displayed with the total number of inspection items across all categories.
- The driver should enter the odometer reading. Note: If the selected unit for the inspection is a Trailer, the odometer is not required.
- Tap the bubble next to the category name to check all items in the category as Satisfactory. The bubble will turn green.

- Tap the name of the category (ie. General) to view/edit individual inspection items.)

If the individual inspection items are reviewed and deemed satisfactory, tap in the bubble to the left of the item to place a green check mark.

If an inspection item needs to be marked as defective, instead of tapping in the bubble to the left of the item, tap on the name of the item itself (ie. Brakes). Enter any Notes about the defect. If desired, click Add a photo to choose a photo from your device, or to take a photo. Tap Save when finished.
 >
> 
Once it is saved, the inspection item will display a red exclamation point( ) in the bubble.

Once all items have been marked for this category (either satisfactory or defective), the Complete button at the bottom becomes active. Tap Complete to finish inspecting this category.

The driver will then be taken back to the DVIR screen for the selected unit. If there are any other categories that need to be addressed, inspect those items using the same steps as above. Once all inspection items/categories have filled-in "bubbles" to the left of their names, you are ready to complete the inspection:
- If there are any overall comments that the driver would like to make for this inspection, they can be entered in the Remarks section near the bottom of the screen.
- Tap Finish at the bottom of the screen.
