Import Vehicles
This article explains how to bulk import multiple Vehicles into the VideoProtects® Fleet Management System using a downloadable Excel template. Users must complete the template with required Vehicle Information, ensuring that details such as Driver IDs, Device Serial Numbers, and Locations exactly match existing records in VideoProtects. After saving the file, users upload it into the system, preview the entries, and confirm the import. Imported Vehicles will then appear in the Vehicle Roster, helping streamline fleet setup and management.
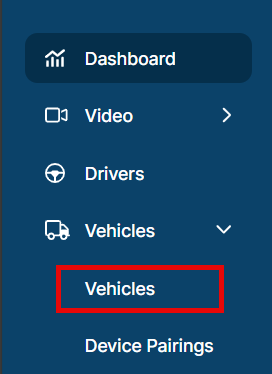
First, go to Vehicles in the left menu.
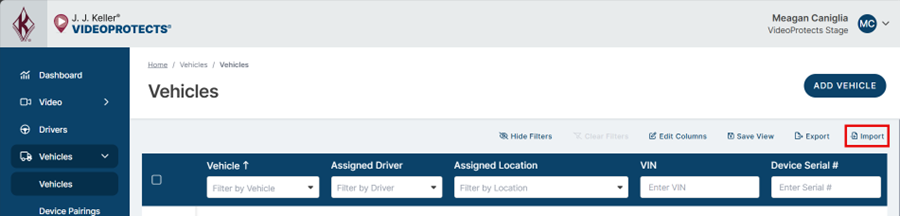
Then, click Import, located above the table.
You will first need to download and complete the Vehicle Excel Template. Click the Vehicle Excel Template link to automatically download the excel file.

Next, fill out the template with at least the required information (Vehicle Name).
Import Notes:
- Drivers, Device Serial #s, and Locations must already be added into VideoProtects in order to assign them to the vehicle.
- For information such as Driver Id and Assigned Location, what you enter in the template must match exactly what is in VideoProtects. For example, the Assigned Driver below (TuckersTruck) is exactly how it was entered into VideoProtects previously.
- It isn't required that you assign a driver, location, or camera via the template. You can update those after the vehicle import if desired. (See Assign Driver to a Vehicle, Managing Locations, or Pairing and Unpairing a Camera to a Vehicle for more information.)
Import Example:

Below is how Tucker Trucker's Driver ID appears in VideoProtects; you can see that the import template above reflects the exact Driver ID in VideoProtects:

Once the template has been filled out, save it to your device, and upload it into the VideoProtects import portal. Then, click Upload & Preview.

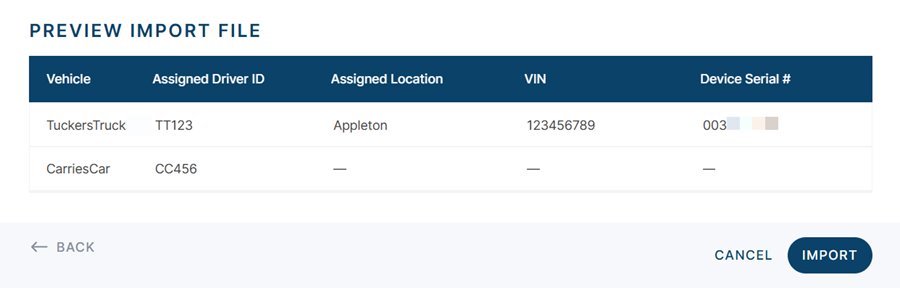
A preview of the information to be imported into VideoProtects will display. Then, click Import.
Now, the imported vehicles should appear in your rosters. (If you do not see the imported vehicle, ensure you are viewing the correct Location.)
