Managing Locations
This article explains how to manage Locations in VideoProtects, which are used to organize Drivers and Vehicles into specific Groups. Admin and SuperAdmin users can add new Locations, assign or remove Drivers and Vehicles, and adjust Assignments when moving assets between Locations. Assignments can be completed using Quick Add, from the Location Details page, or by reassigning assets, with related Drivers/Vehicles automatically moving together. Users can also change which Locations they are viewing within the platform to filter Events and data.
In this article, you can learn how to:
Add a Location | Assign Drivers/Vehicles to a Location | Remove Drivers/Vehicles from a Location | Change Locations
Add a Location
To add a new location, go to Settings in the left menu and select Locations.

Click the Add Location button on the right.

Determine a name for the Location, and enter address/contact information if desired.

Assign Drivers/Vehicles to a Location
Next, you can assign drivers and vehicles that are applicable to that location.
Note: If a driver/vehicle has an assigned vehicle/driver with a different location, it will be overridden and will also be moved to this location. For example, if you move Driver A who is assigned to Vehicle A from Location A to Location B, Vehicle A will also be moved to the new location.
Assign via Quick Add
On the left side of the Locations page there is a box titled No Location. This list contains drivers and vehicles who have not yet been assigned to a Location. Click the plus (+) sign next to a driver/vehicle.

Then, select the applicable location from the dropdown. Click Assign.

Via Location Details Page
Drivers/vehicles can also be assigned right within the Location's details page. Click on the Location.

To add a driver to this location, click Assign Driver.

Check the box next to the driver/s to add to this Location; click Assign. (You can add multiple.) Drivers already assigned to a different location can also be moved to the new location by checking the box next to their name. Note: If drivers have an assigned vehicle with a different location, the vehicle will also be moved to this location.

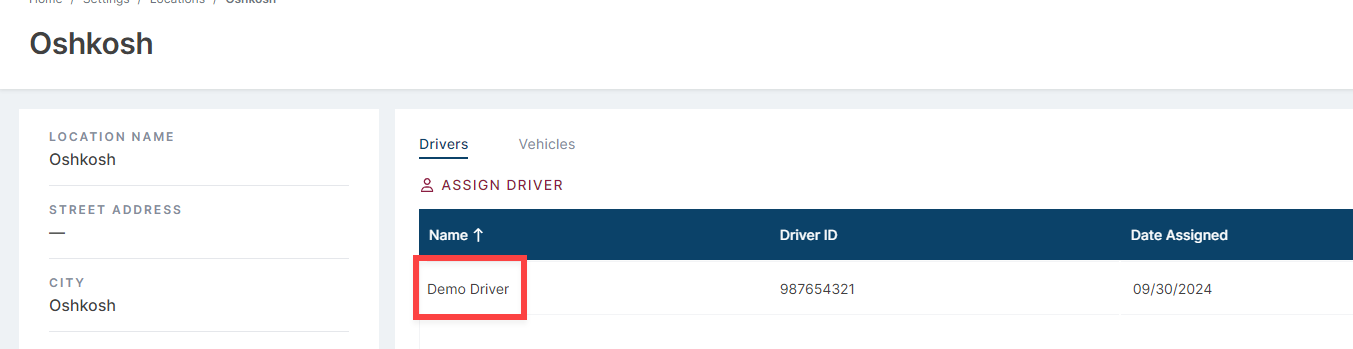
The newly added driver/s will now display for the location.
If you would like to add a Vehicle, select the Vehicles tab > Assign Vehicle, and repeat the steps above. Note: If vehicles have an assigned driver with a different location, the driver will also be moved to this location.
Remove a Driver/Vehicle from a Location
To remove a driver or vehicle from a location, click the minus (-) button.

Confirm your decision to unassign the driver/vehicle. If the driver/vehicle is assigned to a vehicle/driver, they will also be unassigned from the location. (Example: If Driver A is assigned to Vehicle A, and Driver A is removed from Location Z, then Vehicle A will also be removed from Location Z.)

Change Locations
You can switch Locations in VideoProtects to view events, data, drivers, vehicles, etc. specific to that Location.
In the lower-left corner of the site (in the blue menu), the Location you are currently viewing will be noted. Click Change Location.

Check the box next to the Location/s you would like to view. Save. (You can select one or multiple Locations.)

The You're Viewing indicator in the bottom left of the site will now display the selected Location/s.

Now, all pages throughout VideoProtects will update to display information from the selected Location/s. At any time, you can reselect locations.