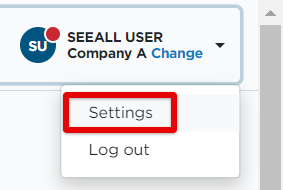
Company Information
This article explains how to add and edit basic Company Information in Encompass®, including the Company Name, Address, and DOT Number. Administrators access this information through Settings > Company Level Listing and can use the edit (pencil) icon to update details for specific Company Locations. The guide emphasizes compliance with the ELD Mandate, requiring the Company Name to match the registered Carrier Name or DBA and suggests a naming convention for multiple locations sharing the same DOT Number. Required fields are clearly marked, and the DOT Number, while not required in the system, must be entered for DOT Roadside Inspections. Once all information is completed, Administrators save the changes to ensure accurate company data in Encompass.
To start, go to Settings.

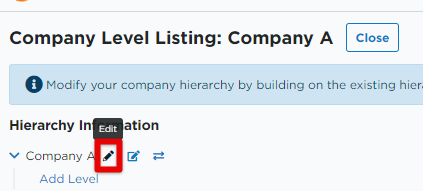
From there, click on Company Level Listing in the Company Info box.
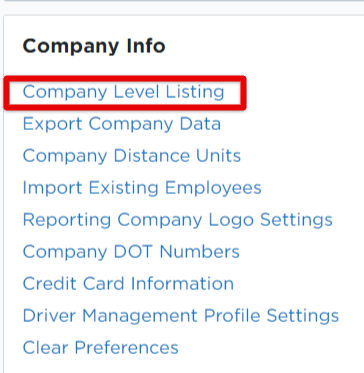
Click the Edit option (pencil icon) next to the Company Name. You can also click on the Company Name itself to open up an information page and edit from there. (If you need to edit specific levels within your company, make sure you are selecting the appropriate one to edit.)
OR 
Important Note!
The ELD Mandate requires that the Company Name match the Carrier Name the DOT Number is registered to or the DBA (Doing Business As) name that it is registered to.
A good practice to follow where there are multiple Company Locations is listed below:
DOT registered name is ABC Company.
If this company has multiple "Locations" or virtual companies that share the same DOT Number, then they should be named in the following suggested pattern:
ABC Company - Appleton
ABC Company - Green Bay
ABC Company - DenverKey Takeaway: When entering the Company Name, the registered Carrier Name is always first.
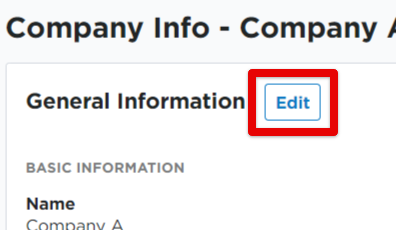
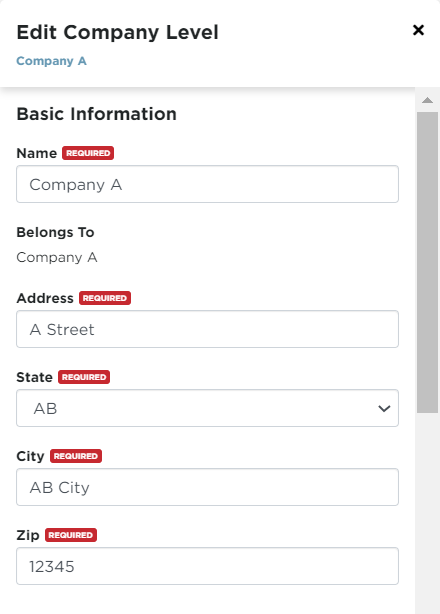
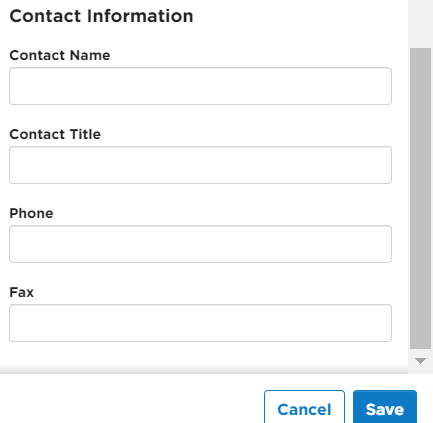
Enter in the appropriate information. Note: Fields in red are required. Additionally, the DOT Number field is not a required field, however, the DOT Number is required by the DOT in a Roadside Inspection. This is where it is entered.
Once all necessary information is entered, click Save.


