Purging Units
PLEASE READ THIS ARTICLE FIRST BEFORE STARTING THIS PROCESS.
The steps below follow through the process of purging Vehicle (Unit) records.
This process is permanent. Additionally, purging a unit record also purges all associated records (i.e., Unit Service files, Title, License, & Registration files, Permitting files, Fuel Tax files, and Unit Maintenance files). Please purge records with caution.
Support Tip: Dispose the desired units to be purged before starting this process. There is a parameter to purge disposed units ONLY. This can help ensure that only unneeded data is purged.
Steps to Purge Units
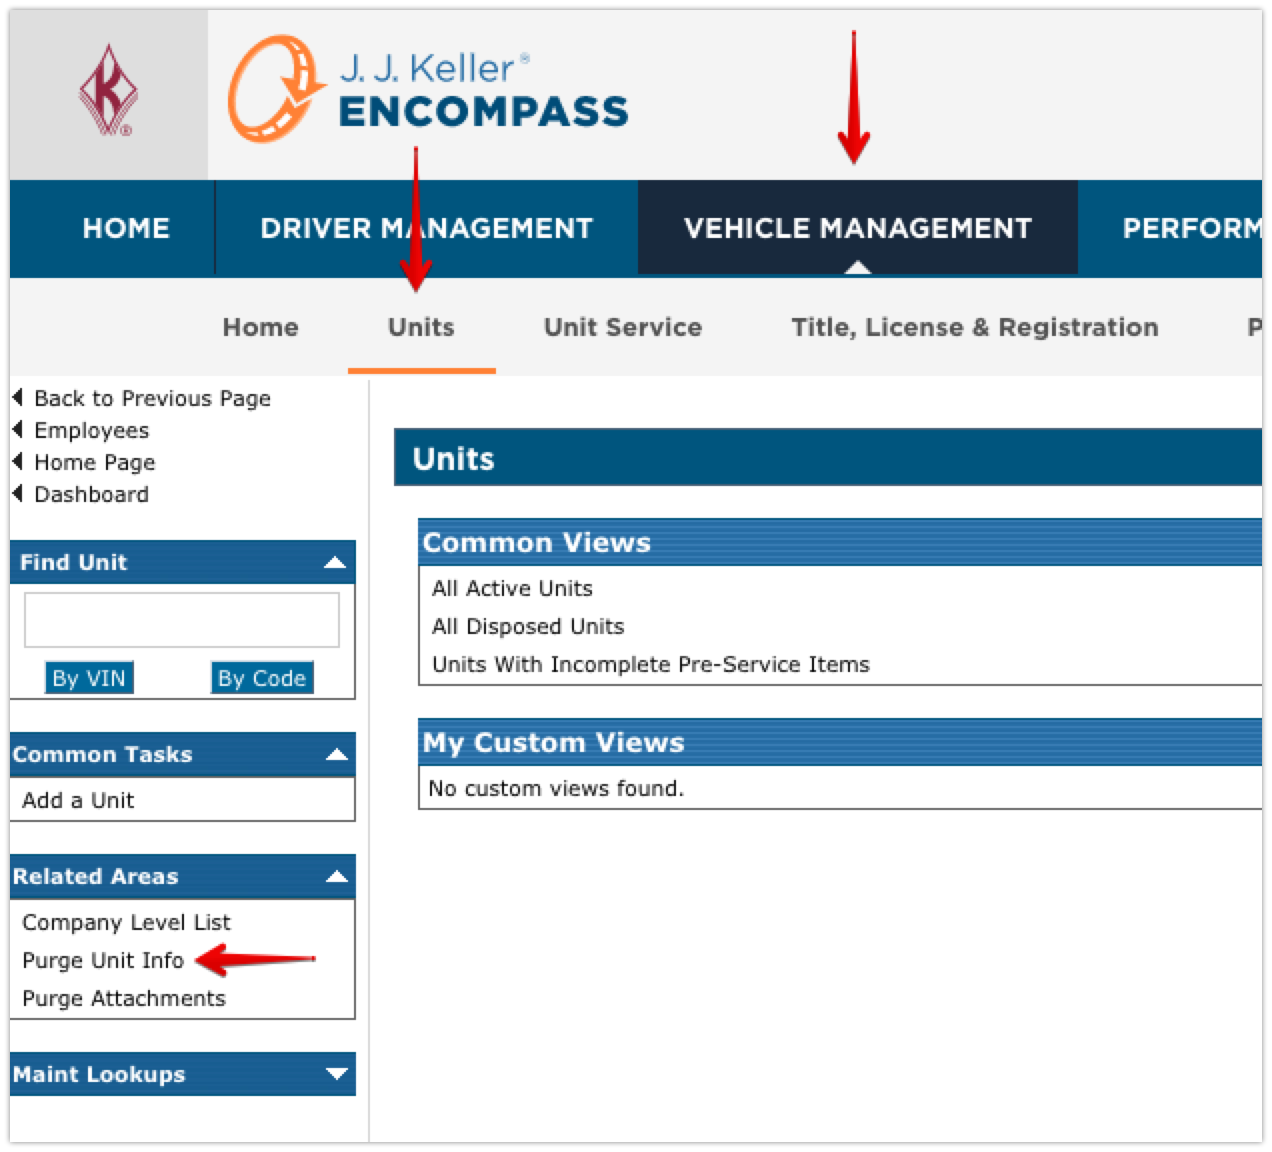
Go to Vehicle Management > Units. Click Purge Unit Info on the left side of the page.
This Parameter screen allows the user to filter records by:
Company Levels (Locations)
Unit Types
Units (Notice the checkbox for Include Disposed Units; this might not be selected by default).
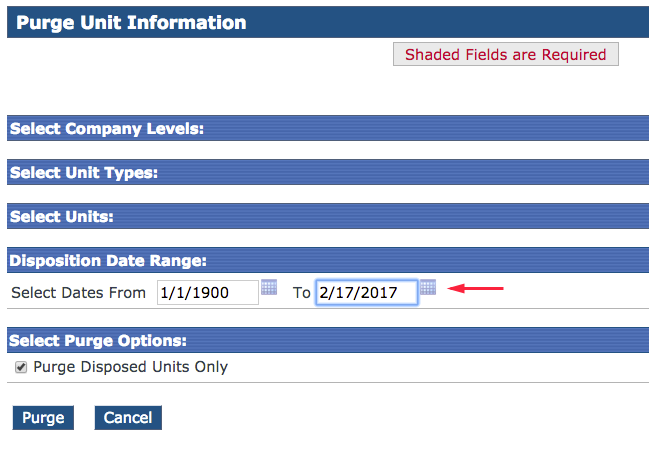
Disposition Date Range
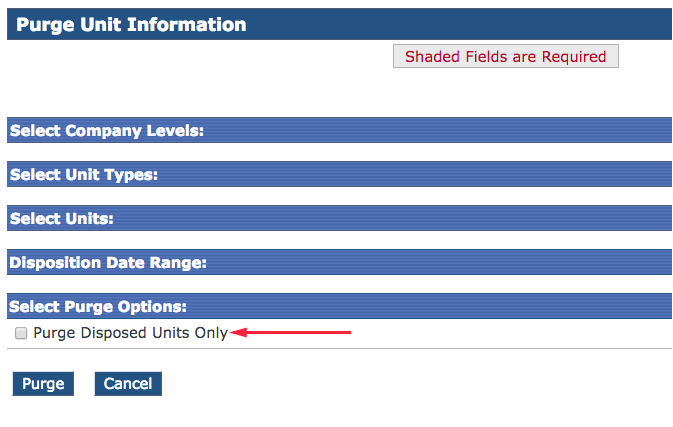
Purge Options (Notice that Purge Disposed Units Only is selected by default)
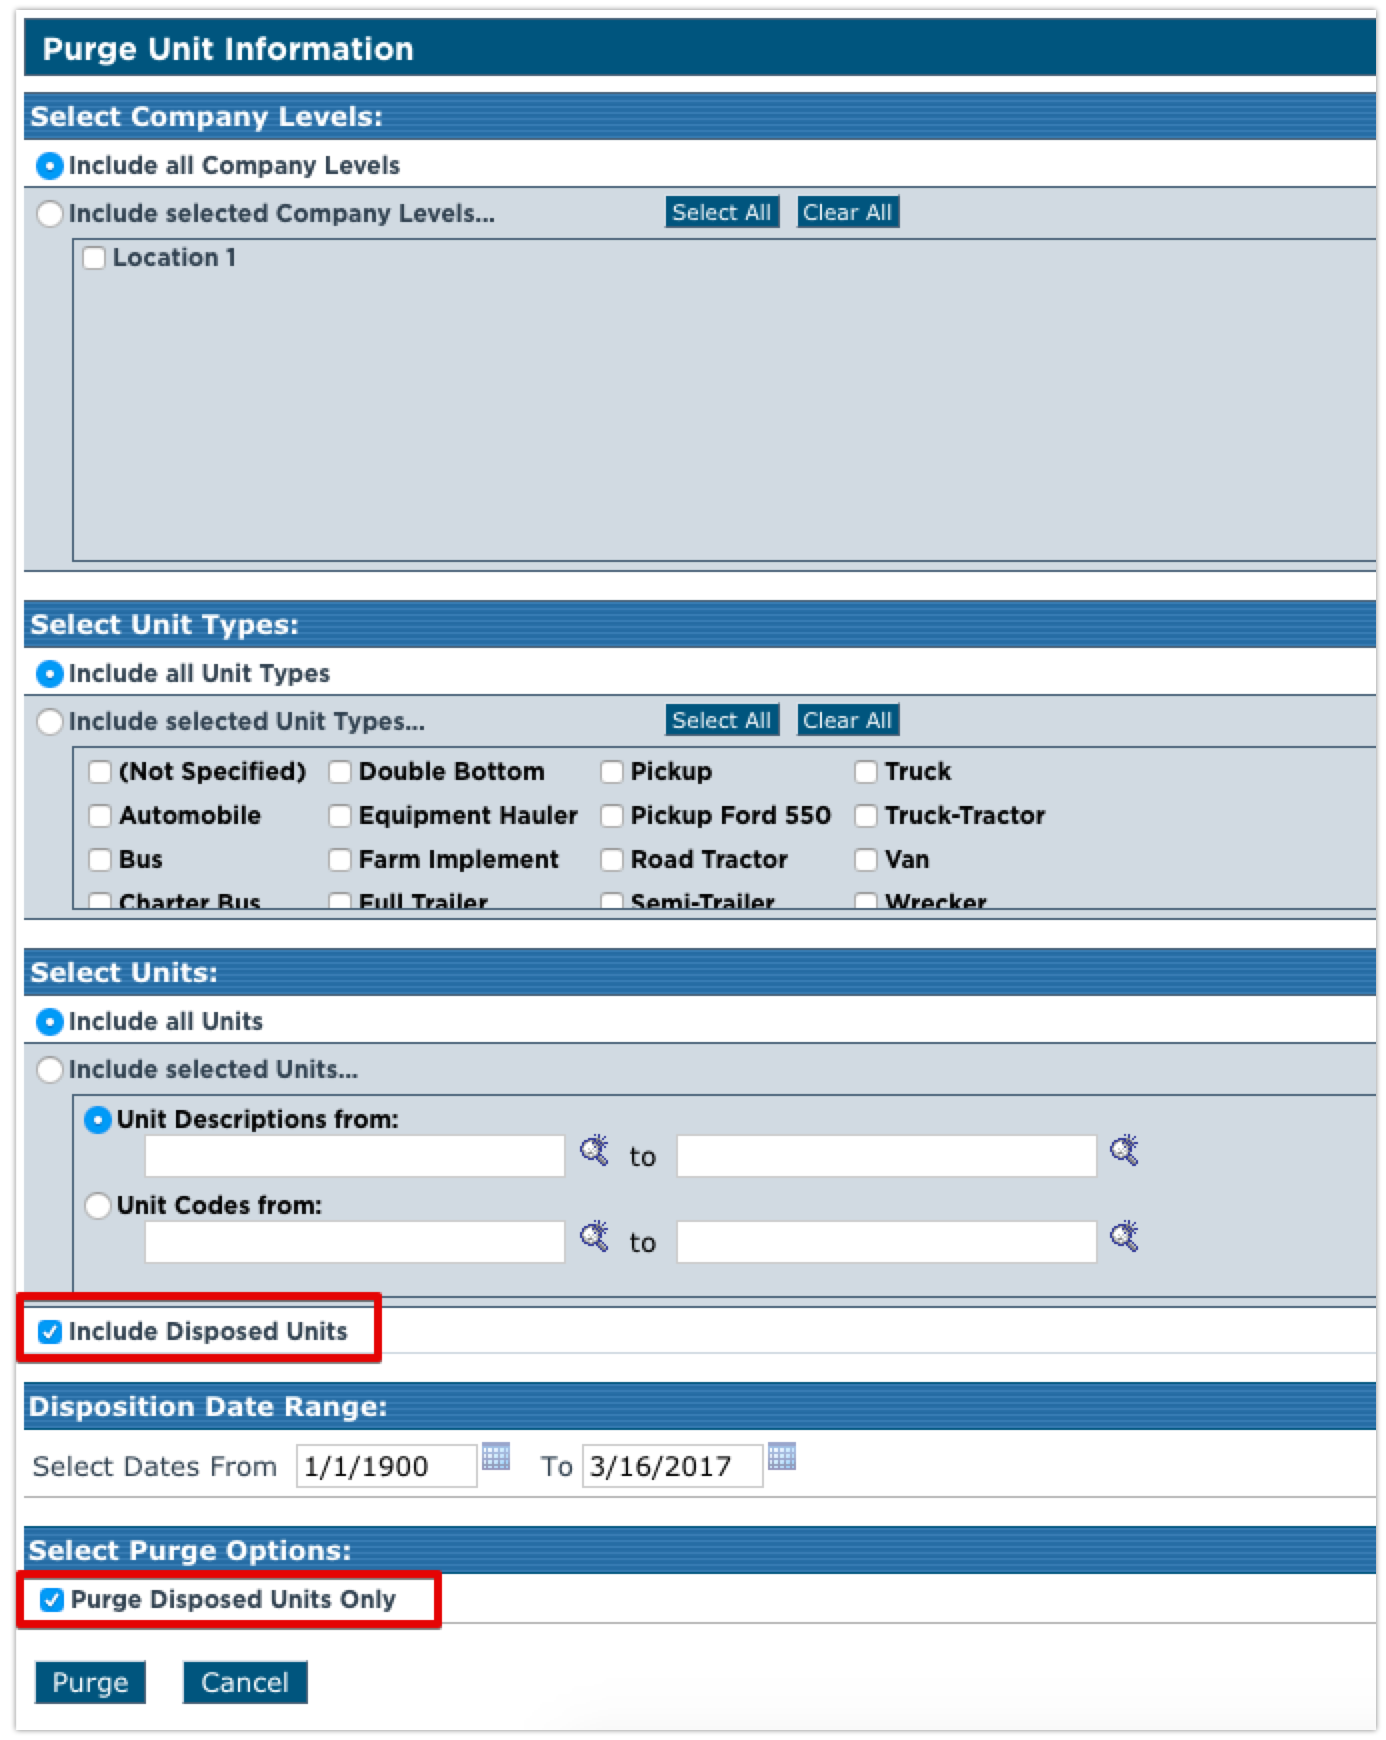
Example: User wants to purge units that were disposed over 3 years ago. The Disposition Date Range would be set to "1/1/1900" for "From" AND [Today's Date - 3 Years] for the "To" Date. If [Today] is "3/16/2020," this means the "To" date would be "3/16/2017."
The Purge Option for Purge Disposed Units Only would remain checked.
Click "Purge"
A preview list will be displayed of the units that will be purged. If there are any units in this list that have records with special retention requirements, the system may provide a warning that would look like this:
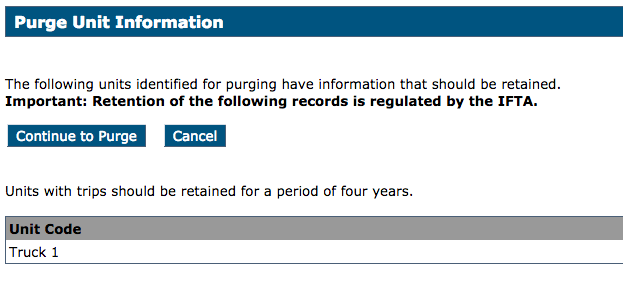
Click Continue to Purge if the units listed below the warning are appropriate to purge. If there are units in the list that should NOT be purged, click Cancel and either edit the unit file(s) to not be included in the parameters specified, or, revise the purge parameters.
Before answering Yes to "Are you sure you want to purge the information for the following units", review the list below to ensure the list of units that are going to be purged is correct. If there are units in the list that should not be purged, click No and adjust the purge parameters.
Note: Clicking Yes here starts the purge process so be sure everything is correct before proceeding.

After clicking Yes, the purge will begin. A message will generate that states "The purge has been started". This process can take several hours to complete.

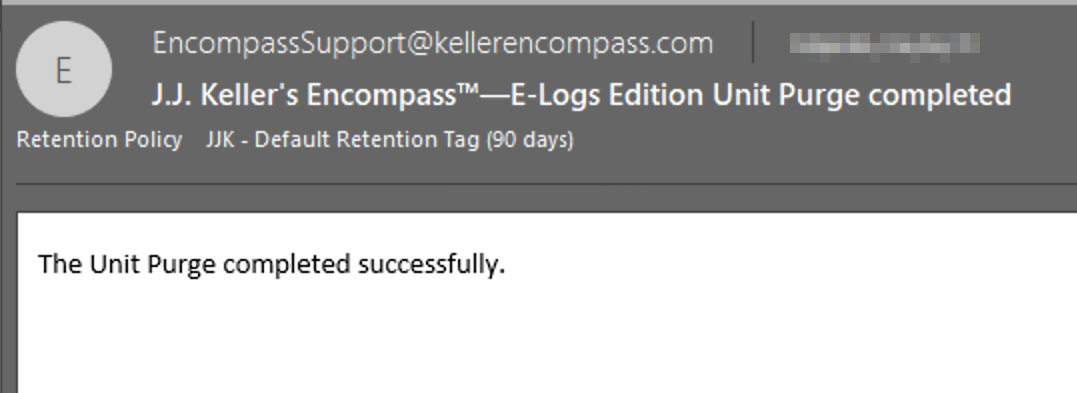
When the purge completes, a confirmation from EncompassSupport@kellerencompass.com will be sent to the email specified.
What if the List is Wrong?
If the preview list of units to purge is incorrect, return to the parameters screen to find the filtering error. Do not continue with the purge if there are units on the list that should not be purged.
Items to look at on the parameters screen:
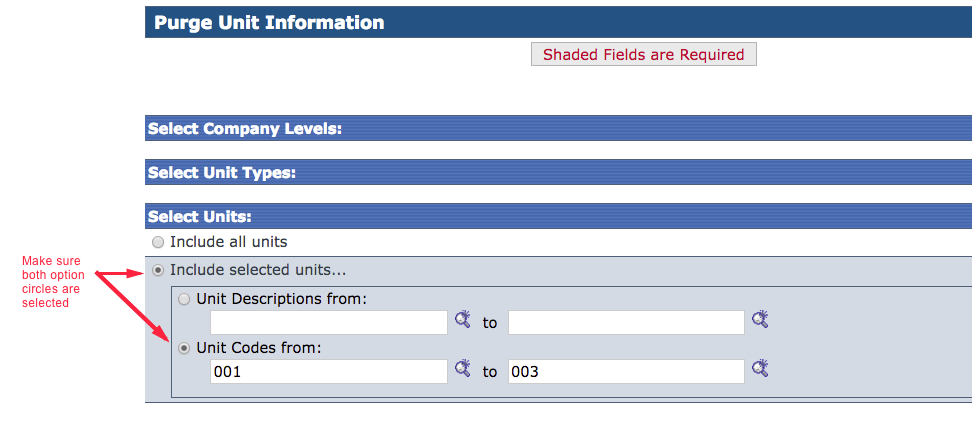
Check that the option boxes are selected correctly. If one is missed, the system will also miss it.
There's an outer option box AND an inner option box.
Check BOTH.
Is the Purge Disposed Units Only box checked? If it is unchecked, all active and disposed units will be included.
Is the date range correct? For instance: Is the date filter for disposed units set to 1/1/1900 to "Today's Date"? This would mean all recently disposed units would also be included. The "To" date may need to be adjusted.