Exporting Data
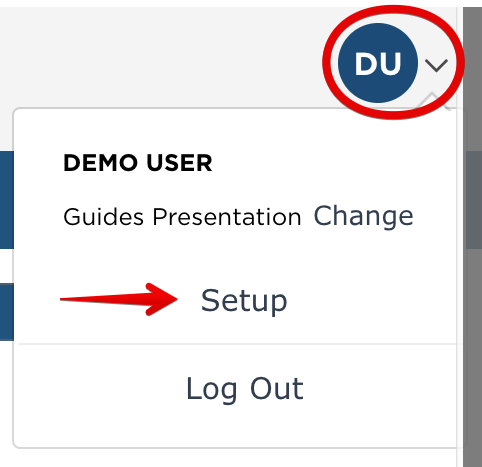
Raw data can be exported out of Encompass by Administrators. This is done by going to Setup in the drop-down menu in the upper right hand corner.
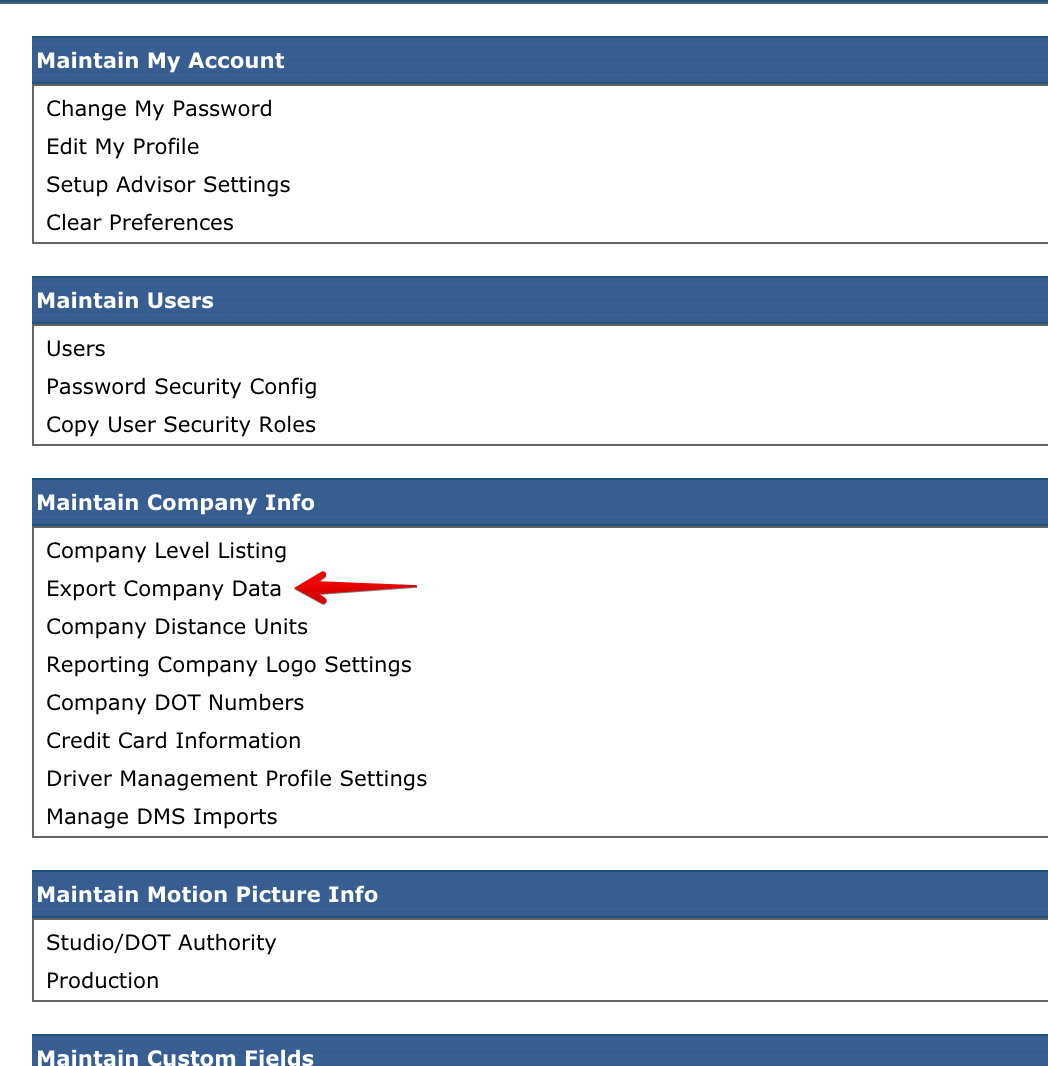
Within the Maintain Company Info box, click Export Company Data.
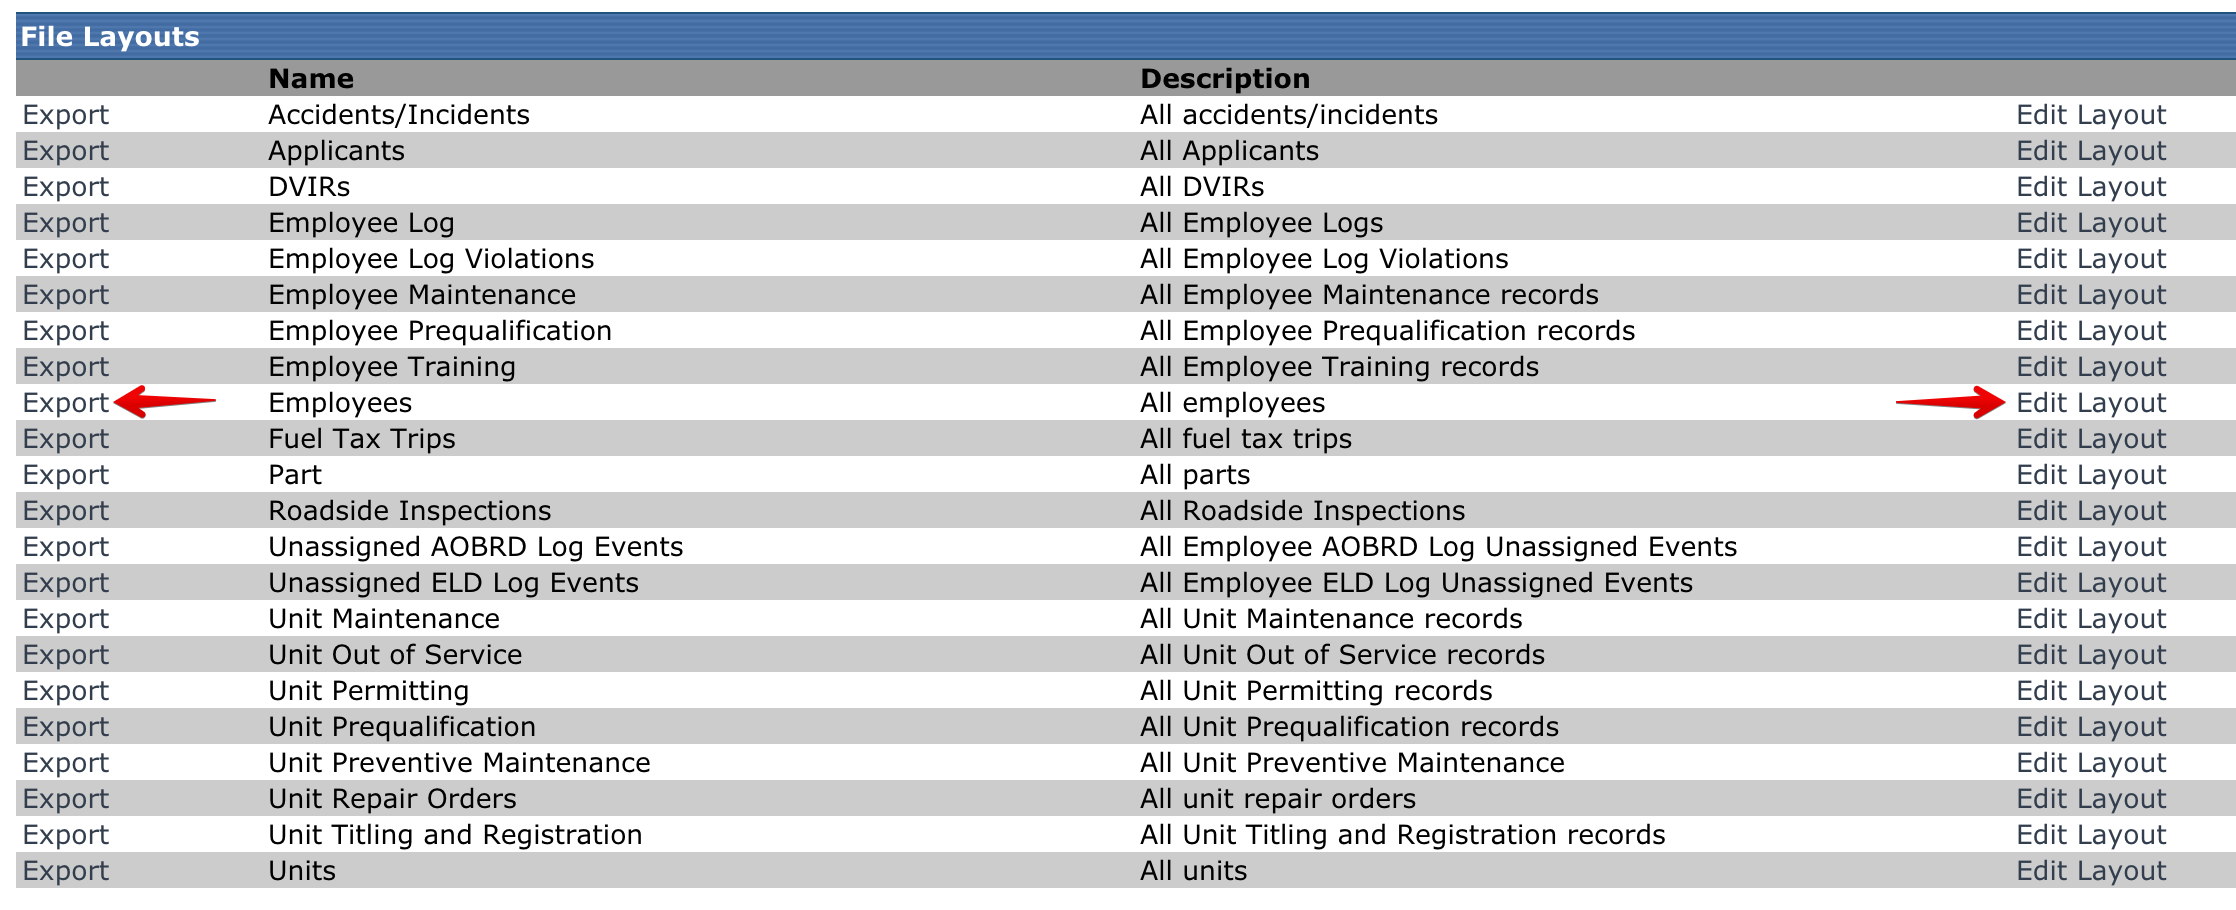
If all of the data for a particular area is needed, click Export to the left of the export type. Otherwise, if there are only particular pieces of data that are needed, click Edit Layout to select the columns that are needed.
Note: Since the export can be a Microsoft Excel spreadsheet, all of the data could be exported and the tools within Microsoft Excel could be used to filter data as necessary. The Edit Layout is only for selecting the needed columns.
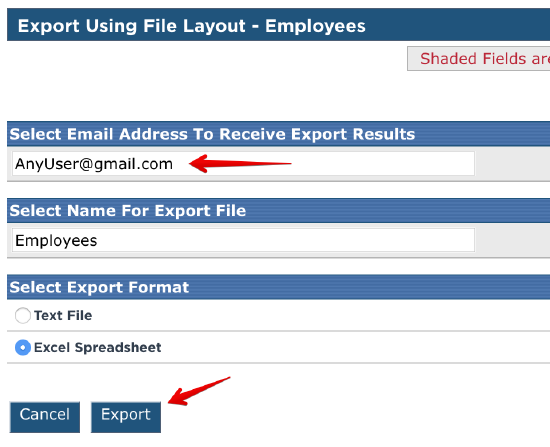
By default, the email address listed will be the user completing the export. This email can be changed to whatever they would like, however. Additionally, the user can change the name of the file to make it easier to identify in the recipients inbox. Finally, select the file format to be used. Then, click Export.
A success message will then be displayed indicating that the export file will be emailed to the recipient.

The export file will be sent from EncompassSupport@kellerencompass.com to the recipient (if the file is not received, review any spam, junk, or clutter folders to make sure it wasn't filtered into another folder).
Edit Layout
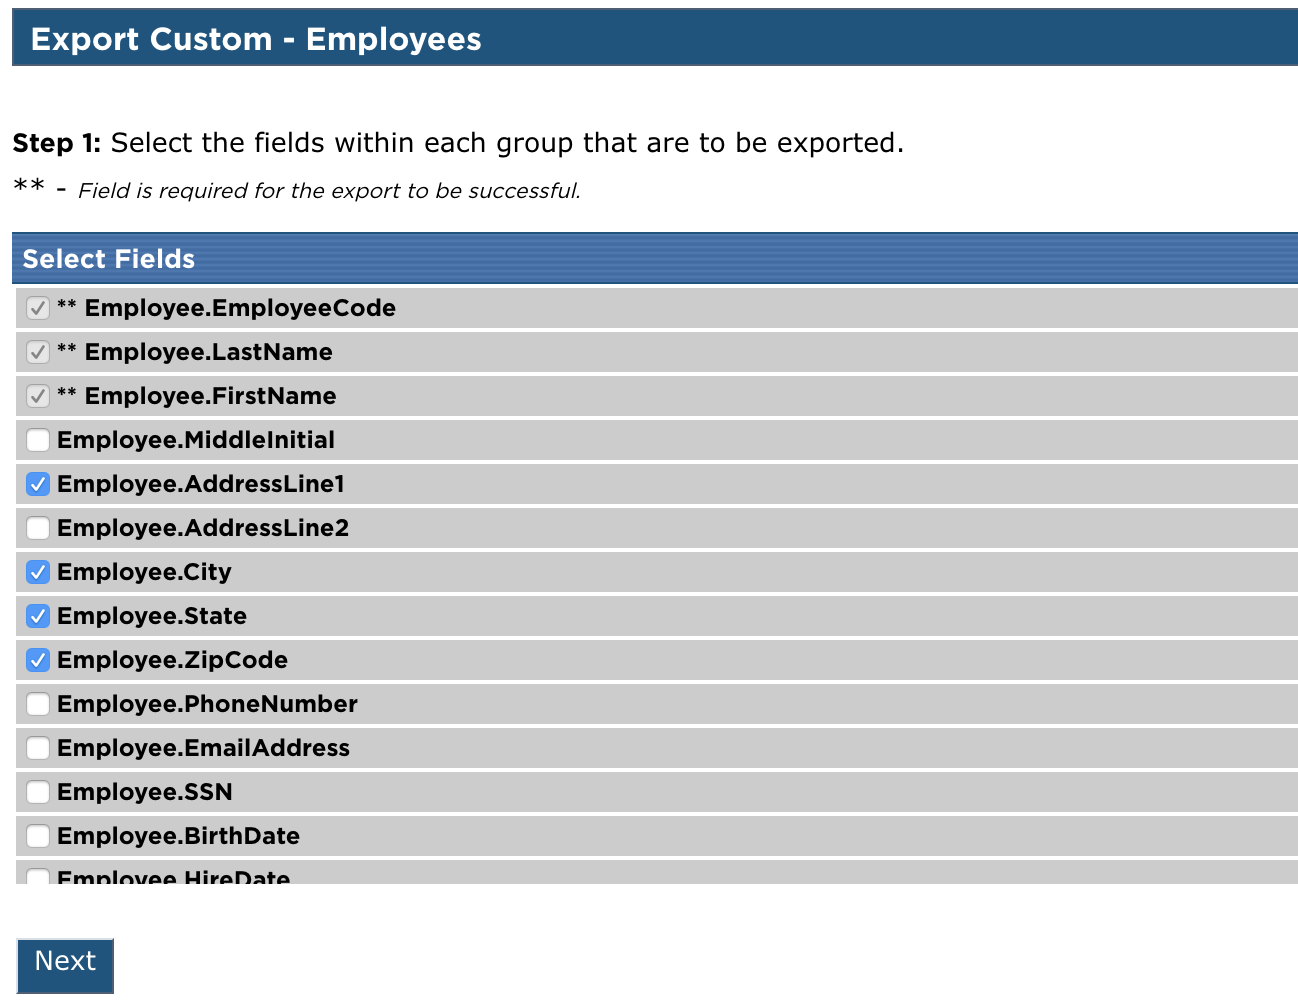
If Edit Layout is selected, the user will be taken through a couple steps.
First, they'll be prompted to select which columns should be included in the export. Once the needed data columns are selected, click Next at the bottom.
Note: The first three fields are selected by default and cannot be de-selected. These fields are required.
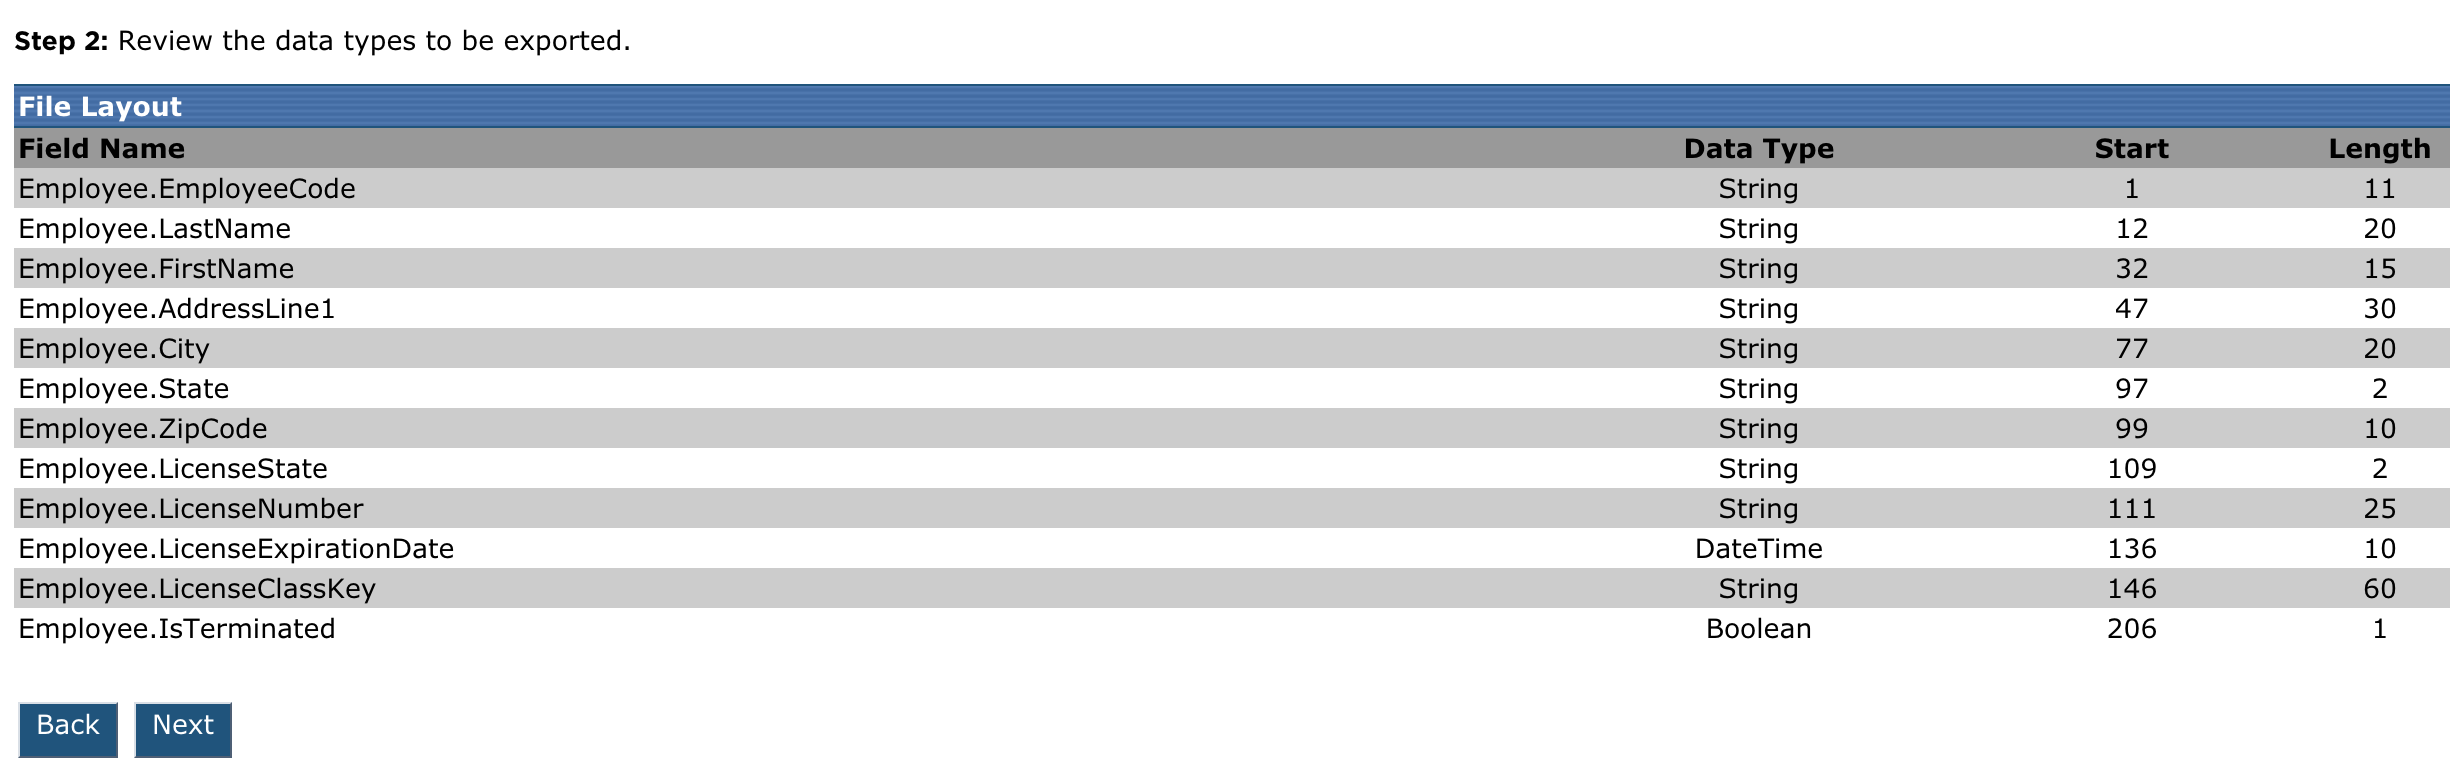
The following page will confirm the data columns that were selected and are set for export. This page also displays the data type, start, and length of each field (this is helpful if the export is going to be a text file and the user needs to use this data for some sort of other import schema). Click Next.
The next screen will allow the user to save this file layout so it can be exported again without having to go through these steps again. The name of the layout will remain Employees as this is still an employee export, however, the description can be changed to indicate which employee data this export pulls. If this layout should be made available to other users and company levels, select Yes. Click Save File Layout to go back to File Layouts screen. Click Save and Export to be taken to the Export Using File Layout page as shown before.
