Import Employees
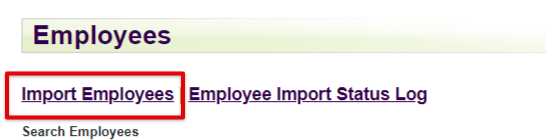
Click Employees in the top navigation bar.

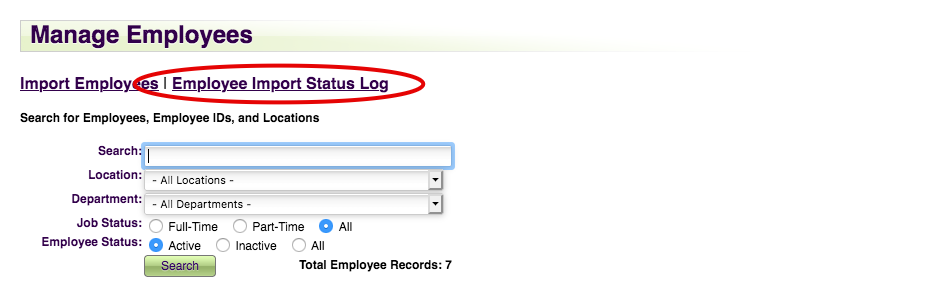
Select Import Employees.
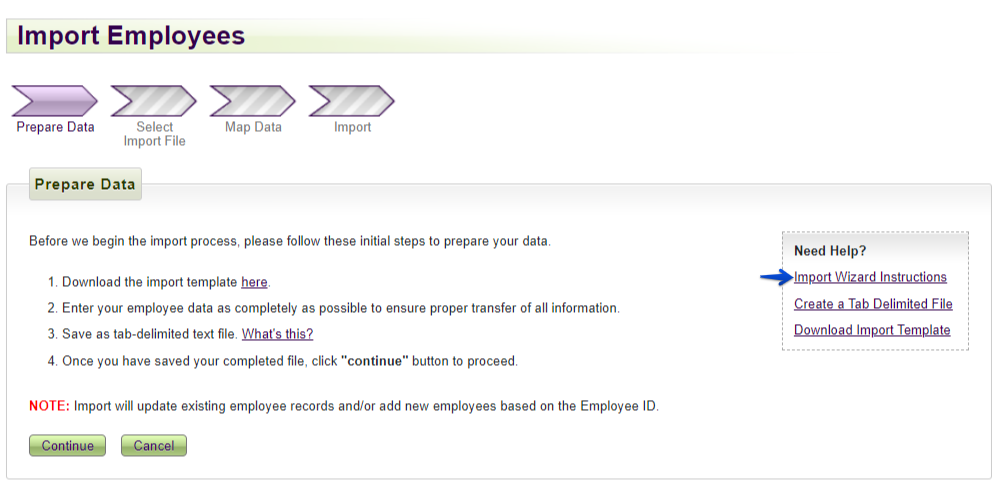
Follow the step-by-step instructions provided on the screen.
- Download the import template
- Enter your employee data in the template as completely as possible to ensure proper transfer of all information.
- The Instructions tab of the template offers valuable information on how to fill out the import.
- Save the completed template file as a tab-delimited text (TXT) file to your device.
- Once you have saved the completed file, click Continue.
Tip: Use the on-screen Import Wizard Instructions for further assistance on how to import.
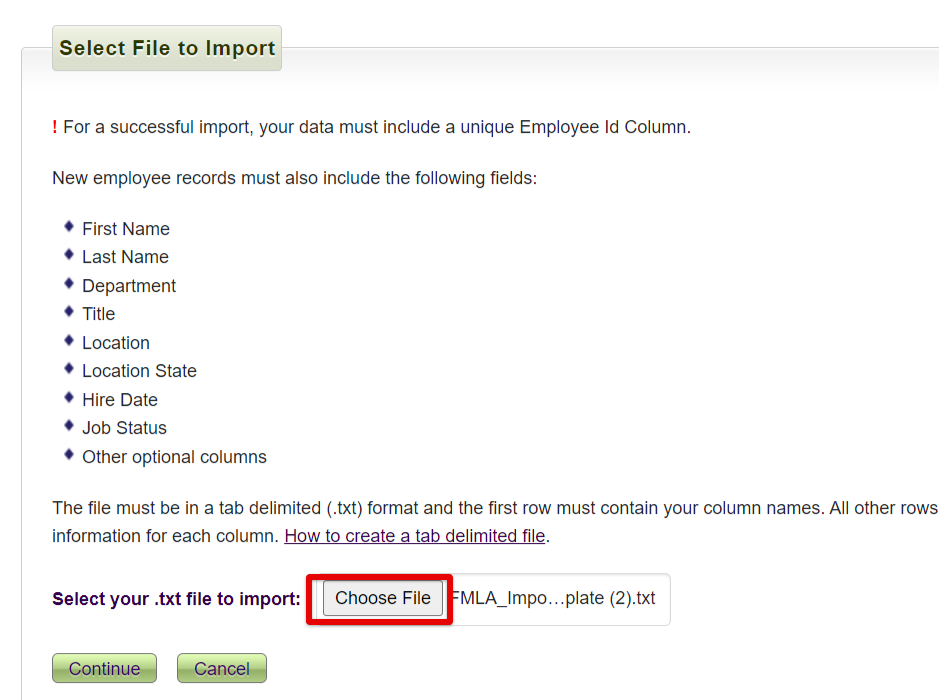
Upload the .txt file from your device. Then, click Continue.
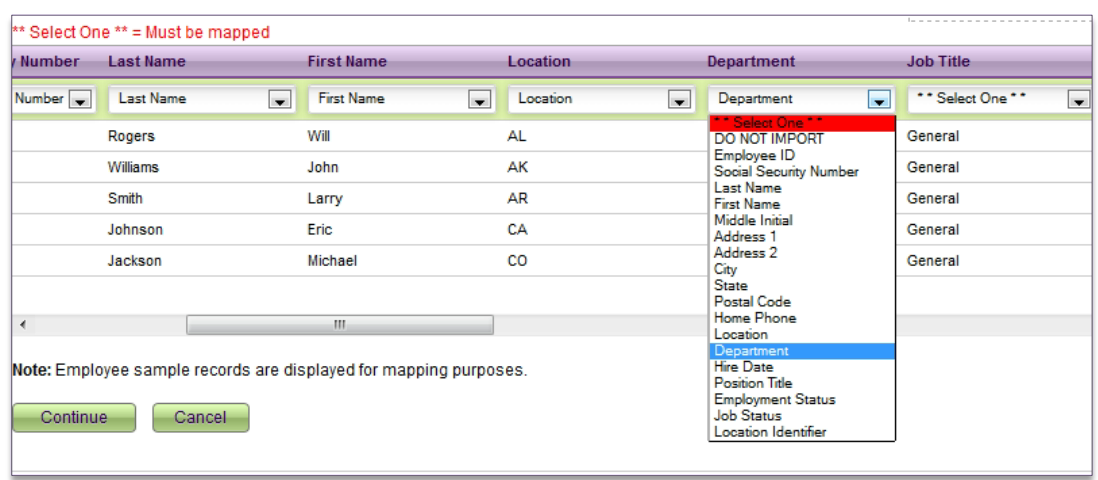
Next, you'll want to map your column headers. Although the import process allows you to import your own field headings, they need to be associated with corresponding FMLA Manager headings. Using the provided dropdowns, select the FMLA Manager heading that best matches the data in that column (per the data view area of the spreadsheet). To skip a heading, select “DO NOT IMPORT” from the dropdown. Click Continue when finished.
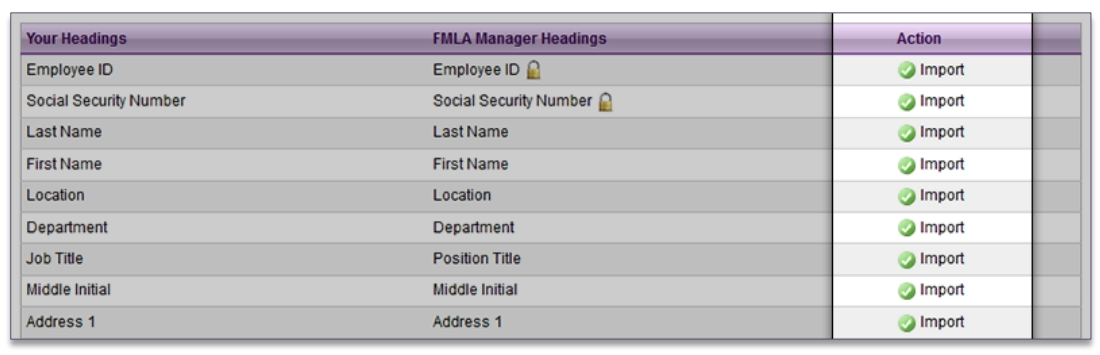
Confirm the FMLA Manager field headings you selected are correct. To make changes, click the “Back” link button in the upper left corner. Click Continue to go to the next step.
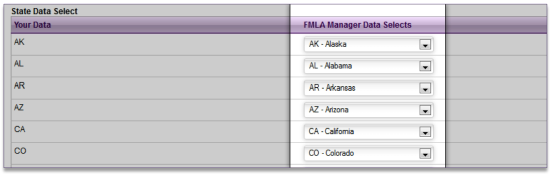
Next, you must map fields to FMLA Manager Data Selects. To streamline reporting within FMLA Manager, some fields have standardized selections. Your data will need to be mapped, or associated, with a corresponding selection using the provided dropdowns. Select "DO NOT IMPORT" to skip the field. Click continue when done.
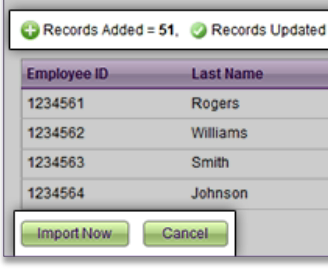
When the Heading and Field mappings have been selected and confirmed, FMLA Manager will display the import status of each employee for your review: Added, Updated, or Skipped. If all conditions meet your expectations, click “IMPORT NOW”. *If you realize changes in your data are needed, you may: 1) Cancel the import and revise the original spreadsheet or 2) Complete the import process and manually make changes to Manage Employees when the import process is complete.
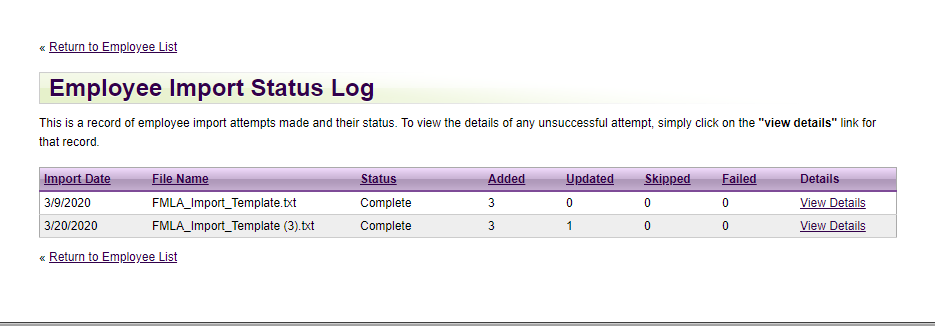
Now, your import will begin processing. Process time depends on the number of records being imported. An email from FMLA Manager will be sent stating that the import process is complete. Once an import has been submitted, back on the Employees screen is an option for Employee Import Status Log. Previous imports and import attempts can be viewed here.
If there were any unsuccessful attempts, select View Details to the right of the import to see why it failed and reattempt the import.