Camera Tracking in Encompass
This article explains how to enable and manage GPS Tracking for Cameras in Encompass, allowing users to view camera locations and movement on the live map. Camera Tracking is enabled by default, but users can toggle it on or off by navigating to Video > Configuration > Device Associations and editing the unit pairing. Only 1 tracking device (Camera or Vehicle Tracker) can be paired per Unit, so conflicts may require disabling one before enabling the other. With the correct user roles and permissions, Cameras will display on the map, with icon colors indicating motion or status, and users can also view Tracking History by selecting a date/time range and intervals. This feature provides visibility into Camera activity without requiring any extra work from drivers.
NOTE: Camera Tracking is automatically turned on by default, and if you plan to use Vehicle Tracking, please follow the steps below to turn off the camera tracking. Only 1 tracking type of device can be used for Vehicle Tracking.
Turn On/Off Camera Tracking
Go to Video > Configuration > Device Associations.
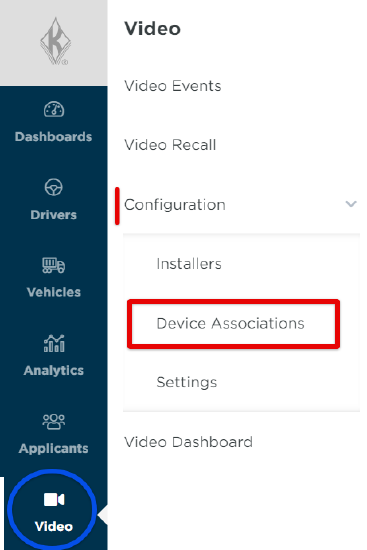
Locate the unit with the camera that you would like to turn tracking on/off for. Then, click the ellipsis menu > Edit Pairing.

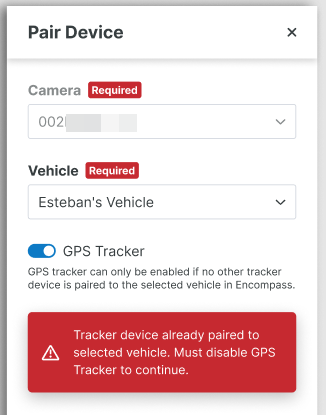
Next, switch the toggle to turn on/off GPS Tracker. Remember to Save when finished.


There is no extra work on the drivers' end that needs to occur to successfully implement camera tracking.
NOTE: Only one tracking device can be assigned to an Encompass unit at a time. Therefore when adding/editing a vehicle/camera pairing, you may encounter an error indicating that a tracker device is already paired to the selected vehicle. To proceed with saving the pairing, disable the GPS Tracker toggle. To proceed with camera tracking for this vehicle, the non-camera tracker will need to be removed from the vehicle in Encompass first (see Encompass Guidance for Vehicle Tracking).
View Camera Trackers on the Map
Now, the camera will be visible on the live map, including its directional movement. The camera tracking feature will ping the camera location every 5 minutes.

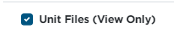
NOTE: Users will not be able to see the cameras on the live map without the following permissions/user roles: Encompass ELD (View Mapping), Unit Files (View Only), and Vehicle Tracking (View Mapping).


You may need to enable Display Camera Tracking in the Map Legend in order for the camera/s to display on the live map. (If Display Camera Tracking is crossed out/has a line through it, this means the cameras will not appear on the map. Click to enable the cameras on the map.)

The color of the camera icon on the map indicates the camera's current tracking status:

For example, the images below display a camera that has no data/the vehicle has not moved within the past 2 hours (red camera), as well as a camera that has no current data/the vehicle is stopped (gray). The green cameras indicate that there is current data/vehicle is in motion.


Click on the camera icon to reveal more details.
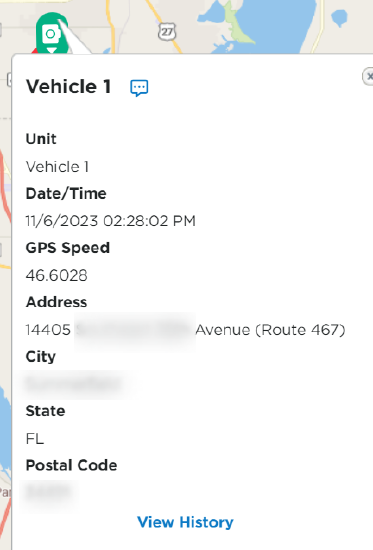
*It is possible that you will see a camera and ELD in the same vehicle appear in slightly different spots. The difference is assumed to be from different GPS technology and different rates of pings.
View History
View History allows you to view the 'travel' history of the camera. You can set a specific date/time frame and interval to view specific locations of the camera. Click the View History button on the card when you click on the camera.

A screen will open displaying the following information:
- The camera and "as of x minutes ago" information. This is the last time history has been pulled for this camera.
- The current location of the camera
- Use the date and time selectors to change the date and/or time you would like to view history for this camera.
- You can change the Time Between Points to view more or less location points. (ie. "15 seconds" would show the camera tracker's location and GPS speed history for every 15 seconds between the selected date and time frame.
- If you change any of the dates, times, or time between points, you will want to click the Refresh button to apply the new parameters.
- A list of historical Time/Street/City/State/GPS Speed is displayed based on your selected "Time Between Points".
- The history is also displayed as points on the map.
- You can zoom in to the specific points by using the +/- buttons on the right of the map.
