DQ Prequalification Checklist
This article explains how to use the Prequalification Checklist in Encompass to collect, complete, and record DOT and company-specific information when hiring a new employee. Users can update the Checklist either by editing the full list at once or individual items, entering required dates, statuses, and optional notes. Attachments can also be added to individual items, with guidance on proper file naming and size limits. Ad-hoc Checklist Items can be created for individual employees when certain items do not apply to their Job Class. Proper completion of this Checklist ensures that employee records are thorough and compliant, though it does not directly affect Driver Qualification status.
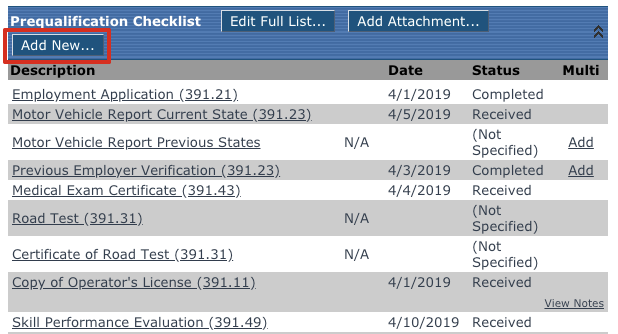
The Prequalification Checklist is designed to help in obtaining, completing, and recording DOT and company-specific information when an employee is first hired.
There are two options available when editing this information:
- Edit the entire list at once, which will not allow for specific notes to be entered.
- Edit an item individually, which will allow for specific notes to be entered.
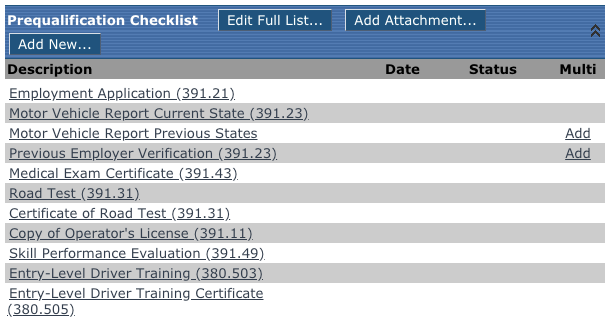
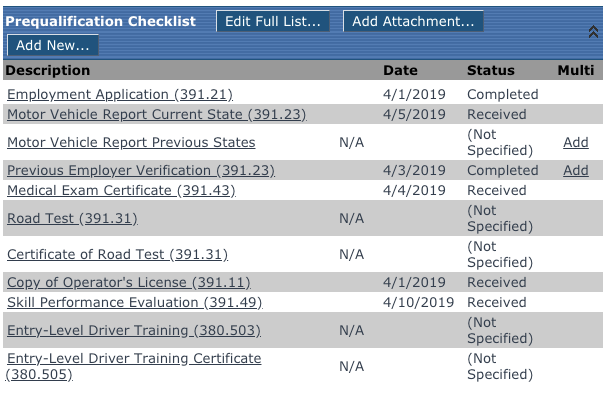
This area is located directly beneath the Driver Equipment sections. The items shown here are some typical items collected during the hiring process. Since this is configurable, system administrators can choose other items to be included in this list.
Edit Full Checklist
To update the entire list, or multiple items at once, click the Edit Full List... button at the top.

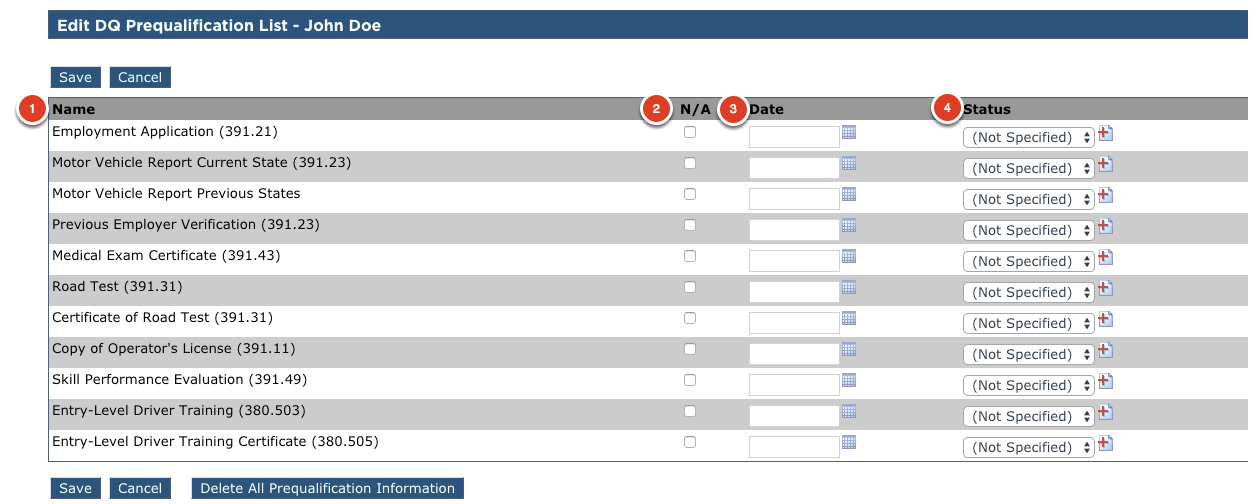
The Edit Prequalifiction List screen will be shown. Fill in the items per the following:
- Checklist Item - The item itself is not editable; this is simply the name of the item.
- N/A - Check N/A if the item is not applicable to the employee. If checked, the system will no longer see the item as applicable and will ignore it. Note: There may be items that have this box shaded out. This means that the administrator has made this item required.
- Date - Enter the date (mm/dd/yyyy or mm-dd-yyyy format) of process or completion. Either type in the date or use the calendar option next to the field. (The date cannot be a future date. It should be the date obtained/completed, not the expiration date.)
- Status - After the date is entered, the status may default to a value for the user. This would be a default value setup by the administrator. If the item remains as Not Specified, use the drop-down to select a value -- i.e., Completed, Received, or Issued.
Note: Prequalification checklists need both a status and date to be considered complete and satisfy the "Incomplete" alert. (Reminder: The date cannot be a future date. It should be the date obtained/completed, not the expiration date.) The Prequalification list does not impact whether a driver is considered qualified in Encompass; only the DQ Maintenance checklist impacts qualification.
Here's what the list may look like filled out:
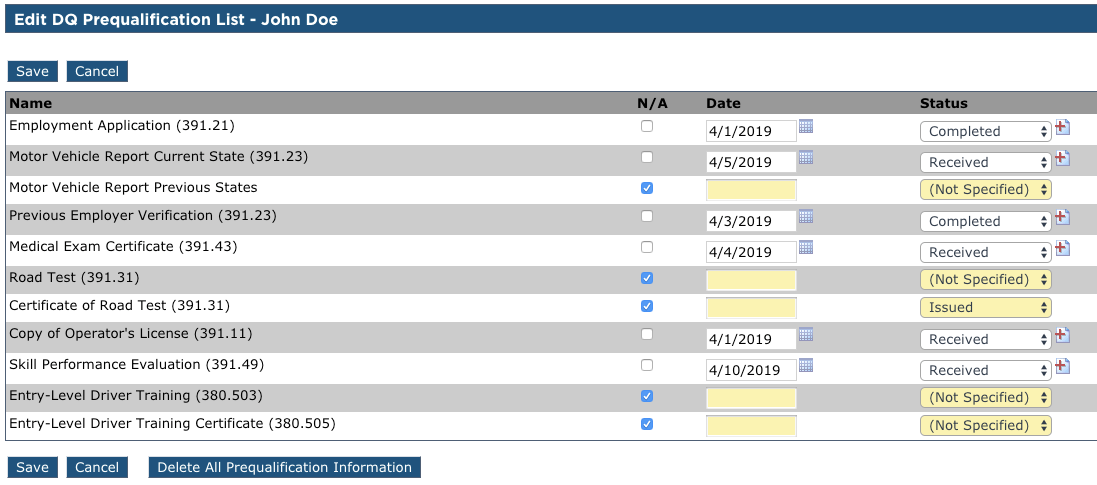
Once all necessary information is entered, click Save.

The checklist on the Driver Qualification File page should then look something like this:
About the Delete All Prequalification Information button.
This button will delete all data and attachments even though it is not explicitly stated.
Edit Individual Checklist Items
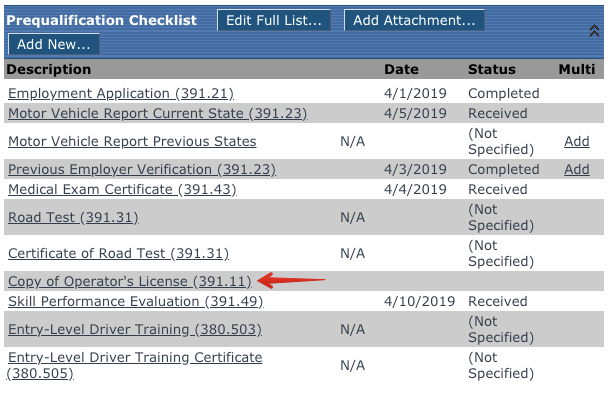
While viewing the Prequalification Checklist, click the name of the checklist item that needs to be updated. For this example, click on Copy of Operator's License.
The Edit Prequalification screen is then shown.
- N/A - Check N/A if the item is not applicable to the employee. If checked, the system will no longer see the item as applicable and will ignore it. Note: There may be items that have this box shaded out. This means that the administrator has made this item required.
- Date - Enter the date (mm/dd/yyyy or mm-dd-yyyy format) of process or completion. Either type in the date or use the calendar option next to the field.
- Status - After the date is entered, the status may default to a value for the user. This would be a default value setup by the administrator. If the item remains as Not Specified, use the drop-down to select a value -- i.e., Completed, Received, or Issued.
- Notes - While this text box is rather large, only the first line of the note will appear on reports, so it is suggested to make any notes as brief as possible.
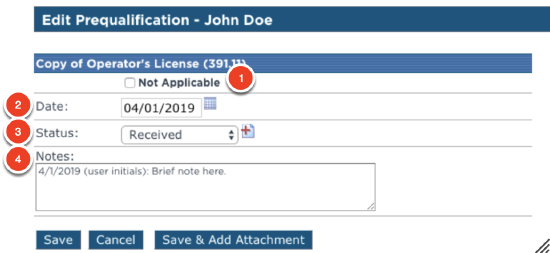
Click Save or Save & Add Attachment when completed.
Adding an Attachment
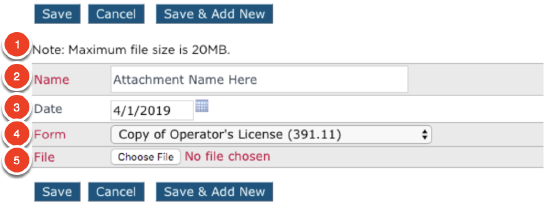
If Save & Add Attachment, the attachment dialogue box will be shown.
- Note: Maximum file size... - This is a warning indicating that the system will not take any attachment larger than 20MB.
- Name - Enter a name for the attachment. This could be the file name or a short description.
- Date - (mm/dd/yyyy or mm-dd-yyyy format or use the calendar icon) Enter the date for the attachment. Some users use the date the document processed and others will use the date the file was uploaded to the system. This is up to personal preference. Tip: If using the date processed, purging attachments later may be easier especially if the date processed is significantly different from the date the document gets attached. But if the user is attempting to track the cycle time between when a document is completed versus when it gets uploaded to Encompass, the date of the upload would want to be used.
- Form - The form is already selected for the user based on the way the screen was entered. This can be left alone. In short, this is the checklist item in question.
- File - Select Choose File to browse to the location of the attachment on the users machine. Note: It's best practice that the file name have no commas (,) as it may result in some viewing issues with particular browsers down the road.
Once the this is properly filled out, click Save.
Adding Ad Hoc CheckList Items
There may be situations where a checklist item might not apply to an entire group of employees, but instead, they apply to an individual. The Add New.. option is available at the top of the checklist.
To add a single checklist item for an individual employee, click Add New... at the top of the list.
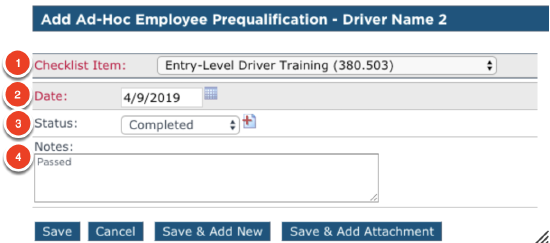
The user will then be taken to the Add Ad-Hoc Employee Prequalification screen.
- Checklist Item Drop Down - This drop-down menu will contain any existing checklist items that have NOT been assigned to this driver's job class yet.
- Date - (Format as mm/dd/yyyy or mm-dd-yyyy or use the calendar tool) The date the item was processed or completed.
- Status - This will auto-fill if the system administrator has set this up. Otherwise, use a drop-down to select a value.
- Notes - While this text box is rather large, only the first line of the note will appear on reports, so it is suggested to make any notes as brief as possible.
Click Save, Save & Add New to go to another blank ad-hoc page, or Save & Add Attachment to add an attachment to this ad-hoc item. See Adding an Attachment for additional details.