VideoProtects API Setup/Configuration
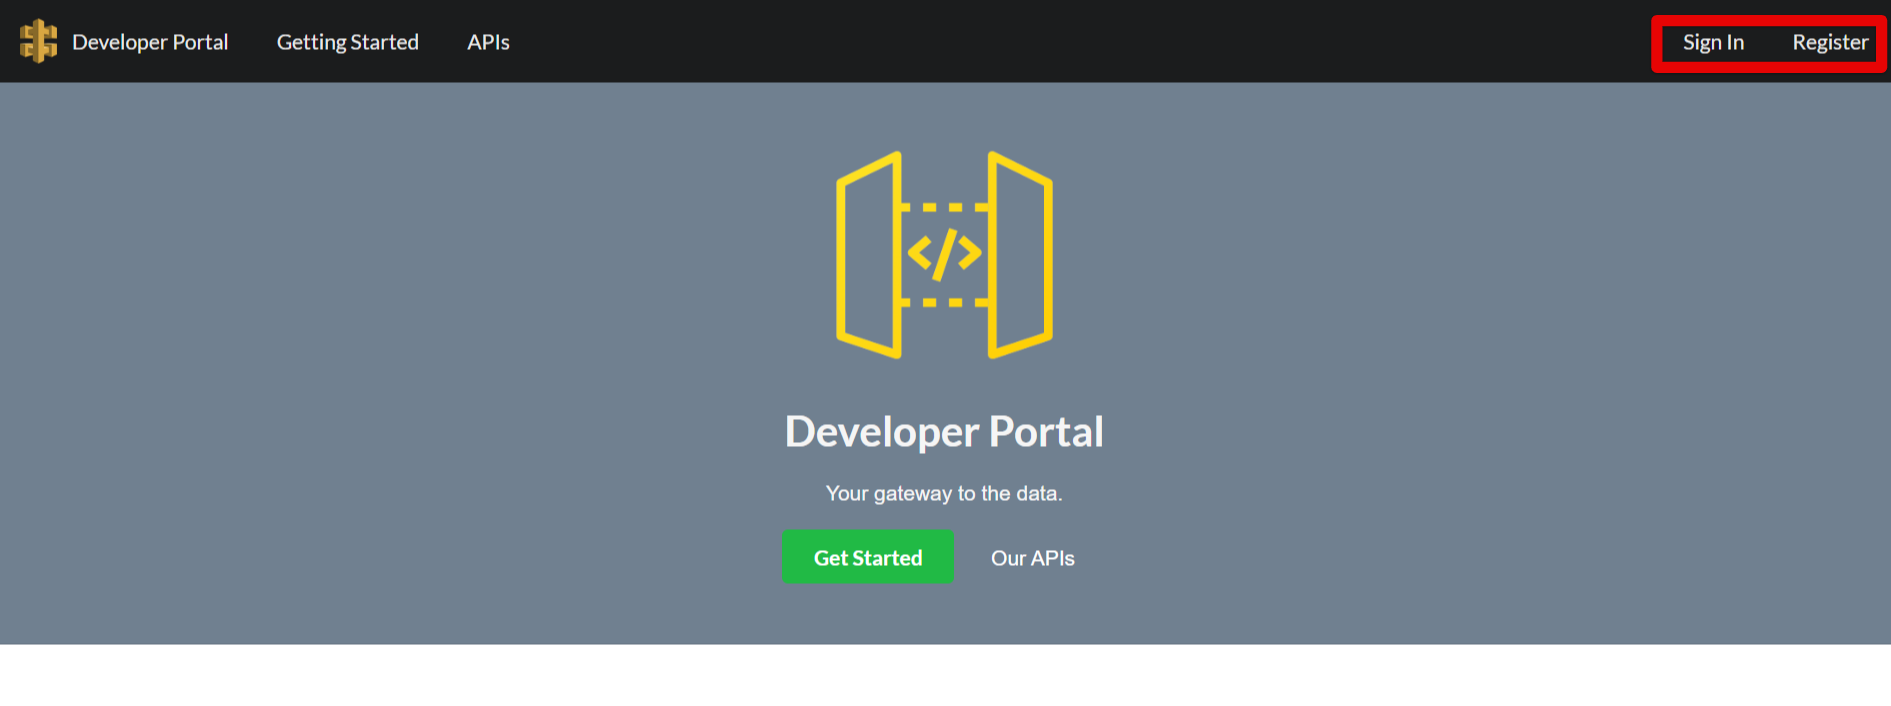
The instructions below will guide you in connecting to and configuring APIs related to VideoProtects. Visit the library/API Portal to get started: https://d1sjlar3k3voqv.cloudfront.net/
Sign In/Register
In order to see, interact, and begin to configure individual API’s, an account must be created in the API Portal: https://d1sjlar3k3voqv.cloudfront.net/. Sign In or Register for an account at the top of the page.
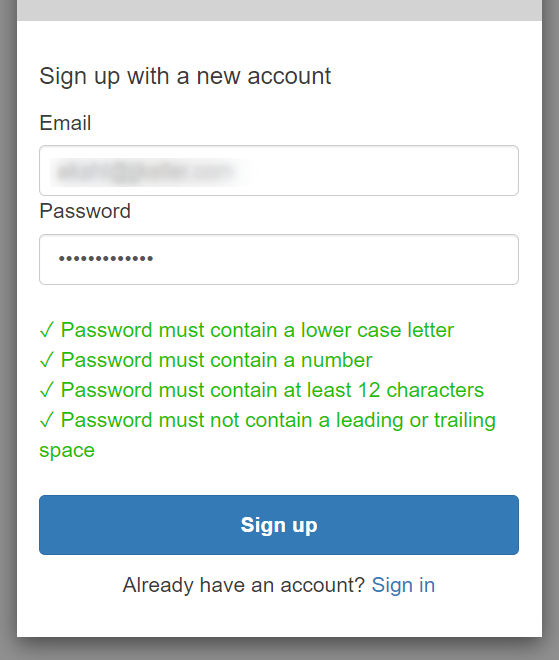
Enter your email and choose a password that meets the requirements.
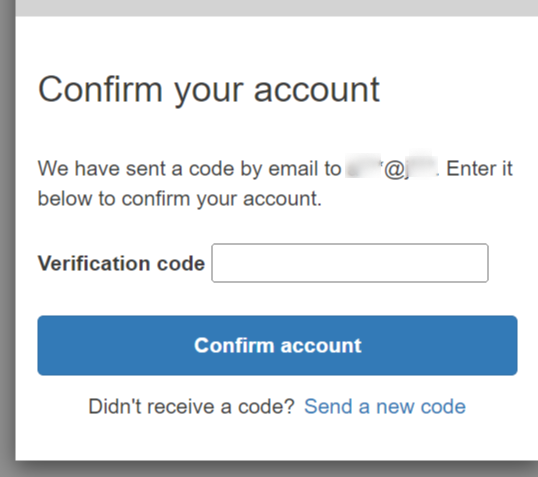
You will receive a verification code in your email. Enter the code in the portal and click Confirm Account.
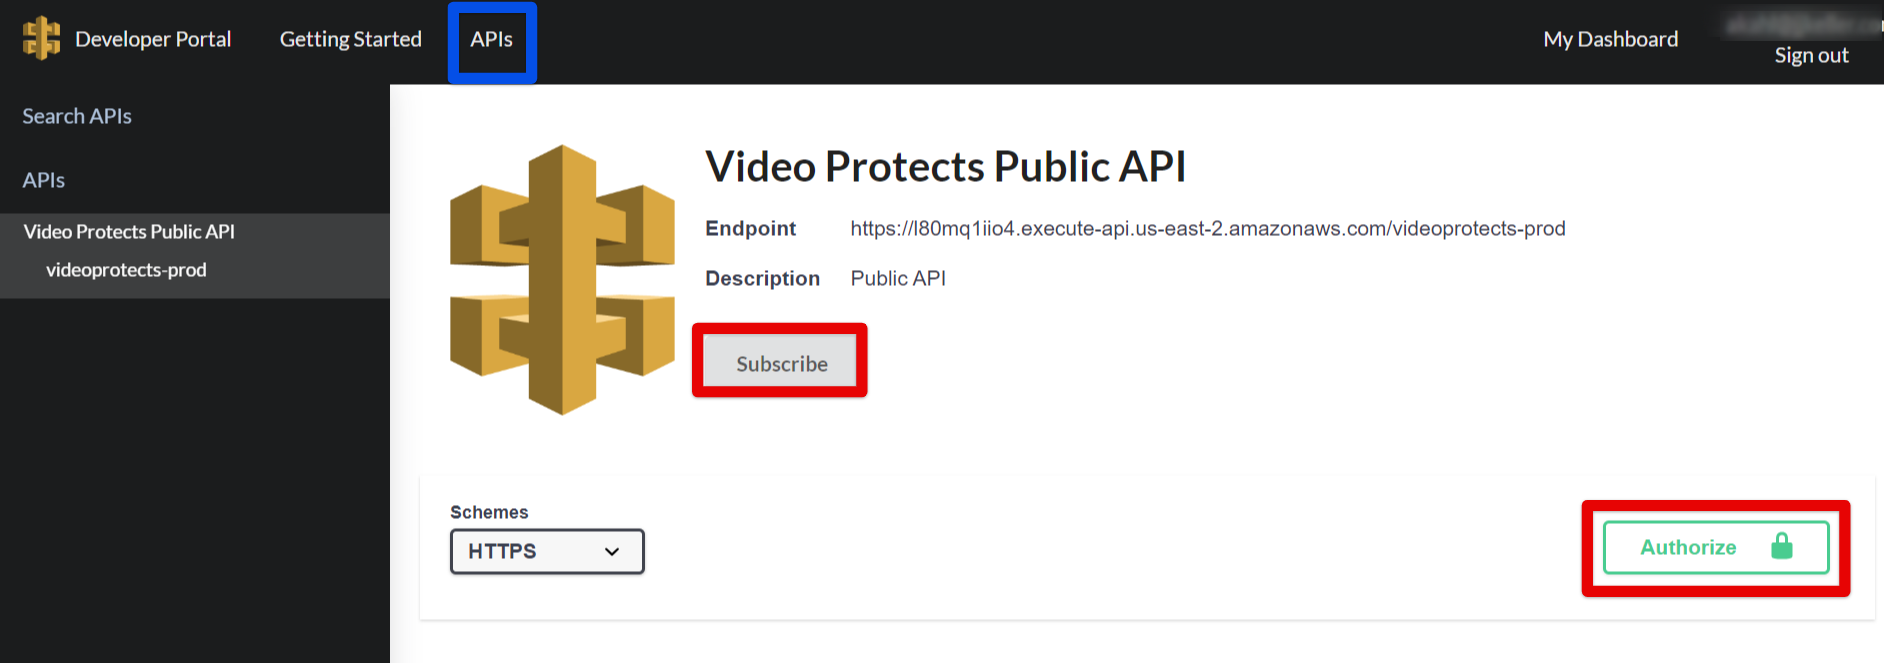
Once you’ve created and confirmed your account, you can subscribe to the APIs available.
Subscribing to APIs
Visiting the APIs page of the site will give you the option to “Subscribe” and/or Authorize.
Your API Key
You can see your API key by navigating to “My Dashboard”. This key can then be used to make calls within the portal and try out the APIs.

Fleet ID's
Some of the API’s involve using a FleetID to obtain data. If you need your FleetID, you can use the “Fleets” API to obtain this. Your FleetID will be presented once you click Try it out > Execute. (The ID should show above the name of the Fleet you’re assigned.)
Note: This Fleet that a user has access to is assigned to the user that’s logged in to the API Portal.
