Enrolling Learners in a Course in TMC
Where to Enroll Learners
There are a few ways to enroll a learner/s in a course. After choosing method below, continue with the Enrolling Learners instructions.
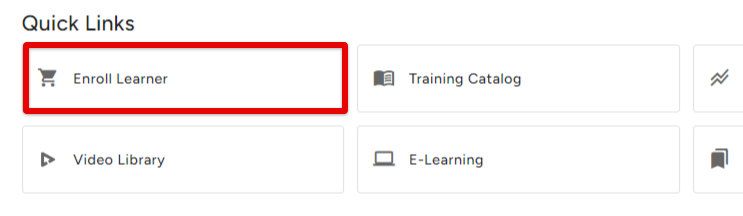
1) Click Enroll Learner from the Quick Links section on the homepage.
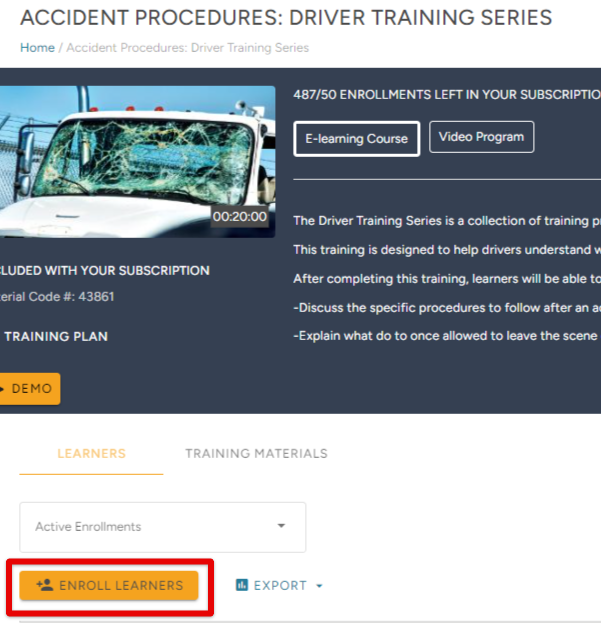
2) Click Enroll Learner directly from a course's information page. Go to Catalog > E-Learning Courses (or Curriculums) > select the desired course.

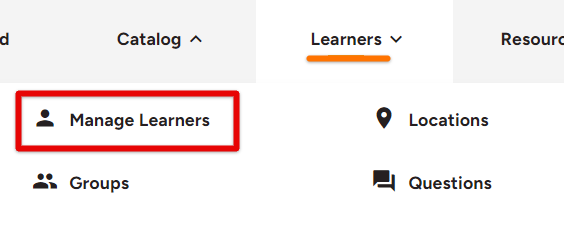
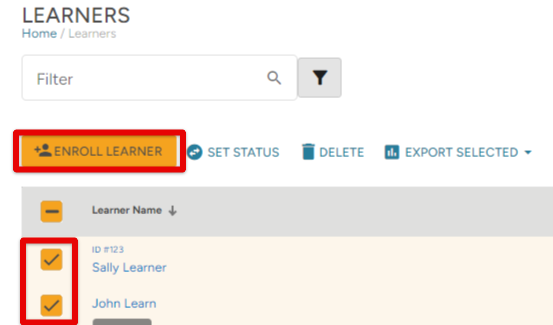
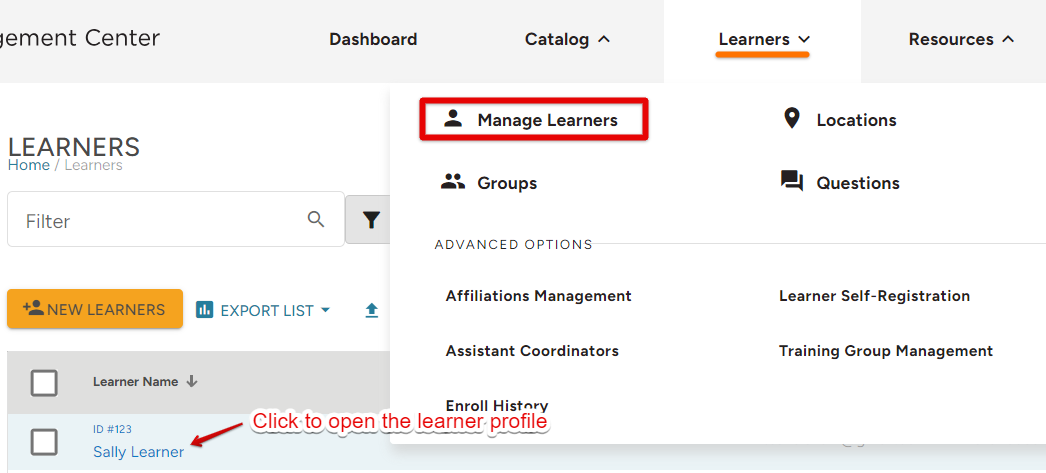
3) Choose learners from the grid under the Manage Learners tab. Go to Learners > Manage Learners. Locate the desired learners and check the box next to their name. Then, click Enroll Learner.
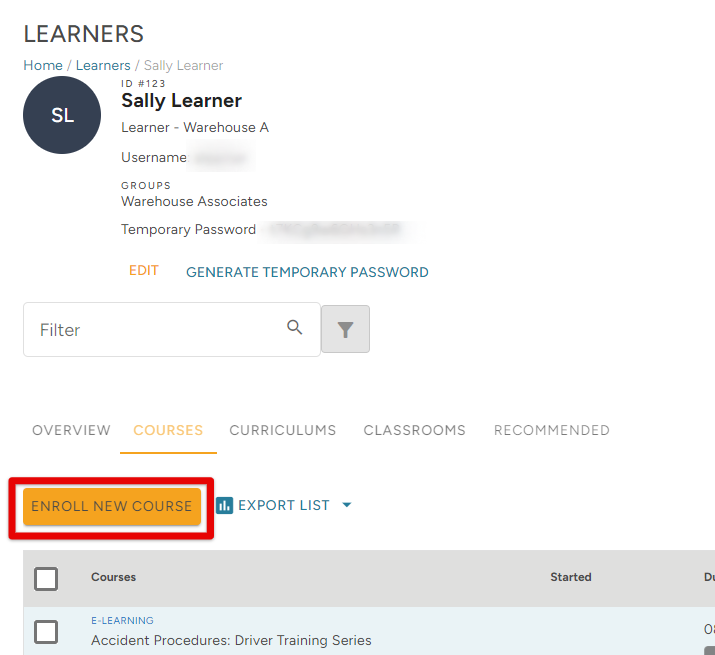
4) Click Enroll New Course from an individual Learner's profile. Go to Learners > Manage Learners. Click on the learner to open their profile.
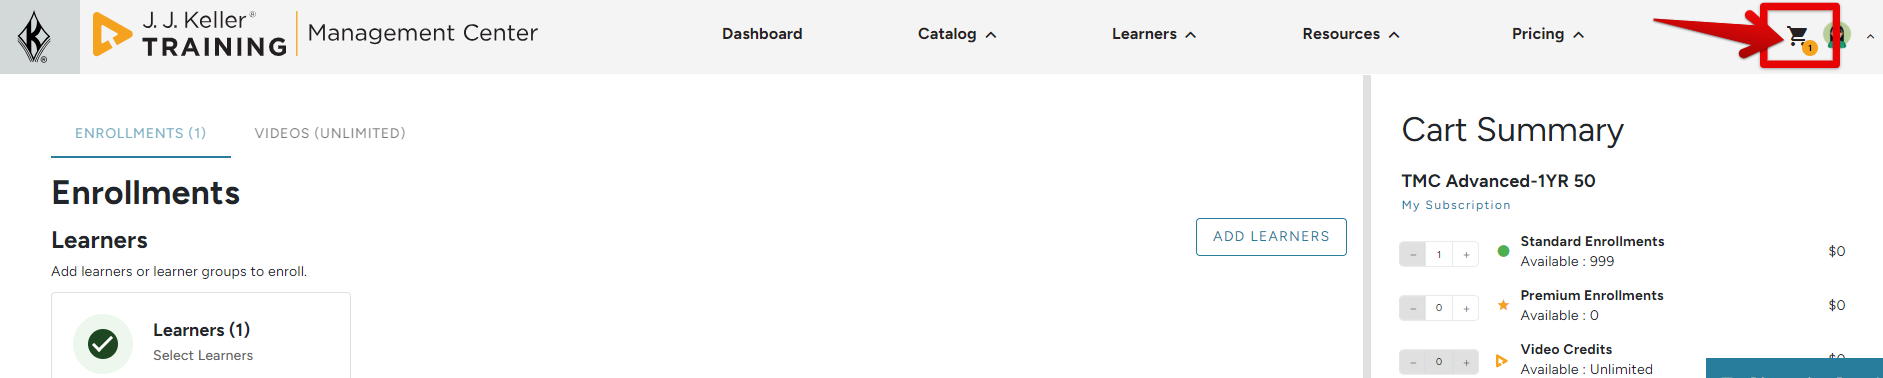
5) From the Shopping Cart. Click the shopping cart in the upper right to begin enrolling learners into courses.
Enrolling Learners
No matter which method you choose to follow to enroll a learner, you will be brought to the Shopping Cart.
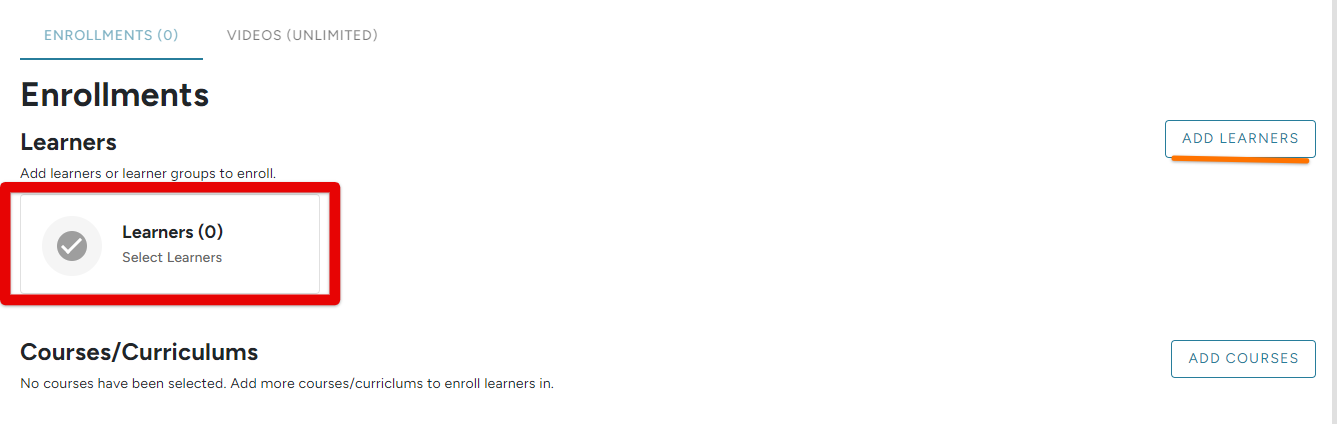
Click the Select Learners box.
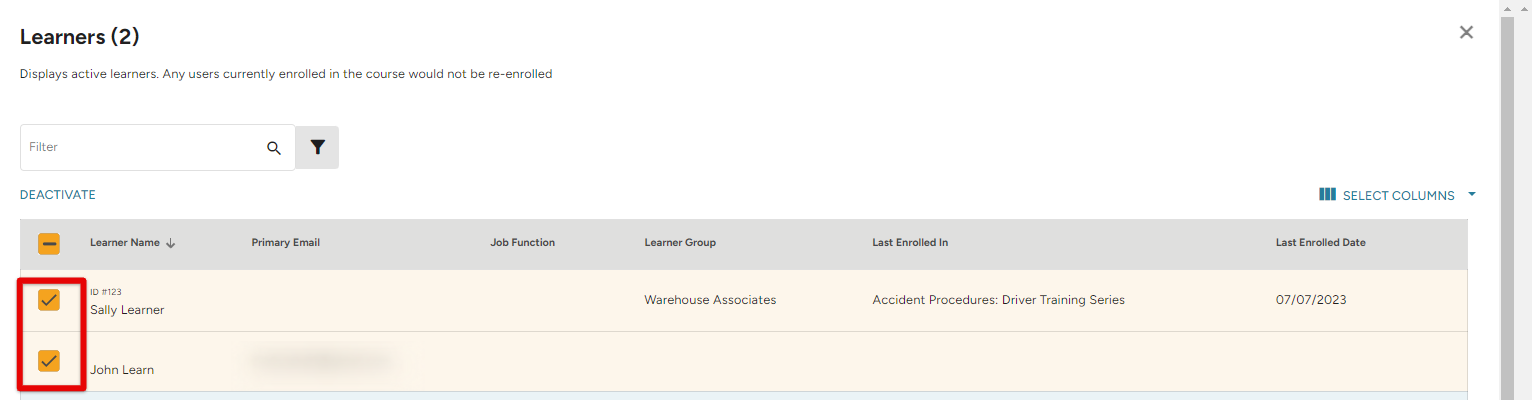
If you chose to enroll a learner/s from the Manage Learners area of TMC or from an individual learner profile, the learners will already be pre-selected.
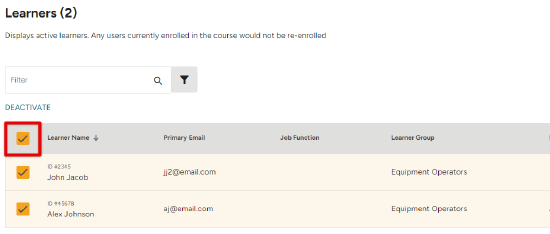
Search for and select the learners you need to enroll in a course. Click Save when finished.

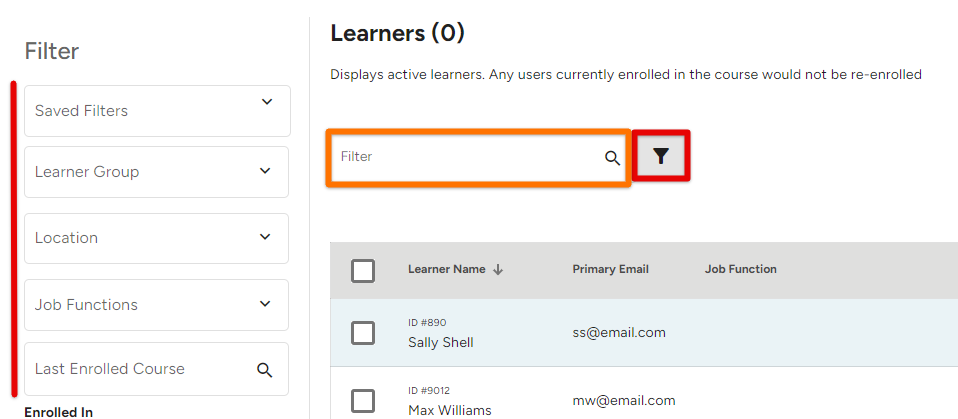
Tip: You can search for and/or filter learner results to narrow down a specific learner group, location, etc. Use the search field to locate a specific learner. Or, click the Filter icon to open up various filter options.
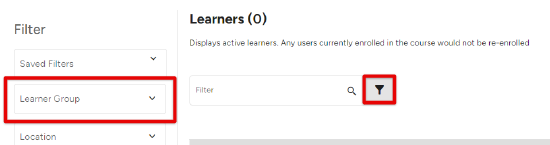
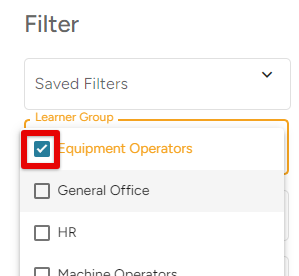
For example, to enroll a specific Learner Group in a course, click the filter icon to open the Filter panel. Then, select the desired group from the Learner Group dropdown.
Then, click Update near the bottom of the Filter panel.
Now, all of the learners in that specific Learner Group will display in the list. Check the box at the top of the list to Select All of the learners in the group.
Continue with the below instructions.

Now, you will see how many Learners have been selected for enrollment.
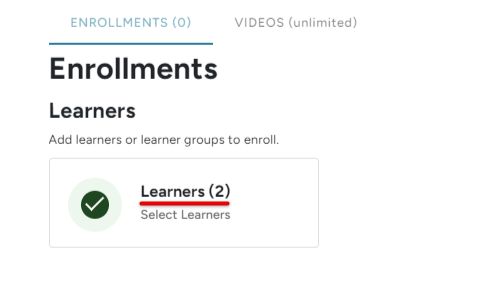
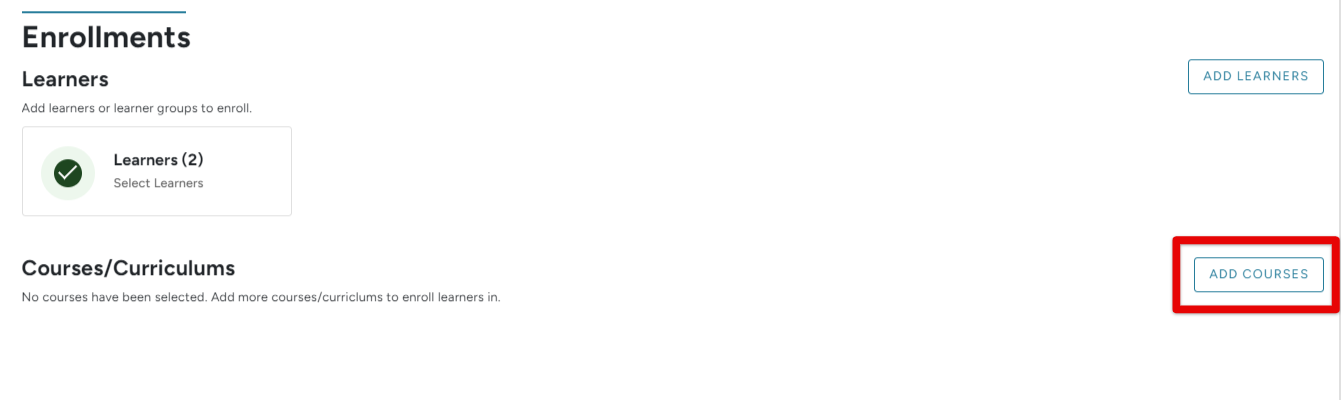
Next, you'll want to add a course/s to enroll the selected learners in.
Adding a Course/s
Any courses/curriculums you have already added to your cart from the E-Learning/Curriculum library will display here. If you have yet to add courses to your cart, or want to enroll learners in more courses, click Add Courses.
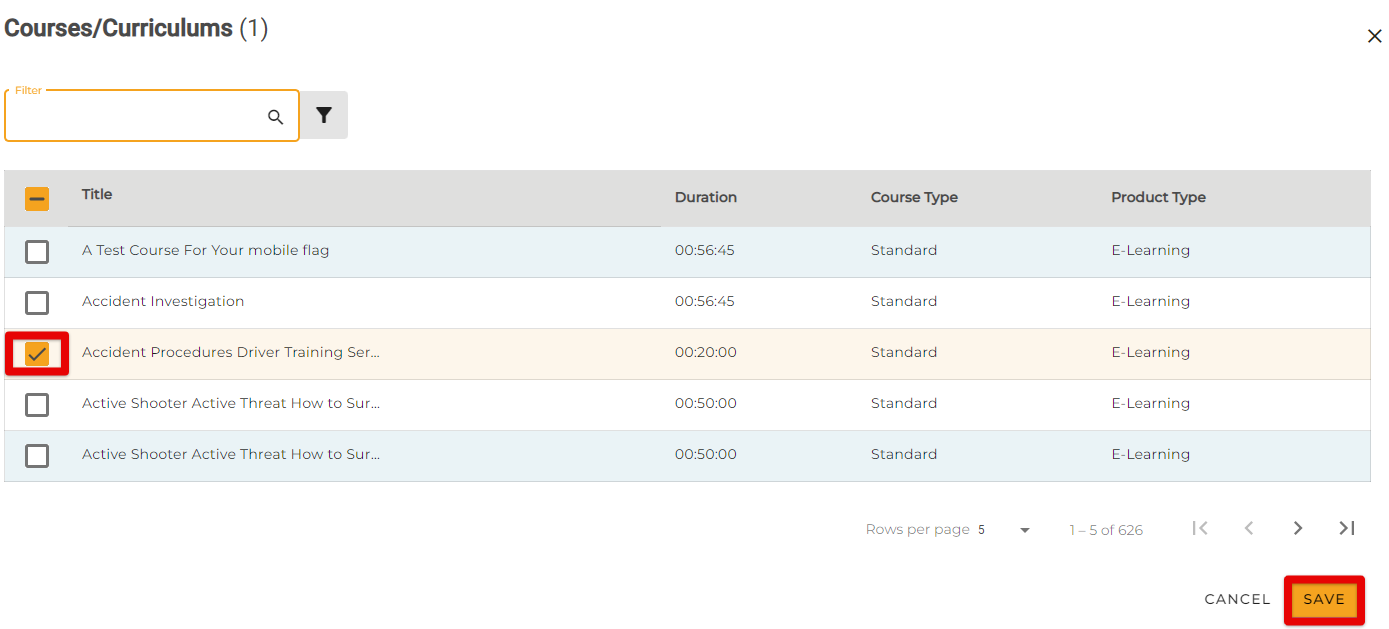
Select the course/s you want to enroll the learners in. Use the search field or filter options to narrow down your results. Click Save when finished.
The selected course/s will now appear. Complete the required fields and others as desired.
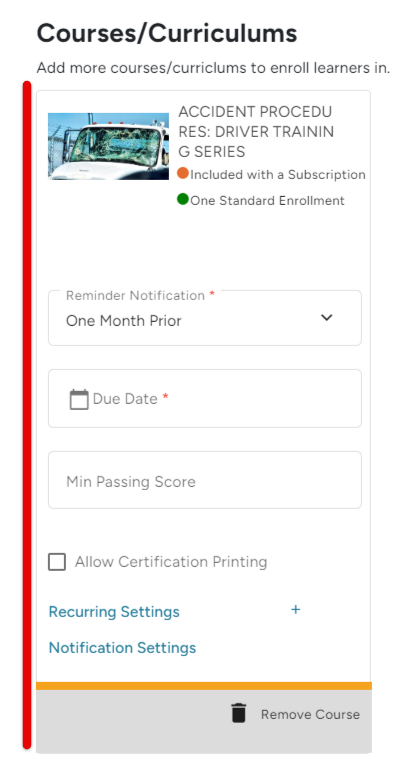
Allow Certification Printing
Allows the learner to print a certificate upon completion/passing of the course.
Recurring Settings (UNDER CONSTRUCTION)
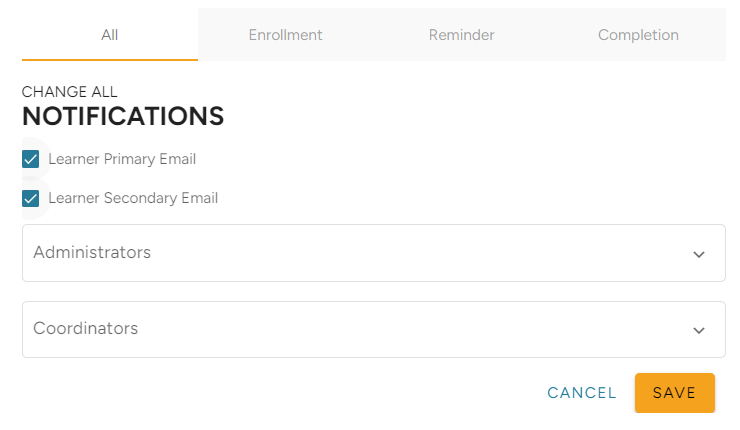
Notification Settings
Allows you to set enrollment notifications that will be sent to designated email addresses (primary, secondary, or both). You can also select an Admin/Coordinator to send a notification to. You can set specific rules for various notification.
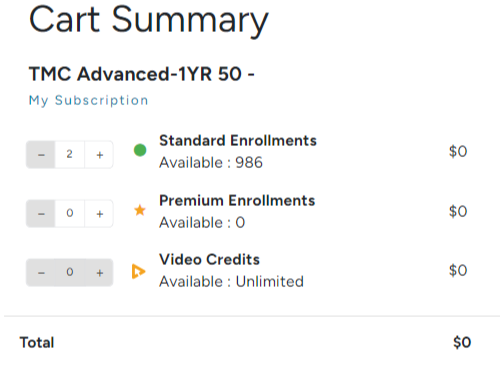
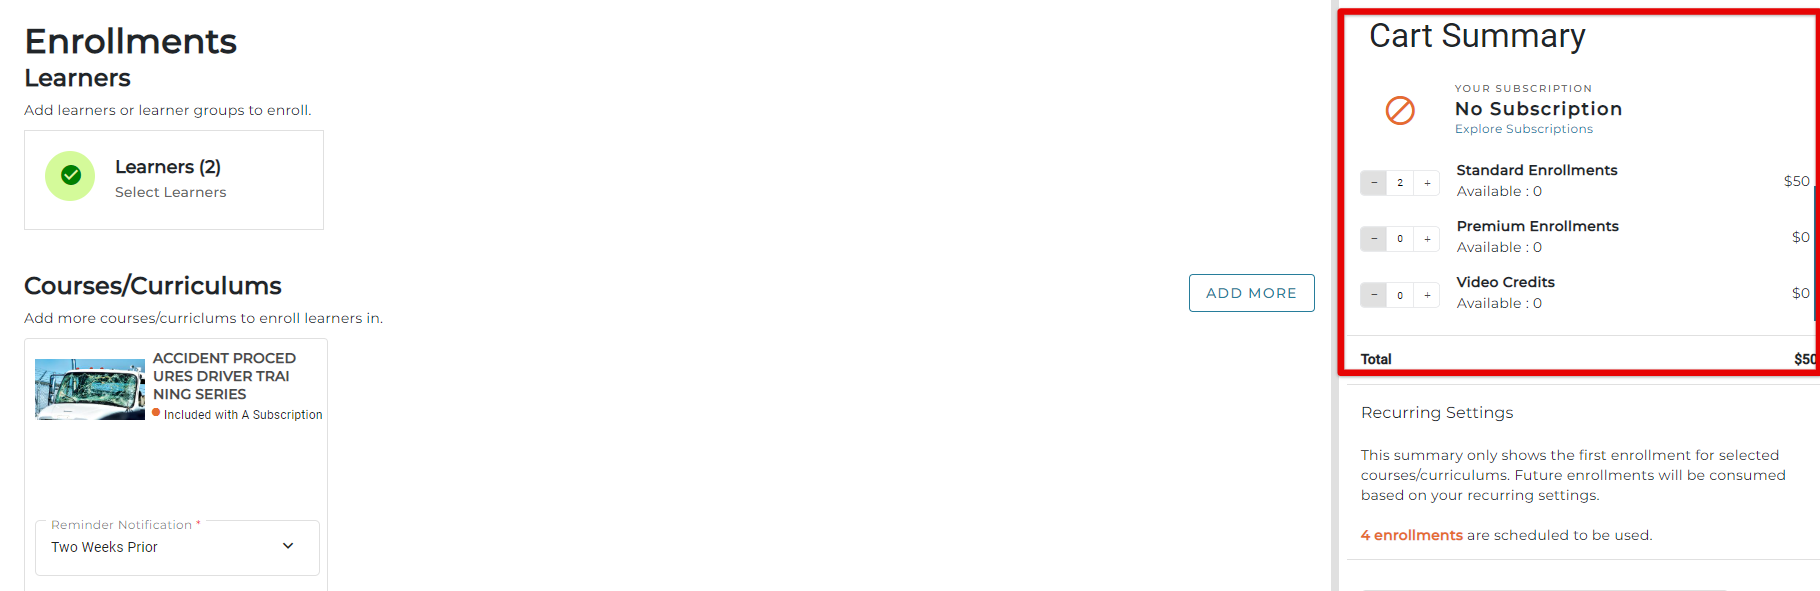
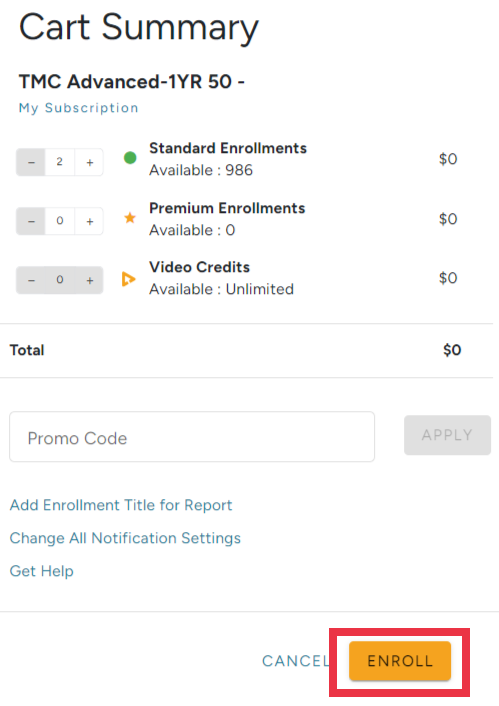
Cart Summary
A summary of all selected enrollments and the cost appears on the right-hand side.
If you do have a subscription, the cart will indicate how many enrollments you have available in your account. The dollar amount will be "$0" if you have enough enrollments remaining in your account to cover the "cost" of your current elections. In the example below, I have 986 enrollments available and will end up using 2 of those upon enrolling.
In the example below, I don't have a subscription, but want to enroll 2 learners in 1 course. You can see that there are 2 Standard Enrollments that cost $50 total.
Promo Code
If you received a promo code, you can apply that in the Promo Code field.

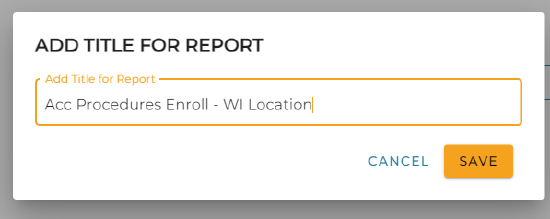
Add Title for Report
For reporting purposes, you can add a "title" that will appear for this purchase/enrollment.
Click Enroll / Check Out
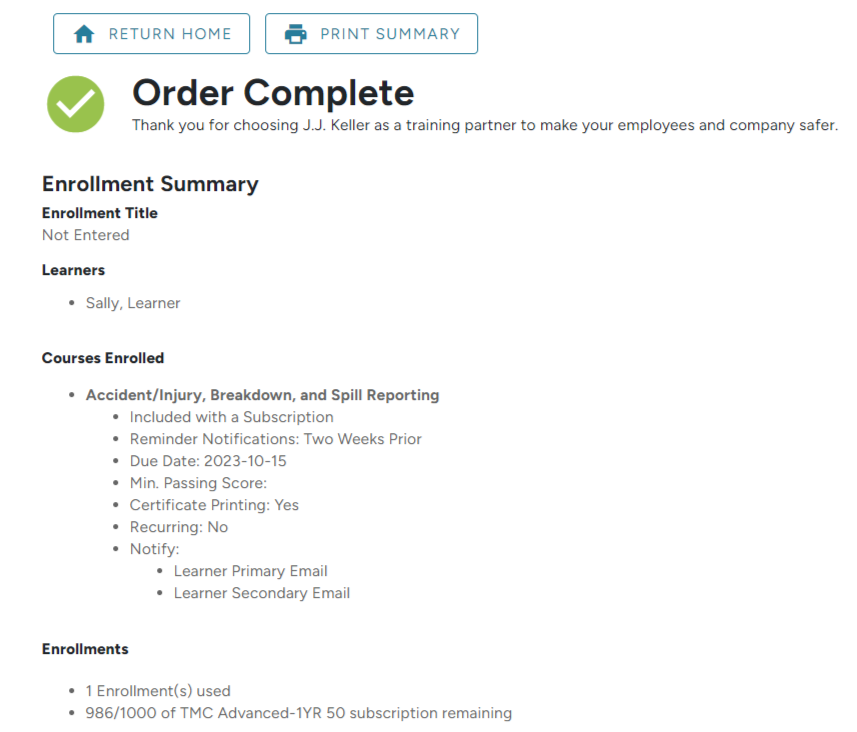
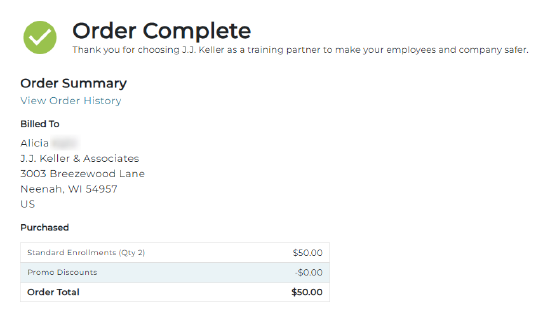
If you do have a subscription to cover these enrollments, you will simply click Enroll. An Order Summary will display.
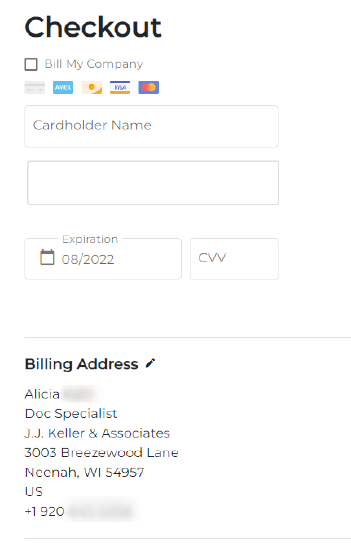
If you don't have a subscription and need to purchase the enrollments, complete the checkout process.
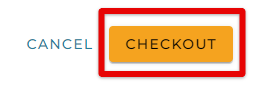
Enter in your credit cart information and ensure your billing address is accurate. You can choose to have an invoice sent to your company by checking the Bill My Company box. An Order Summary will display.
 OR
OR 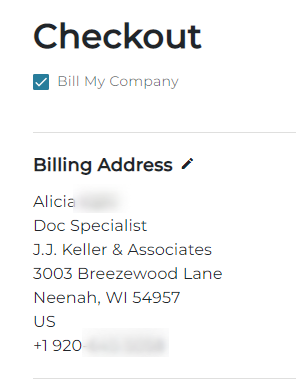
For enrollment history information, see: Enrollment History in TMC