Creating a Classroom in TMC
Classroom Programs are instructor-led trainings/programs conducted in the classroom and on the job. You can utilize classroom programs created by J.J. Keller®, or you can create your own and add supporting materials like PowerPoint® presentations, quizzes, and more.
This article will walk through how to build/add your own Classroom Program.
Create a Classroom Program
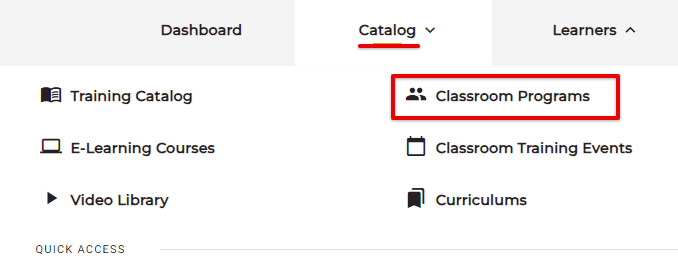
You can access Classrooms from the Dashboard, or by clicking Classroom Programs from the Catalog tab.

OR
Click + New Classroom.

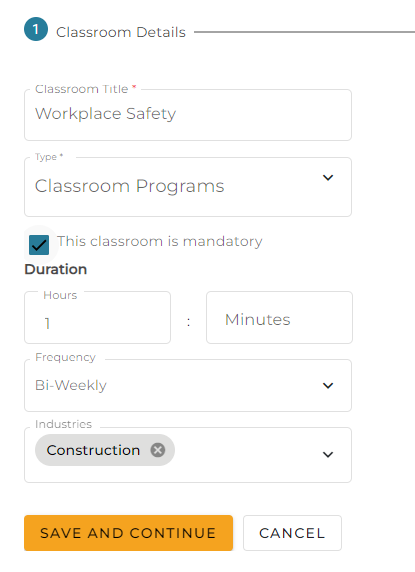
Add applicable Classroom details such as the name of the Classroom, type, duration, frequency (ex. How often should a Learner participate in this program/how often should a Trainer host this program), and any applicable industries. Click Save and Continue when ready to move on.
Click +Add Section.
(Note: You can also add Classroom Sections/Assets/Training Materials after the Classroom is created.)

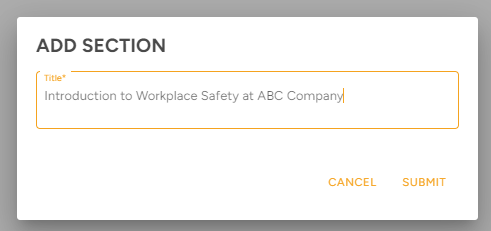
Enter a title for the Section and click Submit.
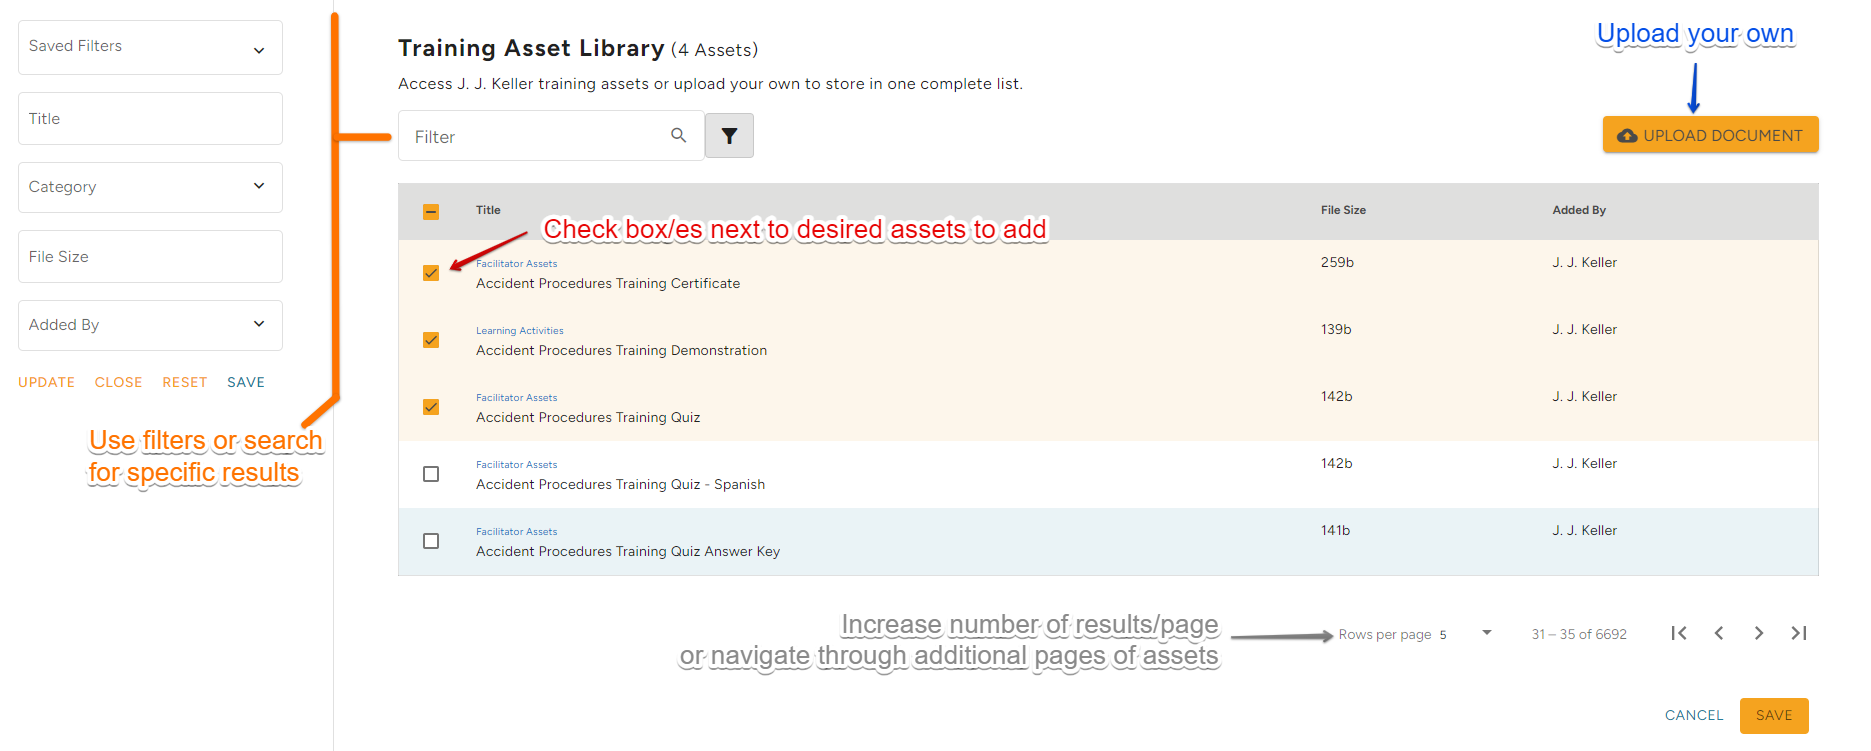
Next, you need to add assets (ie. file uploads, handouts, etc.) from the Training Asset Library (or upload your own). Click +Add Asset. (Add Asset in the gray box will also allow you to add an asset to that section.)

Select a J.J. Keller training asset by checking the box next to the desired asset. Or upload your own. Click Save near the bottom right when finished.
Tips:
- Click the filter button to search for specific assets and narrow down results.
- You can increase the number of results on the page and/or sift through the pages of results by using the results/pagination features near the bottom right of the table.
- Click Upload Document to upload your own file to use for your Classroom.
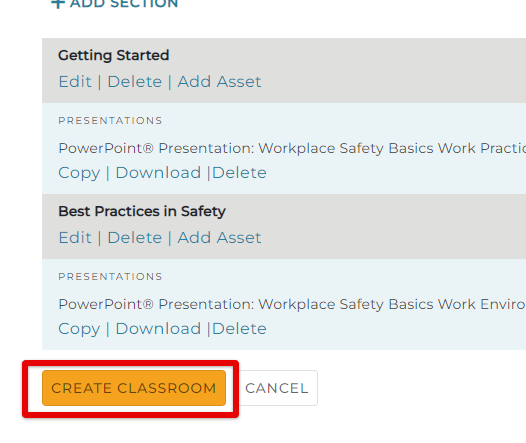
Continue adding Sections and Assets as needed to build your classroom. When completely finished, click Create Classroom.
Additional Actions:
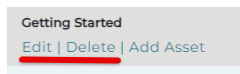
Click Edit or Delete under the Section to perform edit/delete actions.
Under each asset, you can also Copy to create a new asset, Download the asset file, or Delete the asset altogether.
You can reorganize the sections by using the arrows on the right of the Section title. To reorganize Assets, click, hold, and drag the stack of dots to move an Asset to a new location.
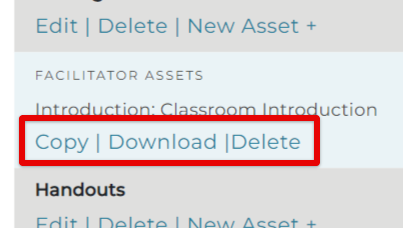

Viewing Your Classroom Programs
To view Classroom Programs that you have created, change the Classroom Programs page layout to List View. (The three lines in the upper right.) Then, in the Added By filter on the left, select a name that is not J.J. Keller. (Remember to click Update to apply the filter.) This will display classroom programs that have been created by you/your company.
Check the box next to Program, or click on the name of the Program to open/edit its details, add a training event, etc. (See Adding Classroom Training Events in TMC for more information.)

