Handling a DVIR with a Defect
When there is a defect, typically, there is some type of repair and review performed and the repair is certified as corrected. The system mimics this process. If the repair was done before the DVIR is entered, the user can enter the information about the repair while the new DVIR is being entered. Otherwise, the user can come back to the DVIR at a later time to enter this information.
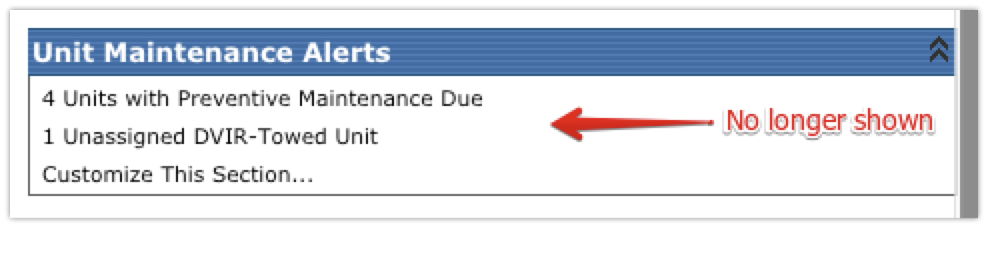
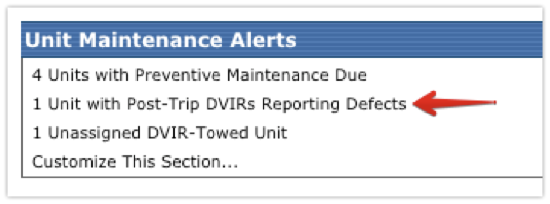
When a DVIR has been submitted with a reported defect, an alert will be generated on the Vehicle Management home page.
The DVIR with the defect can be navigated to in two methods:
1. The Alert on the Vehicle Management Home Page.
2. Navigating to the DVIR via Unit Maintenance
Navigating to DVIR with Defect via Home Page Alert
From the Vehicle Management home page, click on the alert for X Unit(s) with Pre-Trip (or Post-Trip) DVIRs Reporting Defects.
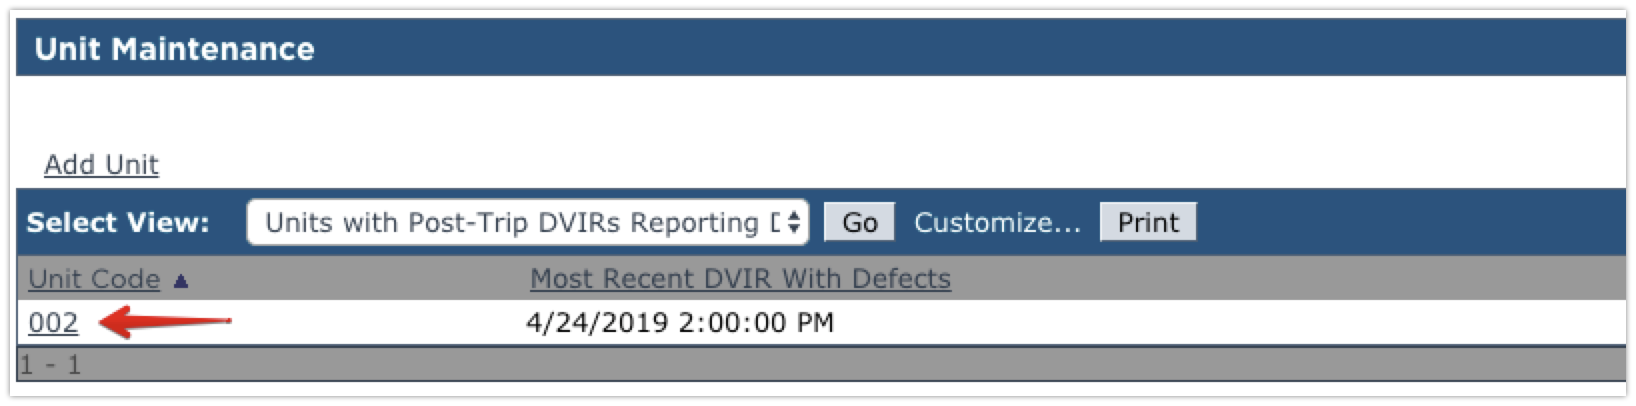
Click on the Unit Code for the date and vehicle of the DVIR that's being cleared.
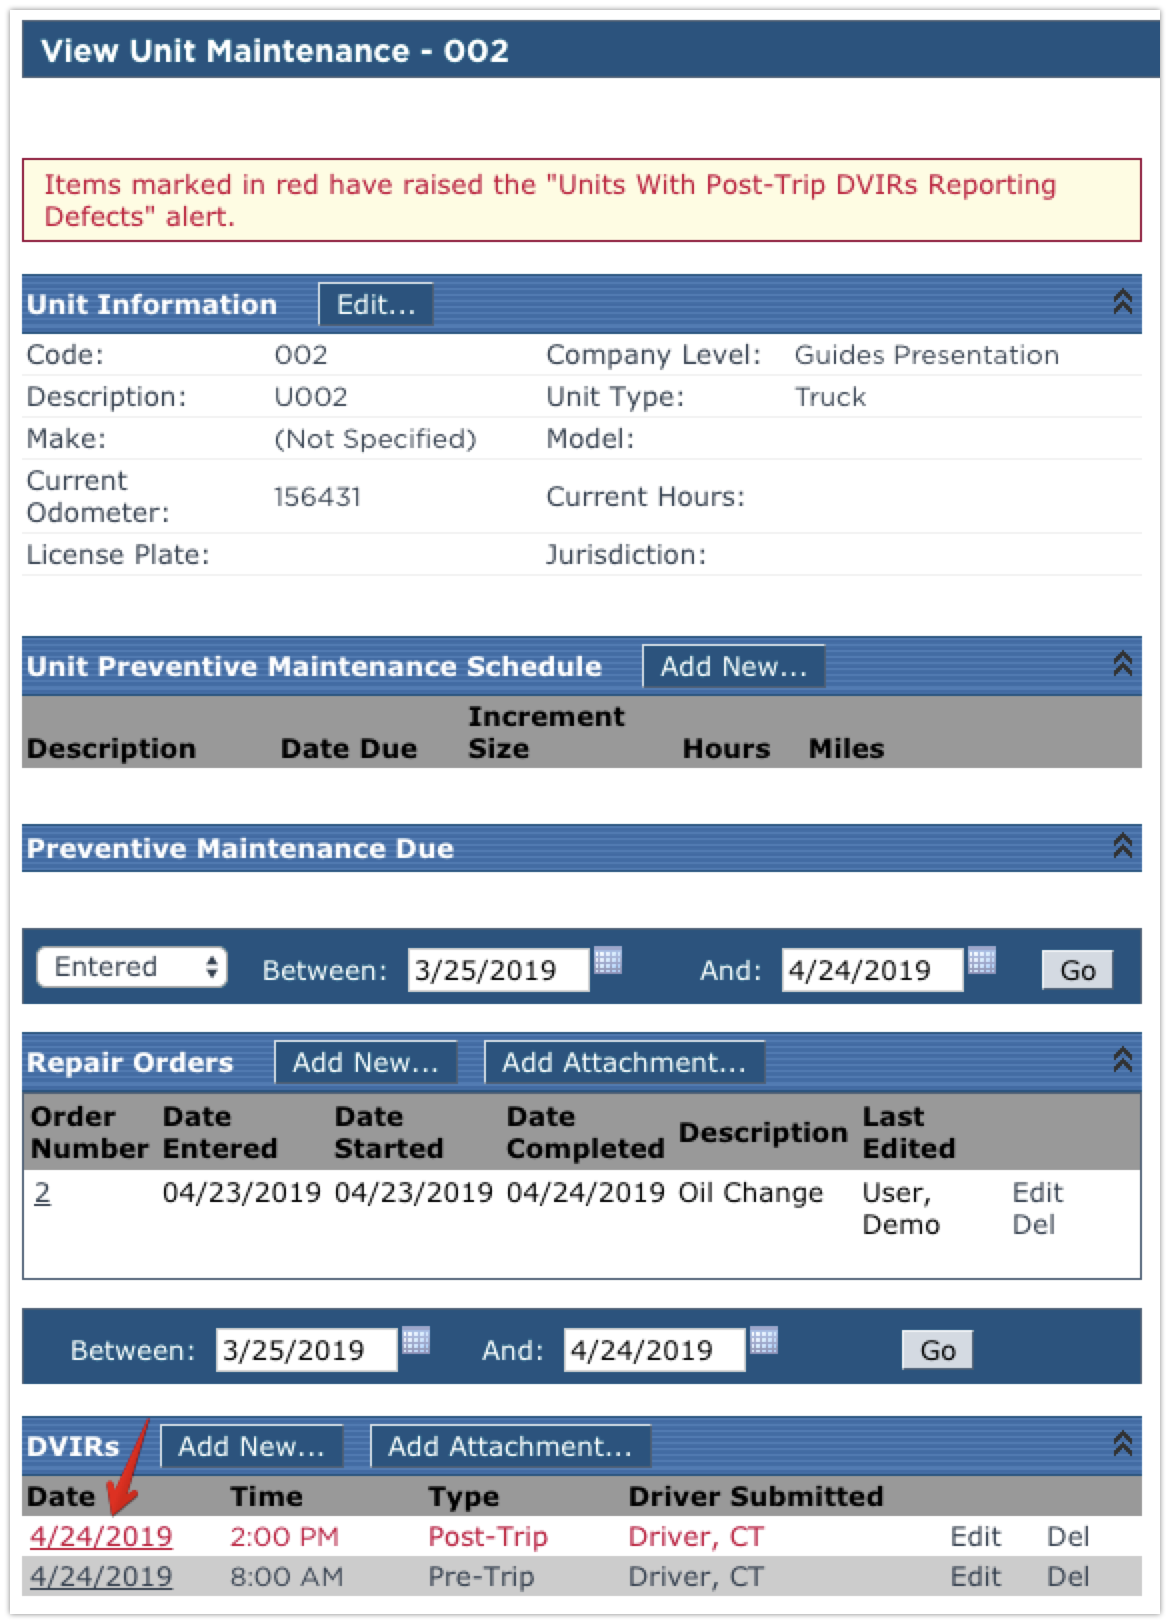
The user will be taken to the Unit Maintenance file for the unit. The outstanding DVIR will be in red.
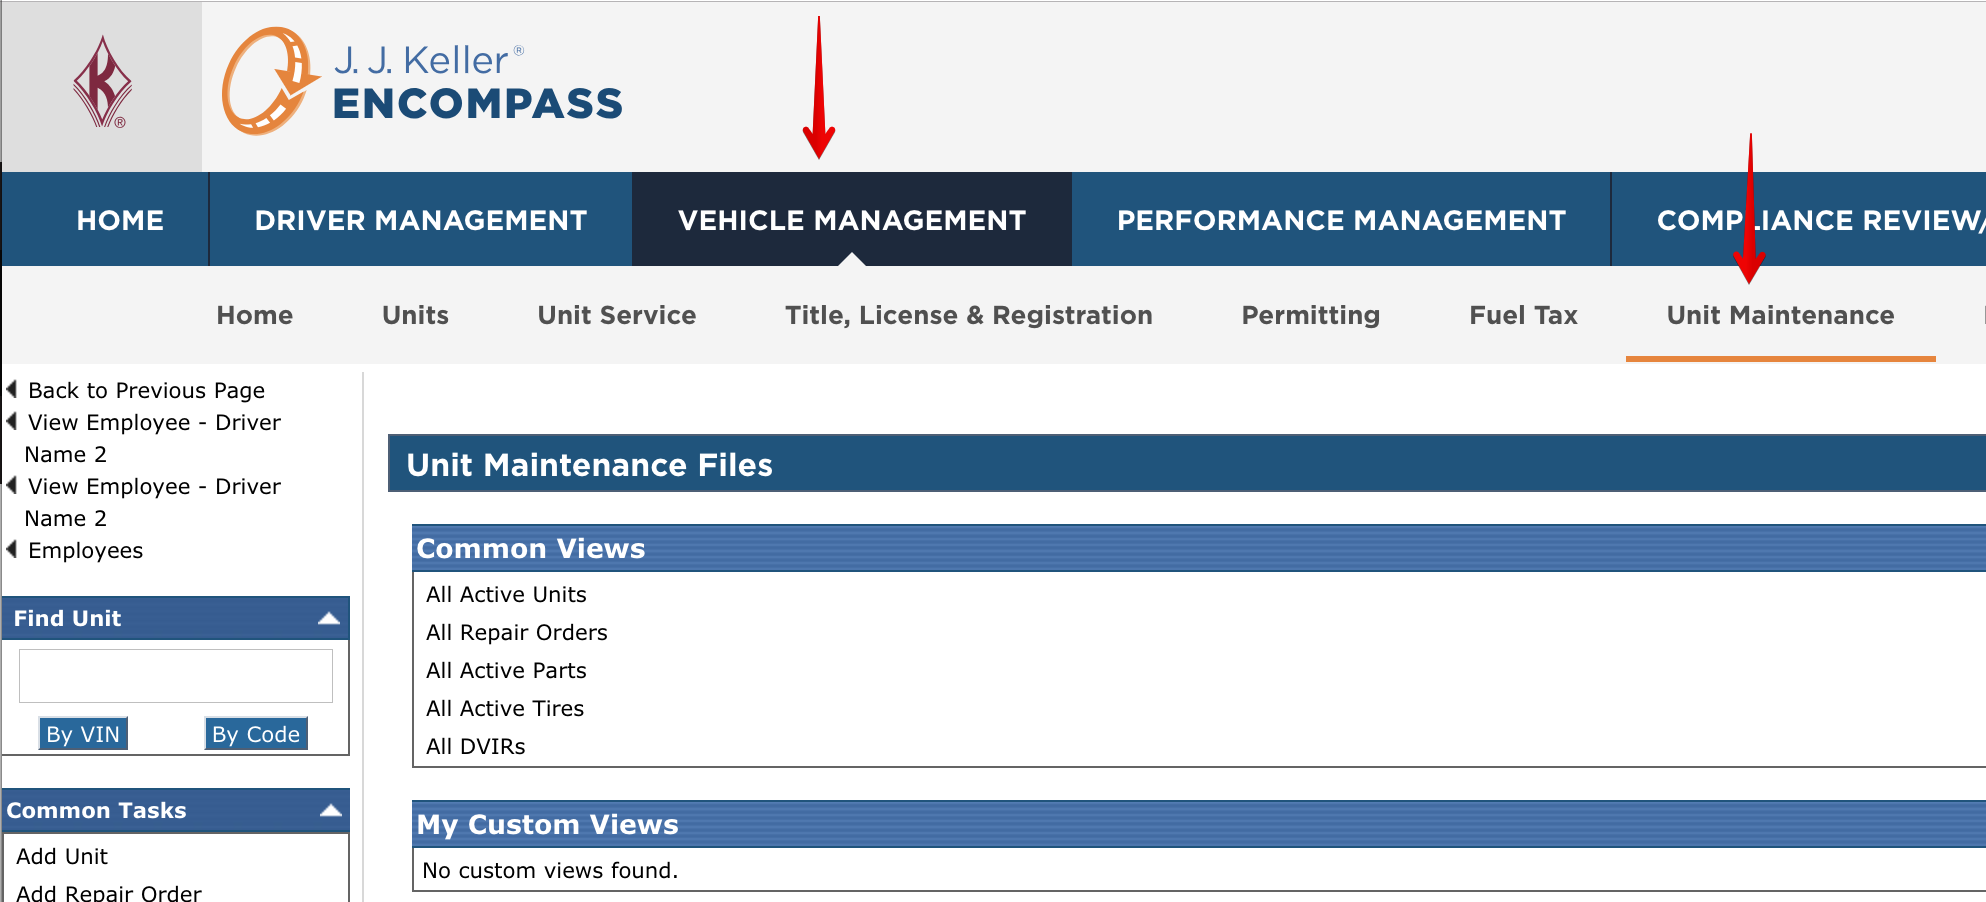
Navigating to the DVIR via Unit Maintenance
Pre-Trip or Post-Trip Inspections, or DVIRs, are stored in the Unit Maintenance sub tab of Vehicle Management.
DVIRs can be looked up a few ways.
1. All DVIR Lookup
2. Unit Lookup to find associated DVIRs
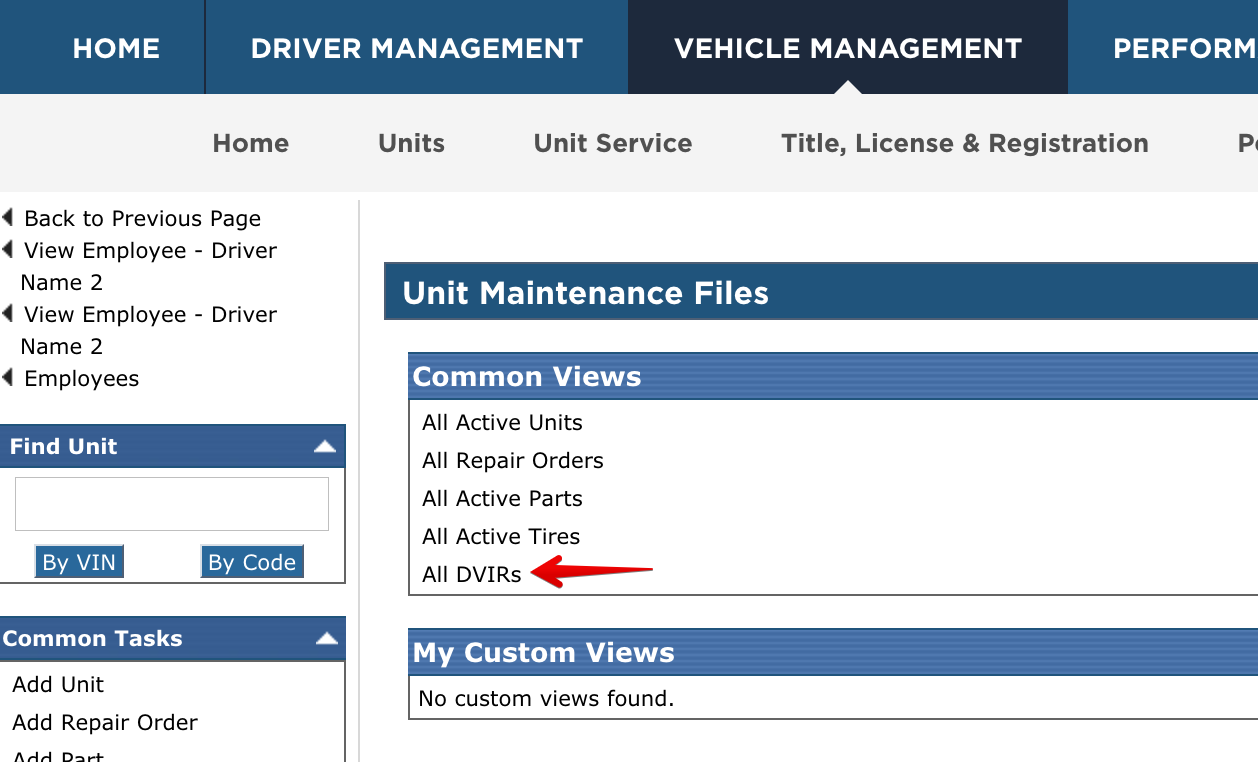
All DVIR Lookup
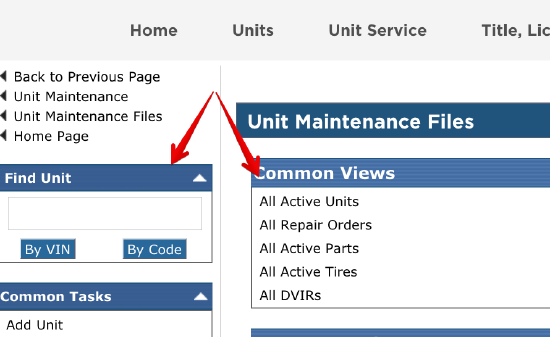
Click All DVIRs under Common Views.
Find the needed DVIR and click on the Date.
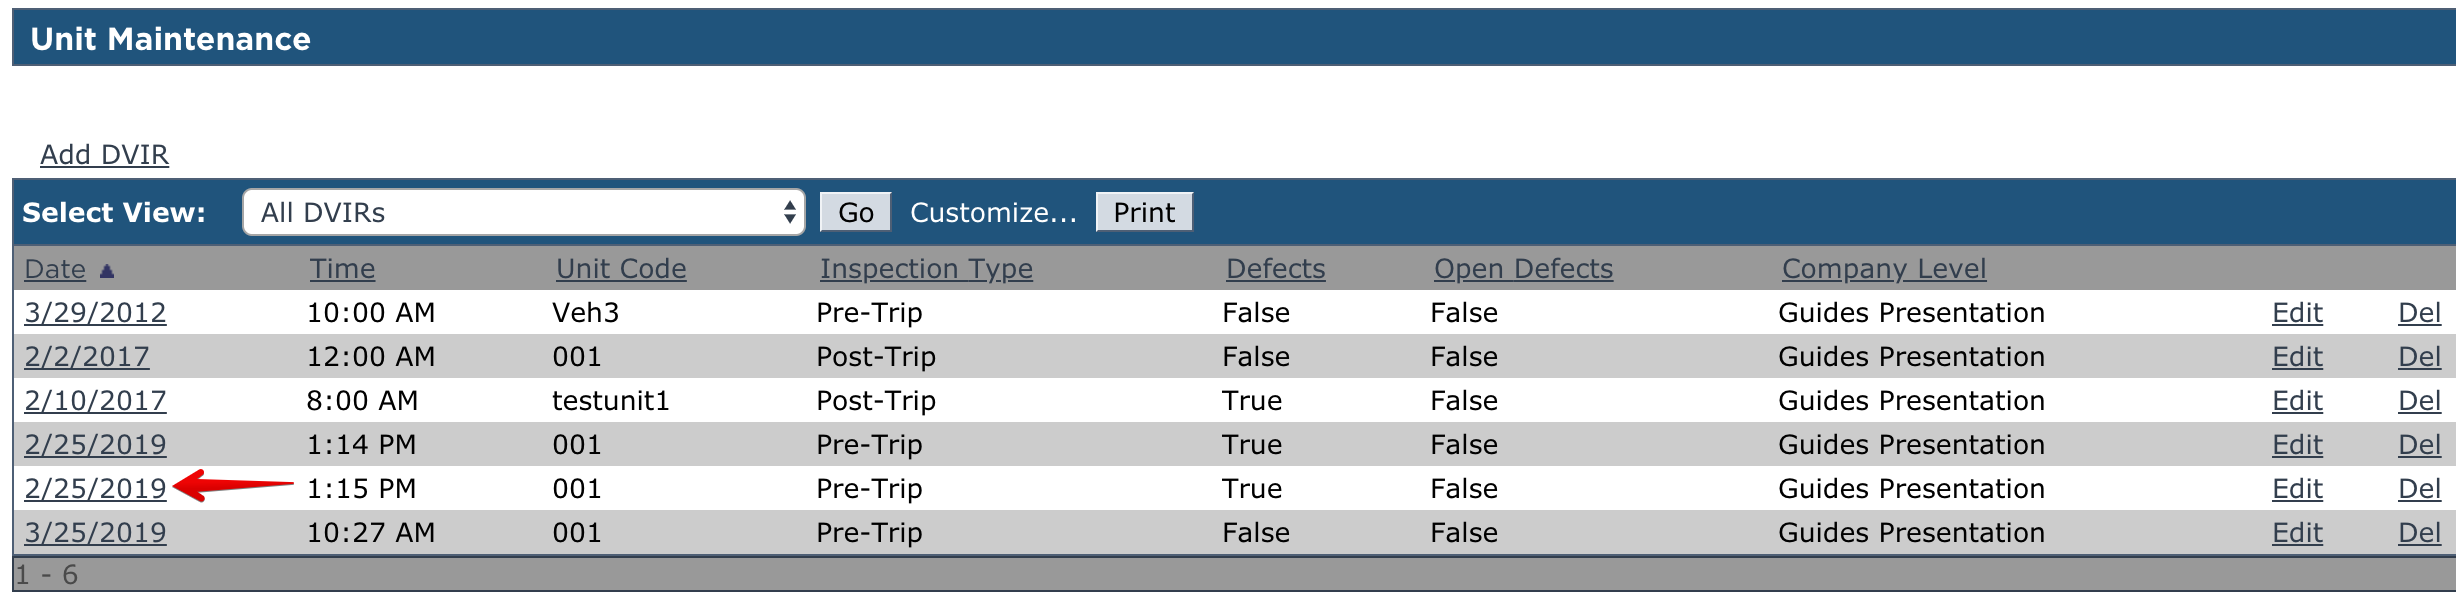
The user will then be taken to the screen to view the DVIR.
Unit Maintenance File Lookup
From the Unit Maintenance tab, find the unit using the search box on the left, or by clicking All Active Units under Common Views.
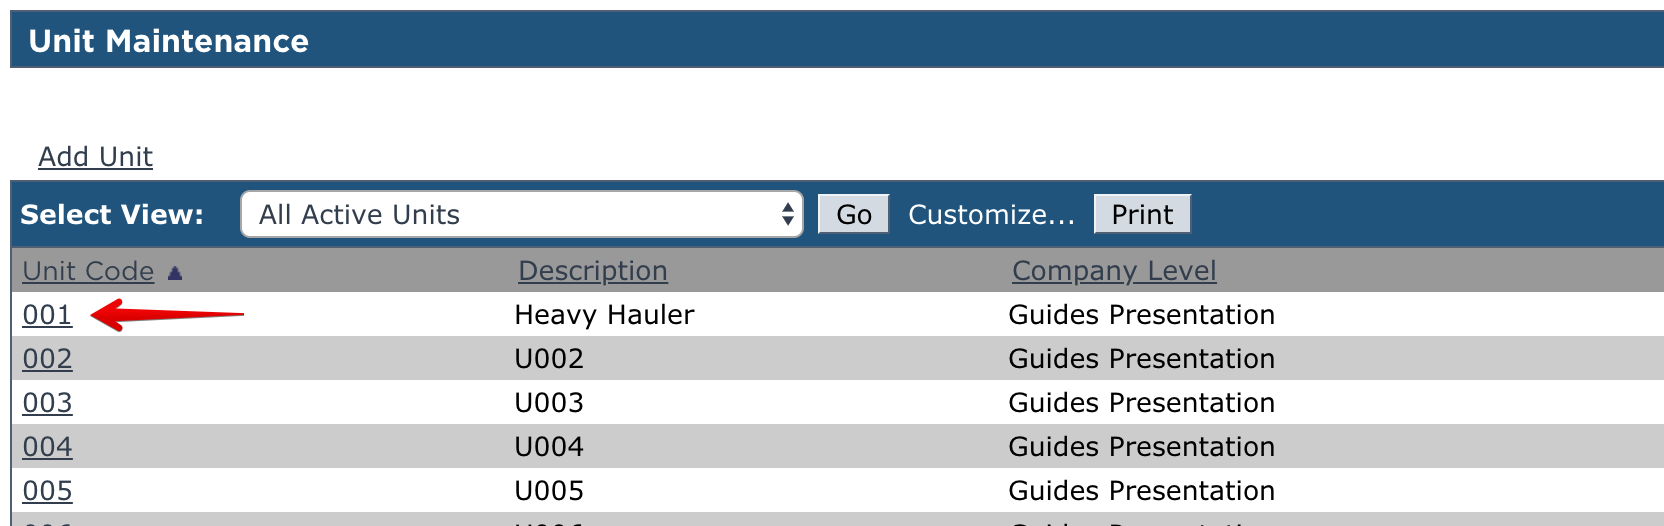
When the unit is found, click on the Unit Code to view the unit's maintenance file.
The last section of this screen will list the DVIRs for the unit for the specified date range listed above. Click the Date of the DVIR.
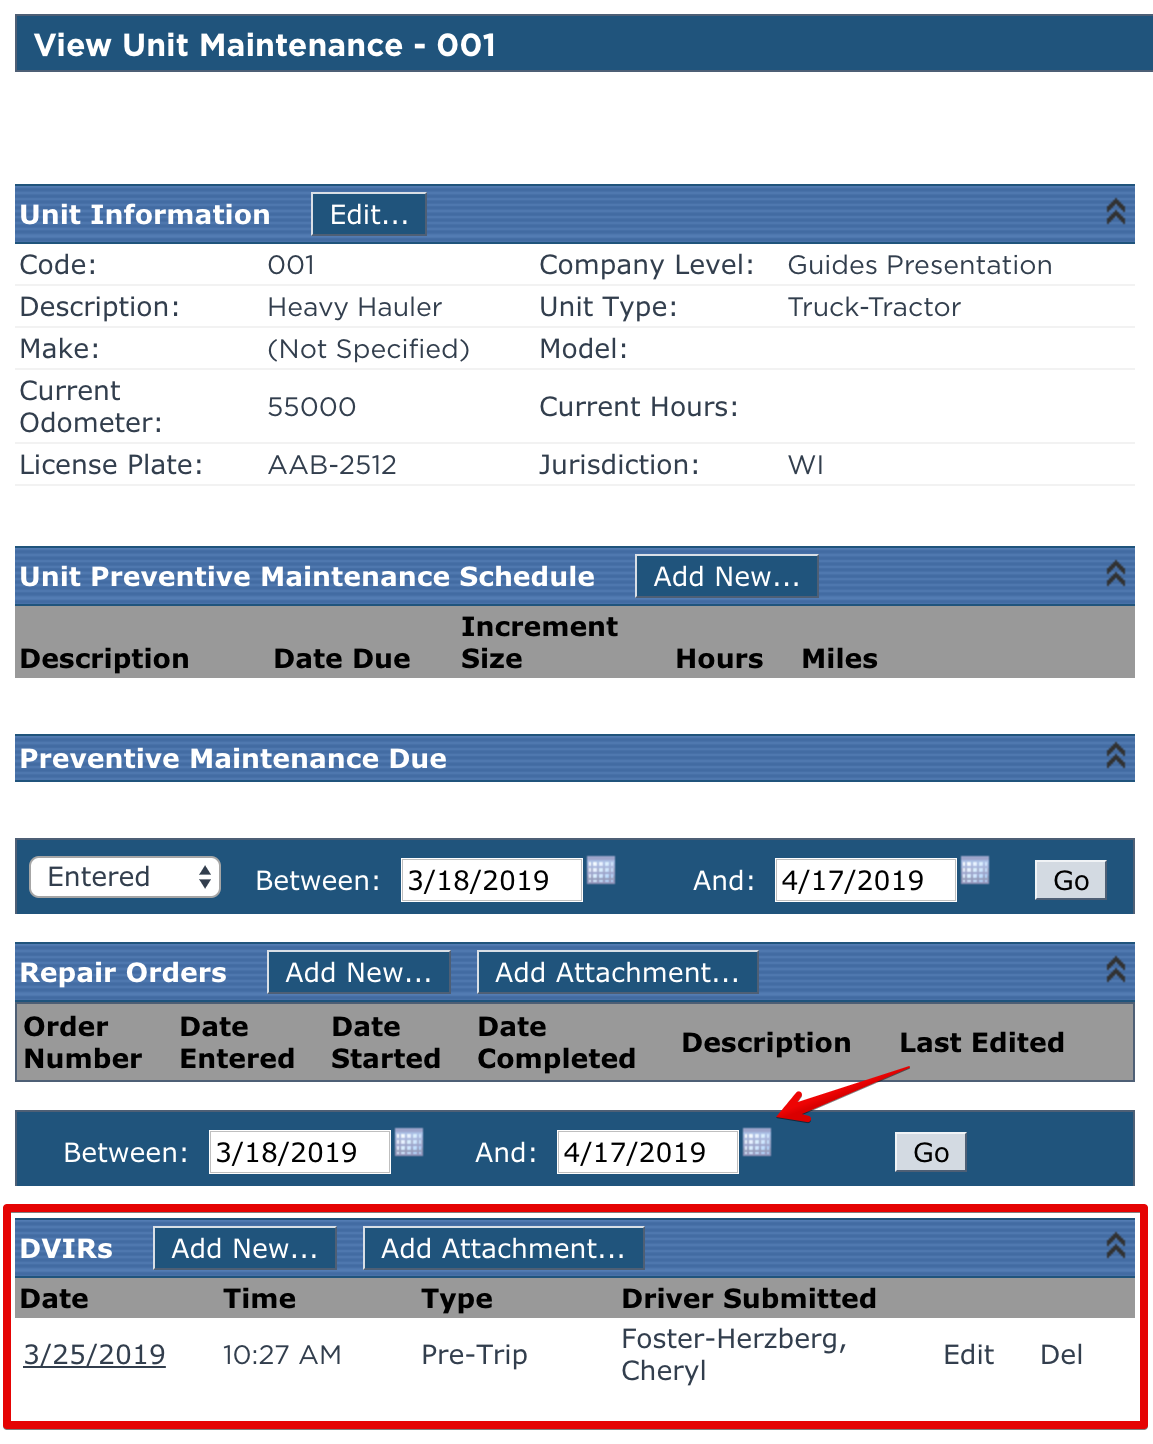
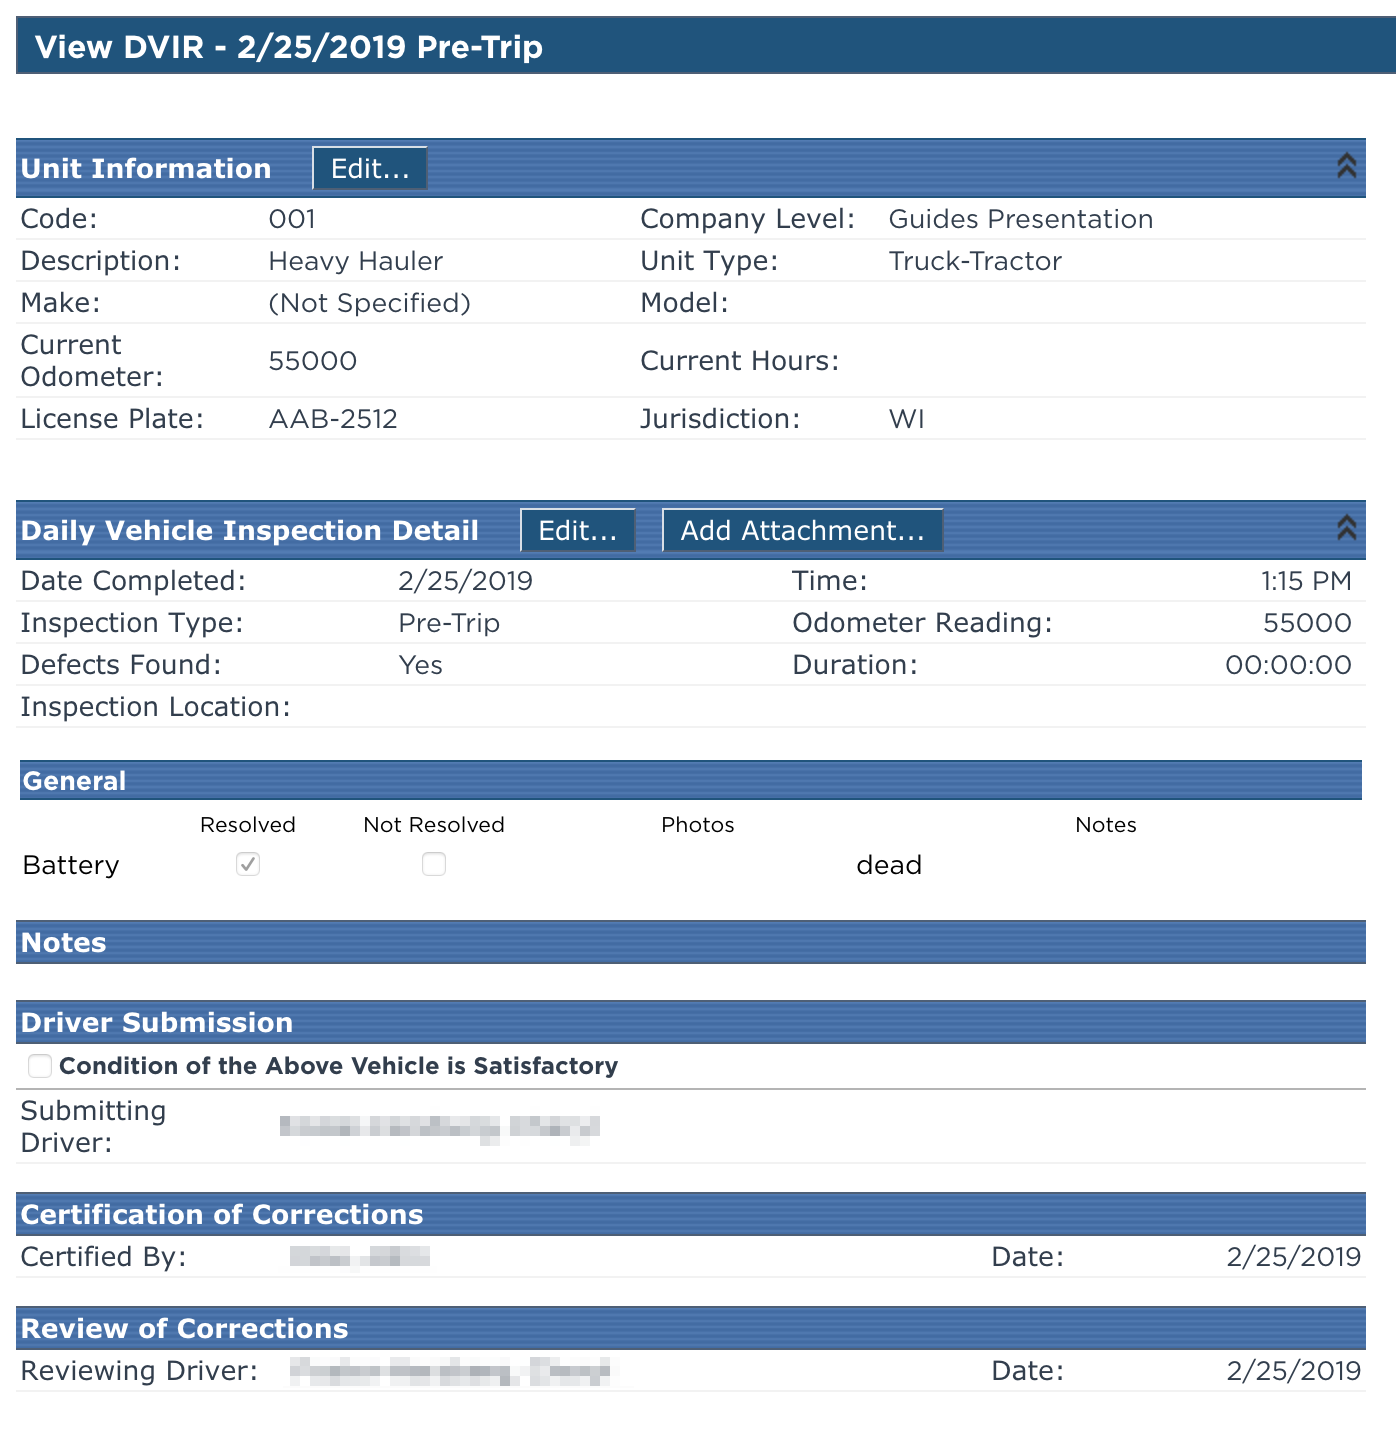
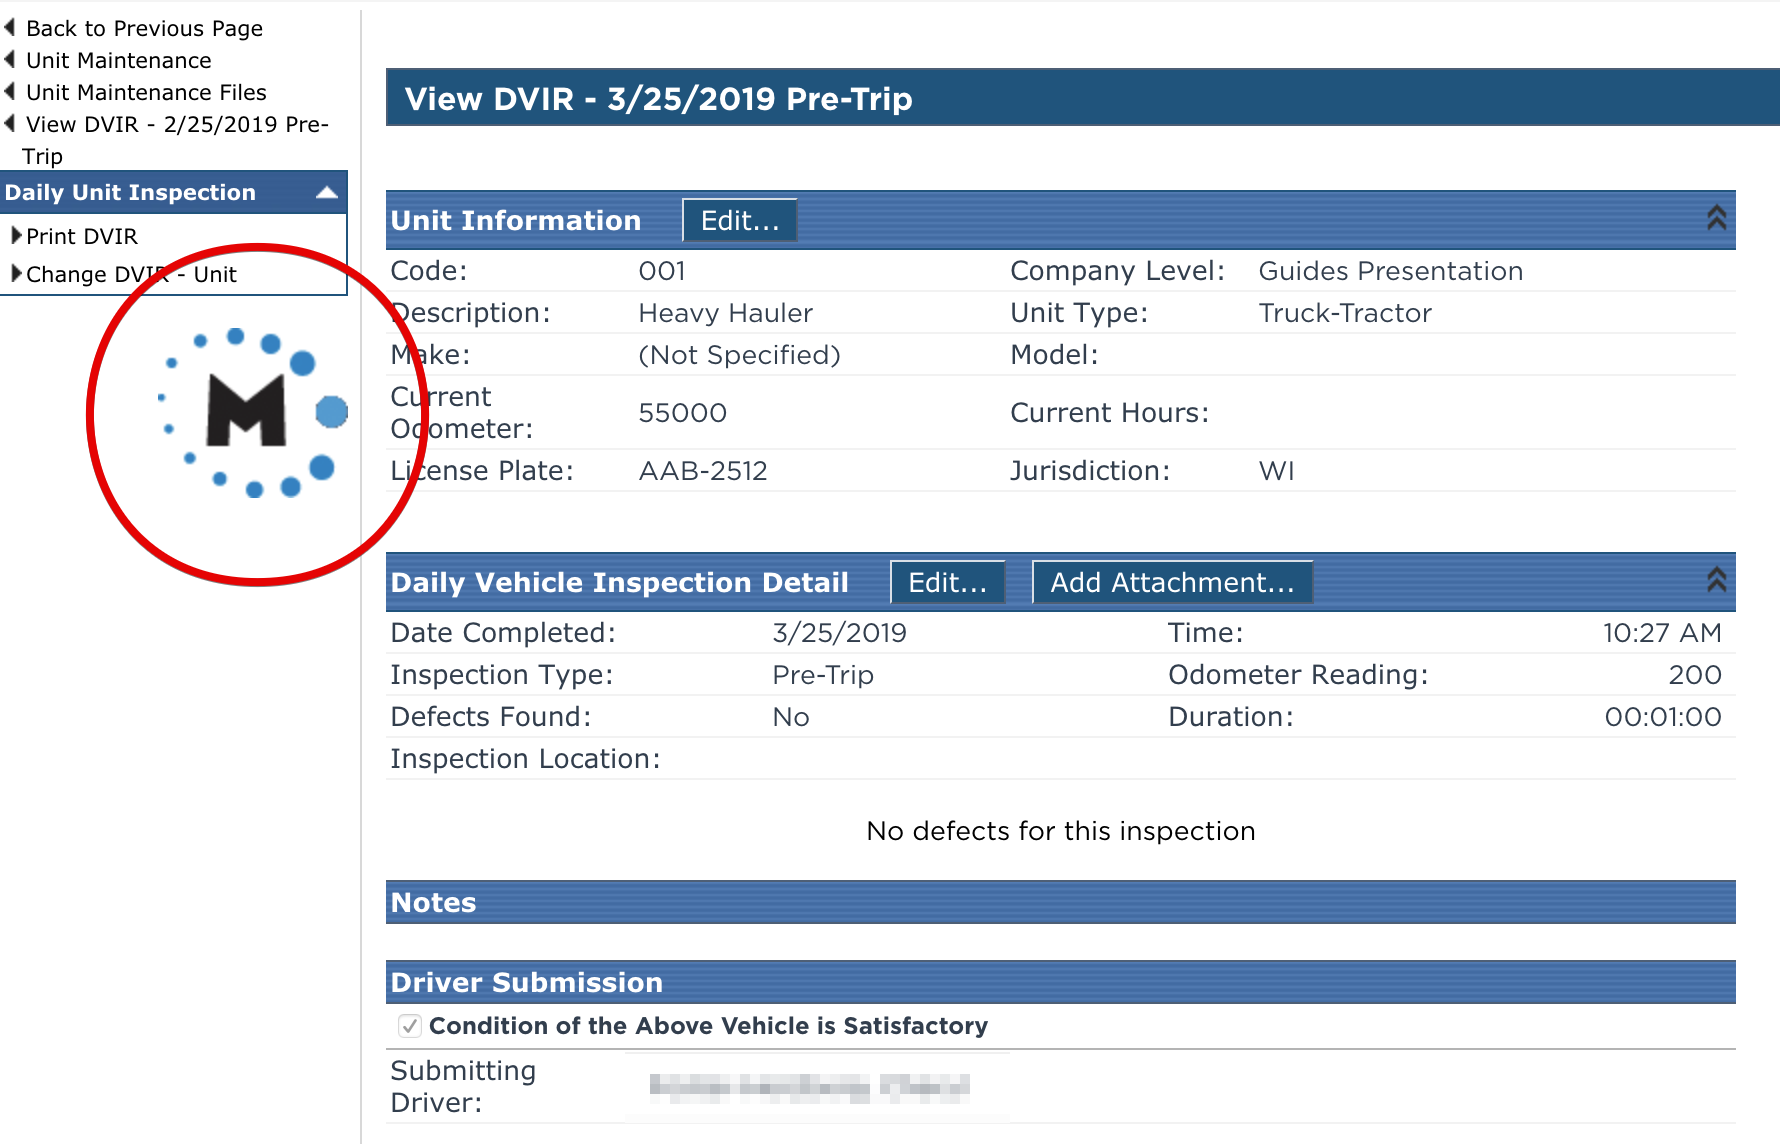
View the DVIR.
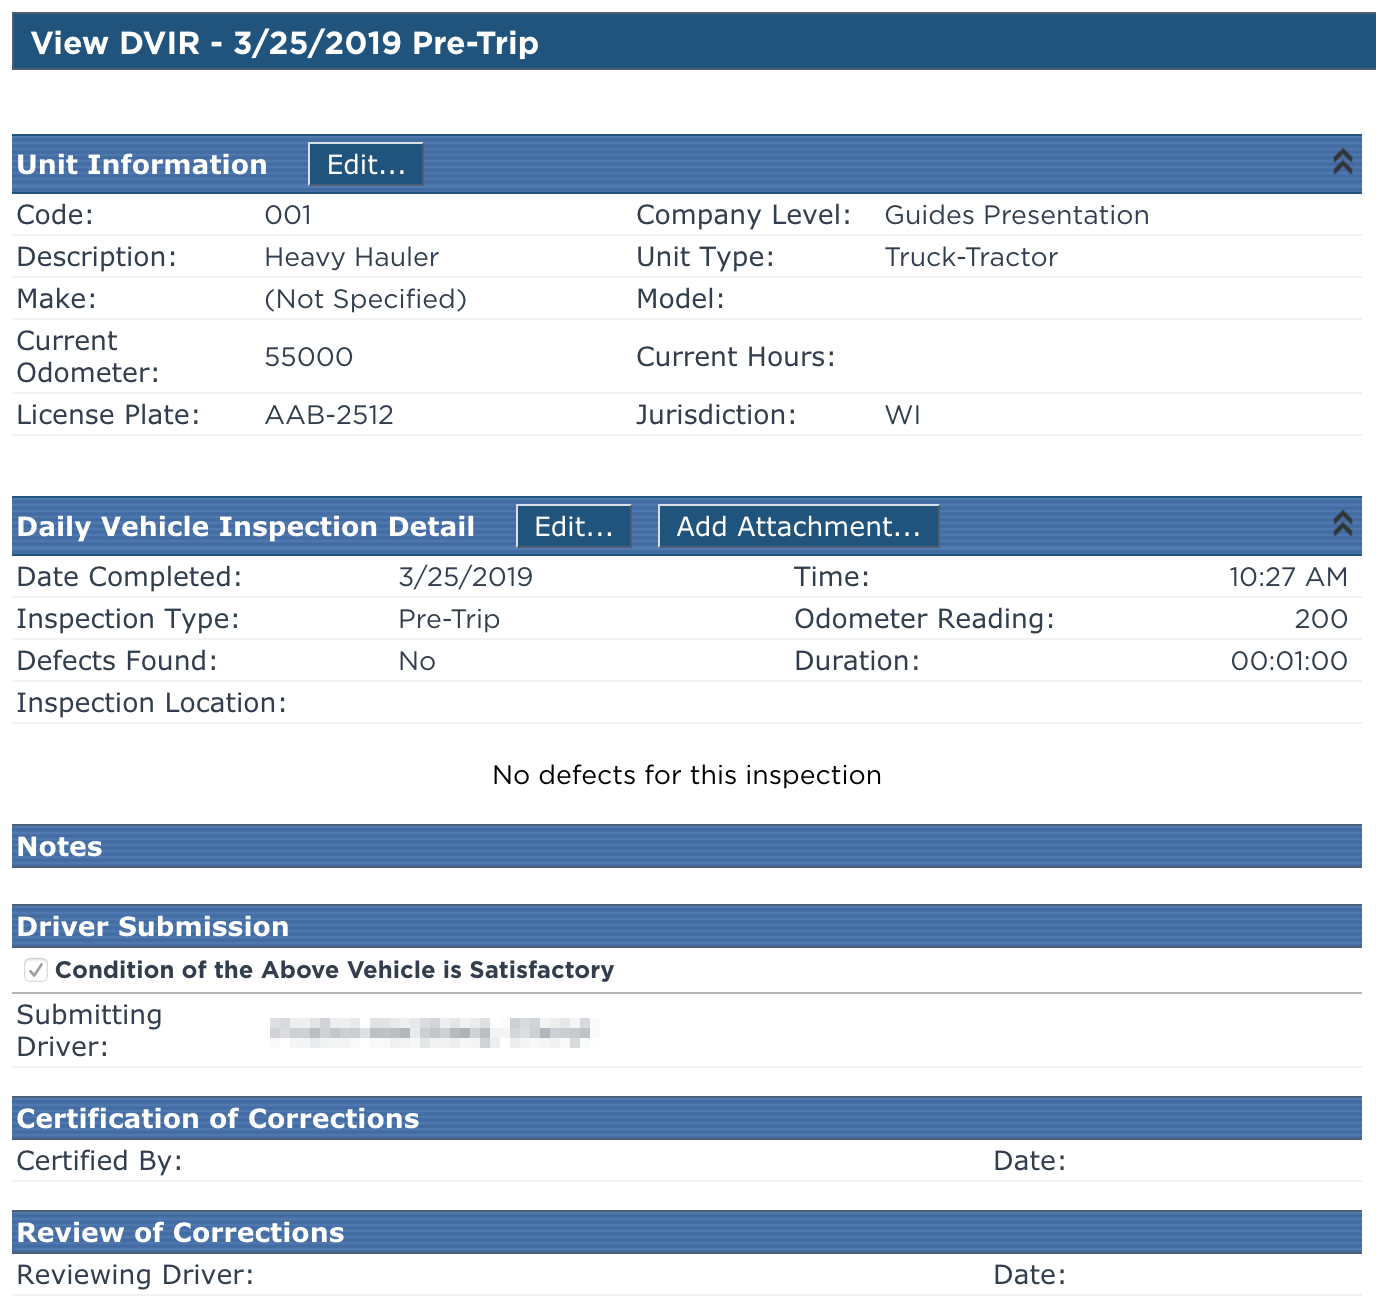
Note: This icon located to the left of the inspection indicates that the inspection was submitted from the Encompass® ELD application.
Completing a DVIR with a Defect(manual)
If a DVIR is manually entered in Encompass, it will need to be completed manually as well.
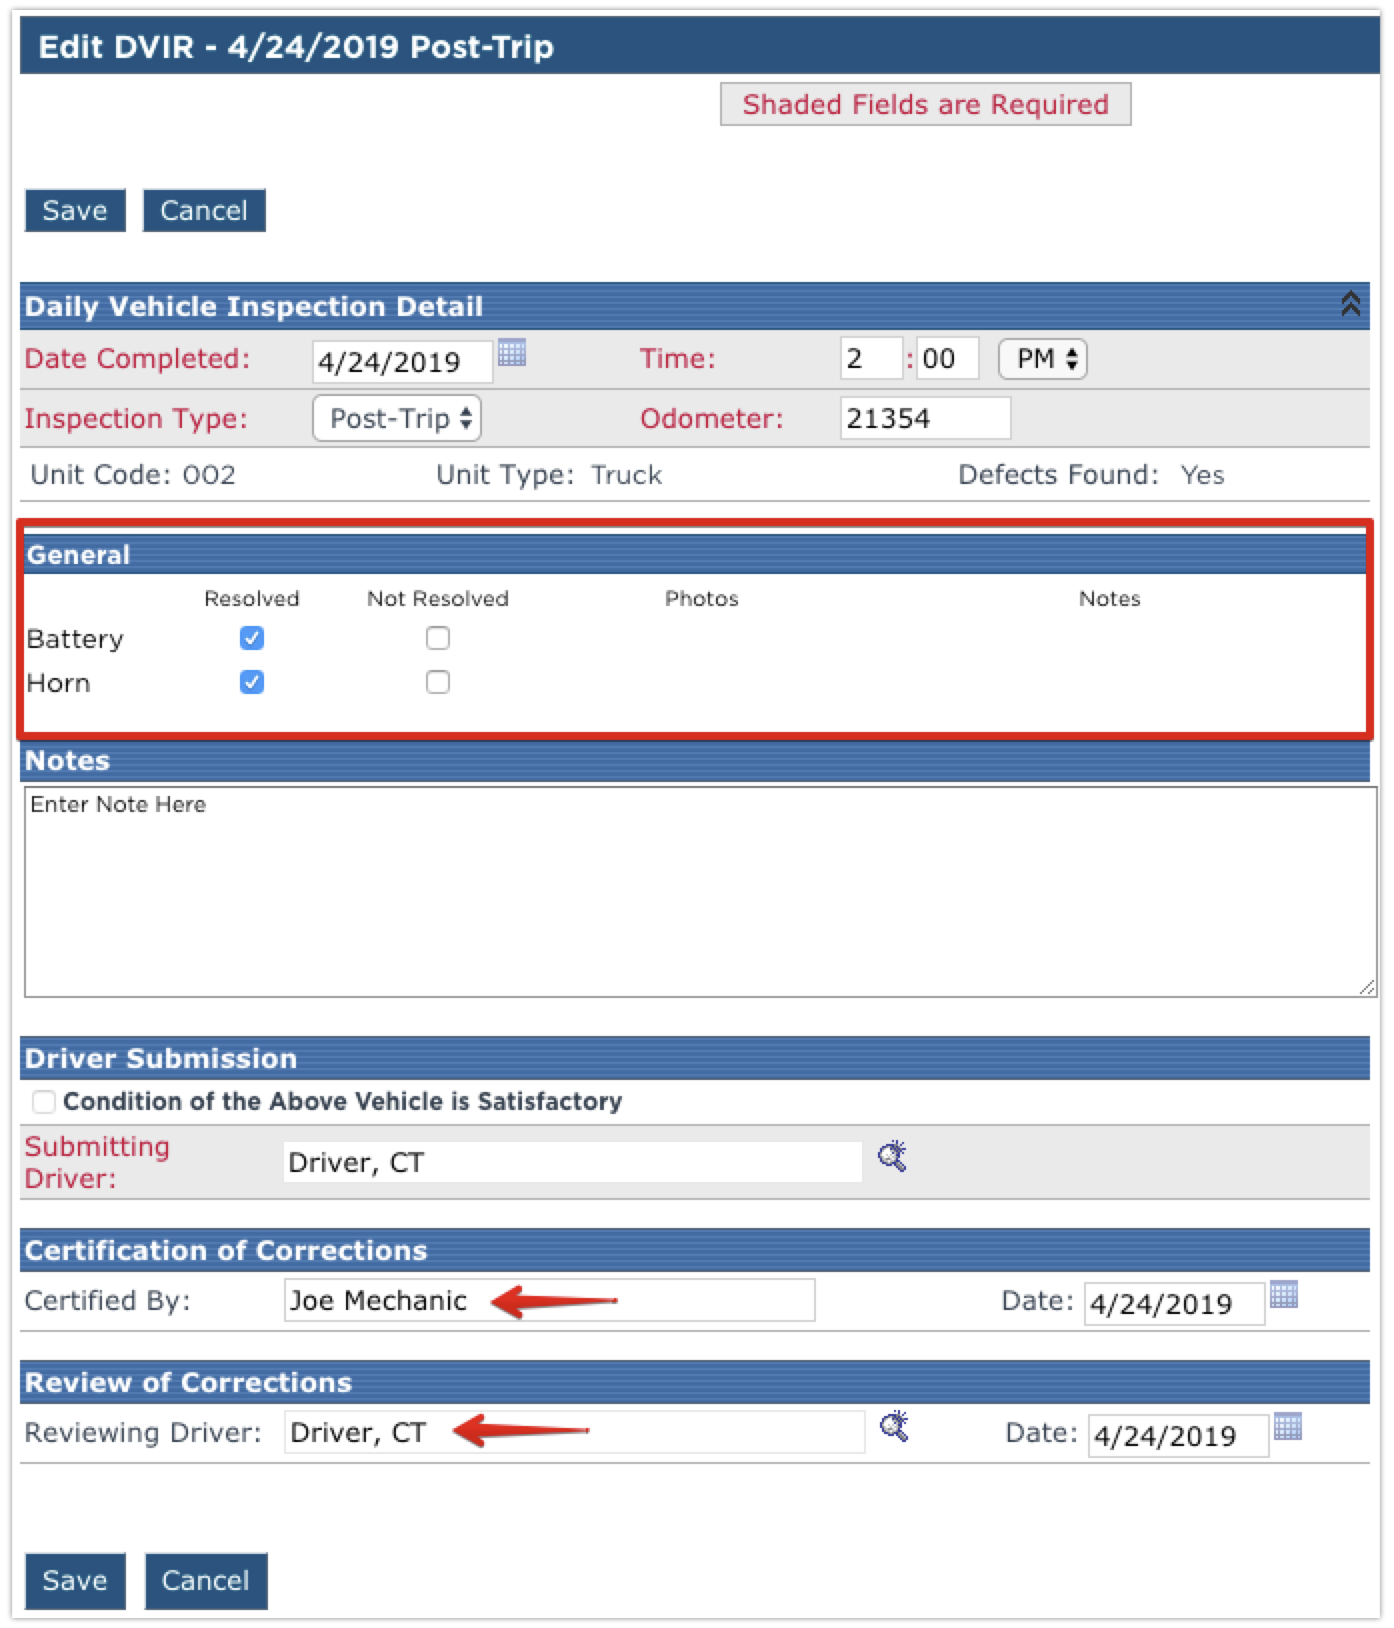
Click Edit next to Daily Vehicle Inspection Detail. The Edit DVIR page will be displayed.
Each defect listed will have the option for select them as Resolved or Not Resolved. If there are multiple items on the inspection and only some of them have been resolved, but others have not, they can be marked and saved, and the DVIR can be returned to later to finish completing the DVIR.
Whomever certified that the corrections were made (a mechanic perhaps), should be entered in the Certified By field along with the date the corrections were certified.
The driver then needs to complete an inspection to verify that the corrections were made. Use the magnifying glass next to the field to select the driver and enter the date in which the driver reviewed the corrections.
Click Save once all necessary information is entered.
A success message will then be displayed.

The alert count is then reduced by 1 (or completely removed if the resulting value is 0).