DQ Maintenance Checklist
The Maintenance Checklist is meant to track items that renew and expire over a range of time. The system administrator is responsible for setting this up. It should be mentioned that the system comes with standard checklist items already indicated in setup These include items like the Annual Review, Record of Violations, and Medical Exam Certificate.
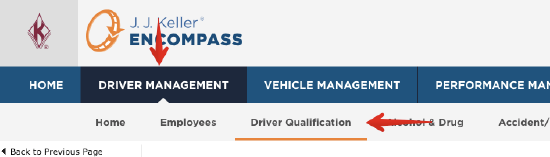
The Maintenance Checklist is found by going to Driver Management > Driver Qualification.
Find the employee by using one of the common views in the center or using the search box on the left hand side.
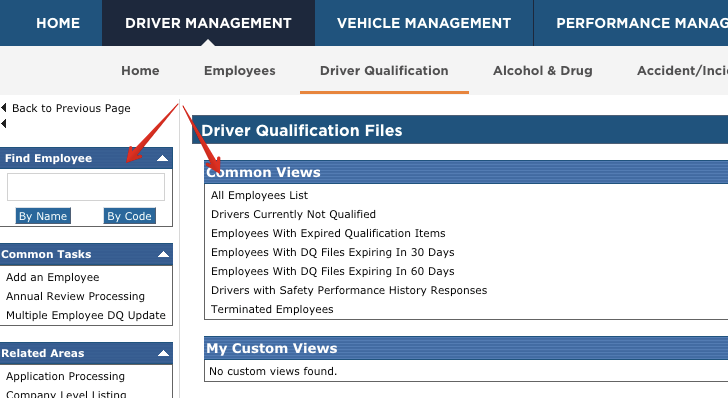
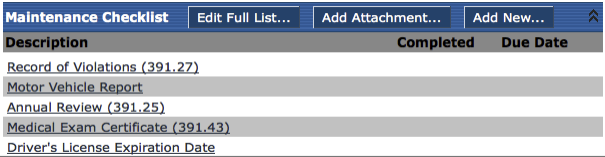
Scroll down to the section titled Maintenance Checklist.
If there are items in the Prequalification Checklist that also fall under the renewable or maintenance items, the dates may already be filled in for the user in the maintenance checklist. If there are no Prequalification Checklist items that occur in the Maintenance Checklist, then the completed dates and due dates will be blank, as shown below.
There are two methods in which the dates for the checklist items can be added:
- Edit the entire list at once, which will not allow for specific notes to be entered.
- Edit an item individually, which will allow for specific notes to be entered.
Edit Full Checklist
To edit the entire list at once, click Edit full List...

Enter in the necessary information for the for the checklist items:
- N/A - This check box means not applicable. The system will ignore an item with this checkbox filled. There may be times when this box is greyed out. This means that the system administrator has set these items as required and cannot be marked as not applicable.
- Last Completed Date - (format as mm/dd/yyyy or mm-dd-yyyy) This field is for the last processed date.
- Date Due - (format as mm/dd/yyyy or mm-dd-yyyy) This field is for the next time the item is due. Most system administrators set this up to auto-fill this date based on how frequently this item needs to be renewed (auto-fill dates can be overwritten). If it doesn't auto-fill, enter the date the item is next due.
Note: The DQ Maintenance Checklist impacts employee qualification and will flag/cause a driver to be "Not Qualified" if there is not a Due Date in the future, or if there is a future date in the Last Completed field.
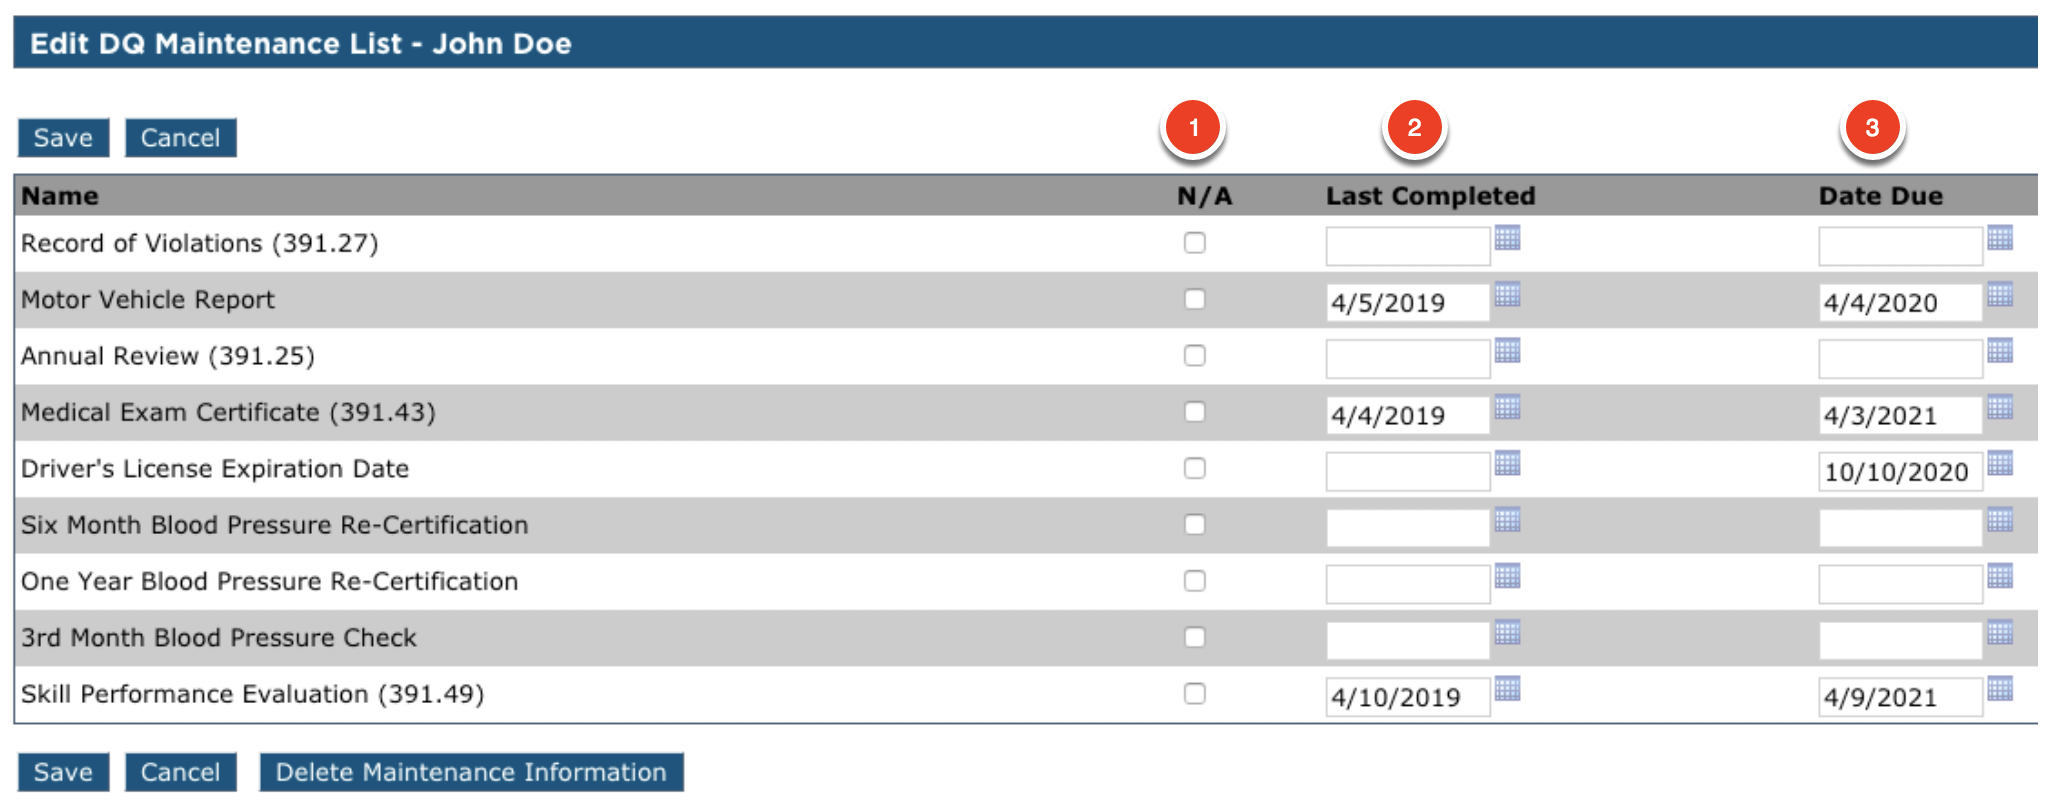
Click Save.
Note: The Delete Maintenance Information Button will delete both completed and due dates for the entire list, along with any attachments saved with the items.

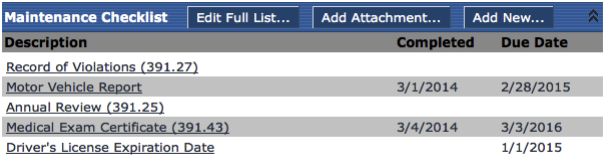
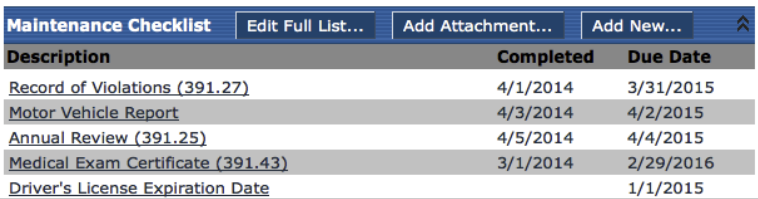
Once saved, the Maintenance Checklist will look something like this:
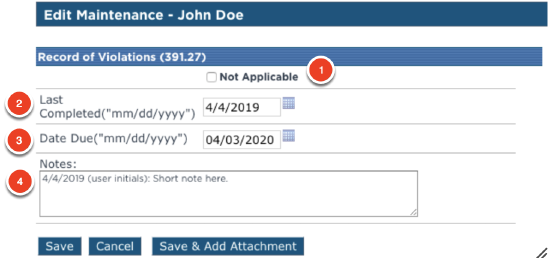
Edit Individual Checklist Items
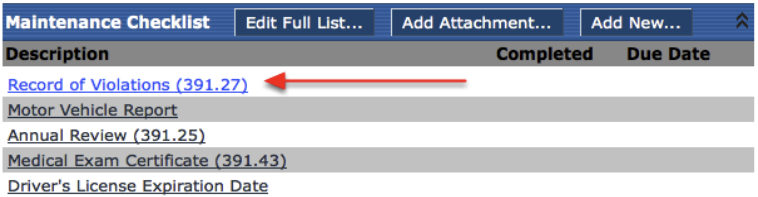
To edit an individual checklist item, click on the name of the checklist item.
Enter in the necessary information for the checklist item:
- N/A - This check box means not applicable. The system will ignore an item with this checkbox filled. There may be times when this box is greyed out. This means that the system administrator has set these items as required and cannot be marked as not applicable.
- Last Completed Date - (format as mm/dd/yyyy or mm-dd-yyyy) This field is for the last processed date.
- Date Due - (format as mm/dd/yyyy or mm-dd-yyyy) This field is for the next time the item is due. Most system administrators set this up to auto-fill this date based on how frequently this item needs to be renewed (auto-fill dates can be overwritten). If it doesn't auto-fill, enter the date the item is next due.
- Notes - This field is for any quick notes that may want to be stored with a checklist item. While this text box is rather large, only the first line of the note will appear on reports, so it is suggested to make any notes as brief as possible.
Click Save or Save & Add Attachment.
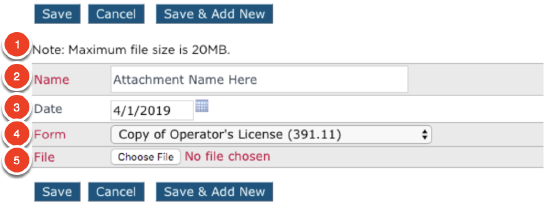
If Save & Add Attachment, the attachment dialogue box will be shown.
- Note: Maximum file size... - This is a warning indicating that the system will not take any attachment larger than 20MB.
- Name - Enter a name for the attachment. This could be the file name or a short description.
- Date - (mm/dd/yyyy or mm-dd-yyyy format or use the calendar icon) Enter the date for the attachment. Some users use the date the document processed and others will use the date the file was uploaded to the system. This is up to personal preference. Tip: If using the date processed, purging attachments later may be easier especially if the date processed is significantly different from the date the document gets attached. But if the user is attempting to track the cycle time between when a document is completed versus when it gets uploaded to Encompass, the date of the upload would want to be used.
- Form - The form is already selected for the user based on the way the screen was entered. This can be left alone. In short, this is the checklist item in question.
- File - Select Choose File to browse to the location of the attachment on the users machine. Note: It's best practice that the file name have no commas (,) as it may result in some viewing issues with particular browsers down the road.
Once the this is properly filled out, click Save.
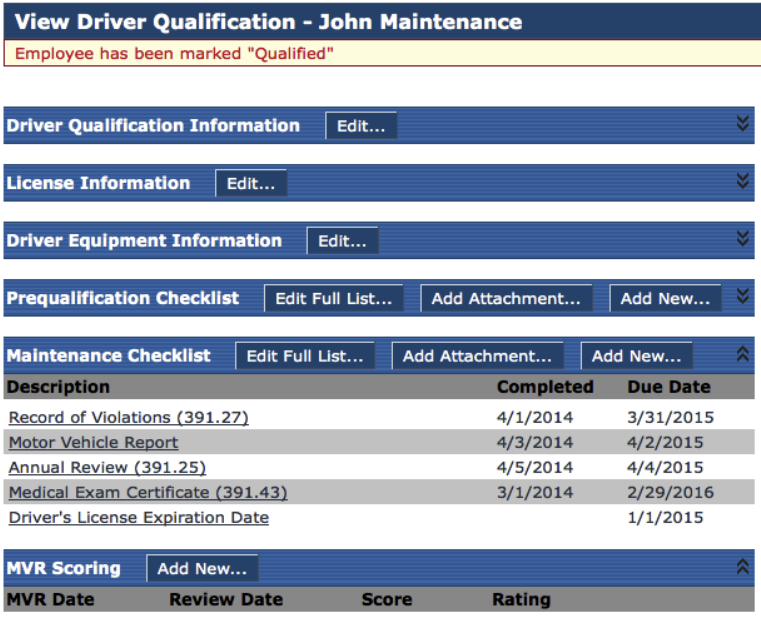
Qualified Driver View
Once all maintenance items are marked as necessary with future due dates, the driver is then eligible to be qualified. When a user clicks Save on the Maintenance Checklist and all information is entered, they will be prompted to qualify the driver. Click Yes to qualify them.

When a driver is marked as qualified in the system, all of the sections above the Maintenance Checklist collapse (as shown below) which makes only the Maintenance Checklist visible. The assumption is that the other areas are complete and that the user prefers to see the important renewable items. In order to view the data in any of these closed sections, click the black double arrows on the right side of the header.
Adding an Ad Hoc Checklist Item
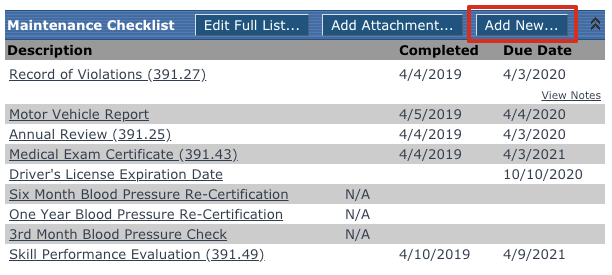
There may be situations where a checklist item might not apply to an entire group of employees, but instead, to an individual. The Add New... option is available at the top of the checklist.
To add a single checklist item for an individual employee, click Add New... at the top of the list.
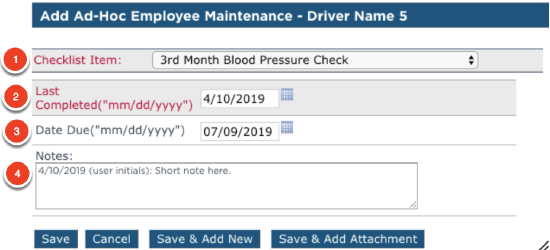
The user will then be taken to the Add Ad-Hoc Maintenance screen.
- Checklist Item - This list will contain only maintenance items that are not assigned to the employee's job class, and therefore, not already in the employee's maintenance checklist.
- Last Completed Date - (format as mm/dd/yyyy or mm-dd-yyyy) This field is for the last processed date.
- Date Due - (format as mm/dd/yyyy or mm-dd-yyyy) This field is for the next time the item is due. Most system administrators set this up to auto-fill this date based on how frequently this item needs to be renewed (auto-fill dates can be overwritten). If it doesn't auto-fill, enter the date the item is next due.
- Notes - This field is for any quick notes that may want to be stored with a checklist item. While this text box is rather large, only the first line of the note will appear on reports, so it is suggested to make any notes as brief as possible.
Once all details are entered, click Save, Save & Add New, or Save & Add Attachment.